How to make Instagram Reels
To make an Instagram Reel, tap the plus sign, choose Reel, then tap the camera button and press and hold the record circle to film each clip. Tap Next, swipe up to open the editor, trim and reorder your clips, add text or stickers, then tap the blue arrow, pick a cover, write a caption and tap Share.
Quick steps
- In Instagram's settings, open Data usage and media quality and turn on Upload at highest quality.
- Tap the plus sign in the top left corner, choose Reel, then tap the camera button to record.
- Set the flash, speed, timer, length and any effects you want before you record.
- Press and hold the record circle to film a clip, release to stop, and tap Next when you have every clip.
- Swipe up to open the full editor, then trim, reorder and add clips or overlays.
- Add text and stickers, then tap the blue arrow at the top.
- Tap Edit cover to pick the thumbnail, write a caption and tap Share.
Beginner's Guide to Meta Marketing
A free guide to marketing on Instagram and Facebook.
This guide takes you from a blank Instagram account to a posted reel. It follows the video’s example: a few clips recorded on the front camera, a cutaway to a video of a shelf, a name added as text, a sticker, a cover and a caption.
Turn on Upload at highest quality
Change one setting before you record anything.
- Go to your profile and tap the hamburger menu in the top right corner.
- Scroll down and tap Data usage and media quality.
- Turn on Upload at highest quality.
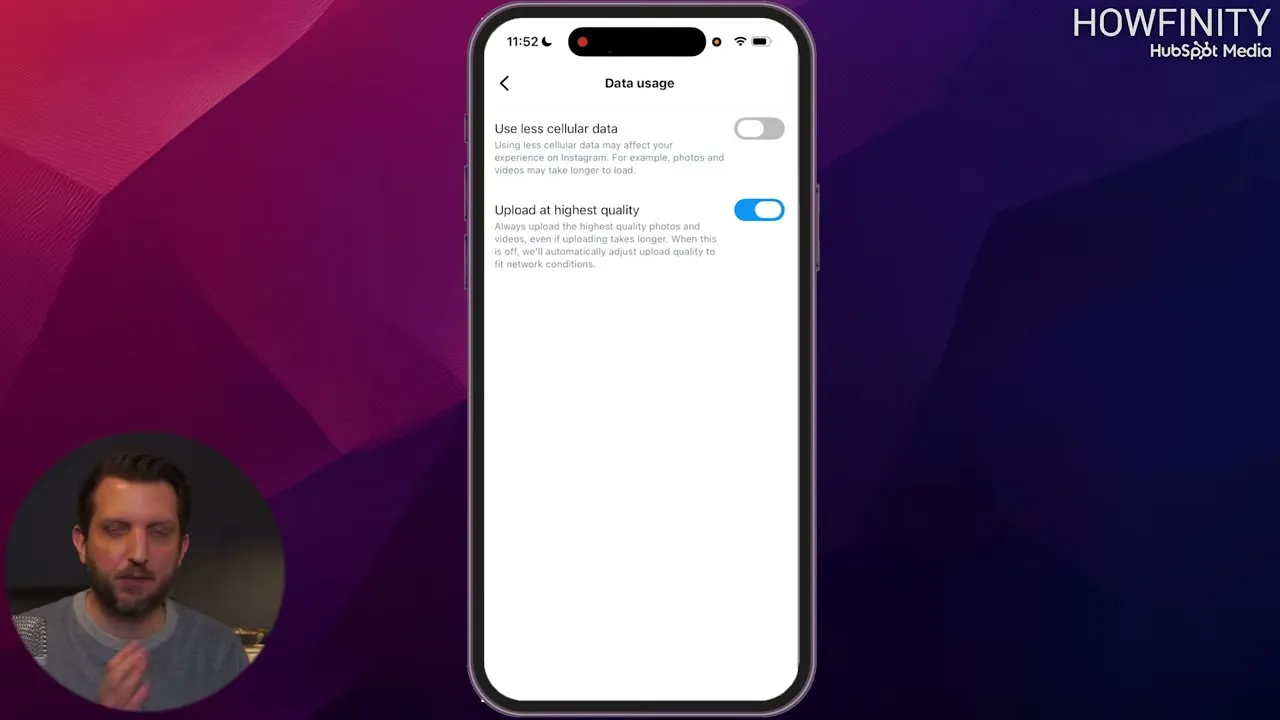
This switch is off by default. With it on, what you record in the app uploads at the highest quality. The same screen has a switch for using less cellular data, which you can set either way.
Start a new reel
- Back on your home screen, tap the plus sign in the top left corner.
- Tap Reel. It is the first option in the list.
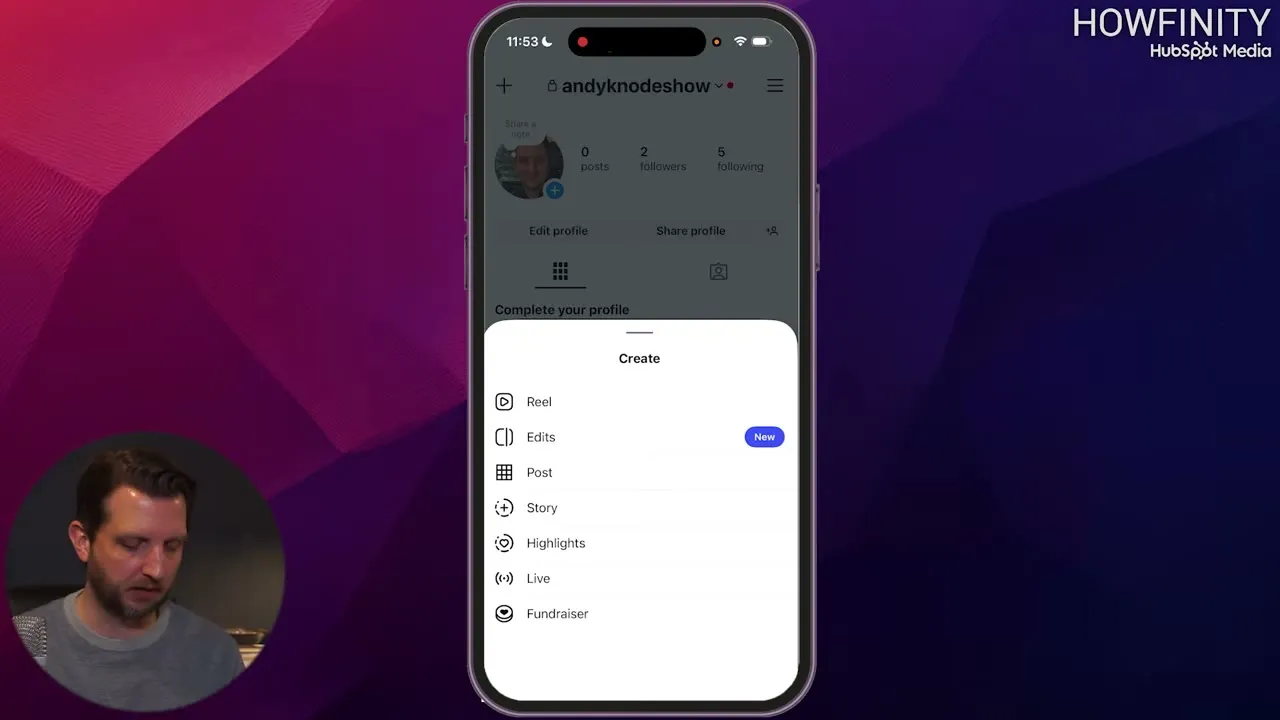
- Instagram asks for permission to access your photos. You can select certain ones or give it full access.
- Pick a video you already recorded, or tap the camera button to record a new one. The video records a new one.
- Instagram asks to use your camera and microphone. Tap Continue, then allow both.
- To flip the camera so you can see yourself, tap the arrows in a circle in the bottom right corner.
- Tap Get started.
Camera options before you record
The recording screen has options you can set before you film. Most of them are also available after you record, so you can skip them and adjust later. Setting them here helps if you want to avoid editing.
Across the top:
- Flash (the lightning bolt). Turn it on if you don’t have enough light, or set it to auto and Instagram decides. The video leaves it off.
- Speed (the 1x). 1x is normal speed. You can record at a half or a third for a slow motion effect, or speed it up to 3x or 4x for something like a time lapse.
- Timer. Useful when the phone is on a tripod. Set the timer, get in front of the camera, and it starts for you. Tap Done when it’s set.
Speed and the timer are the ones you can’t change after recording.
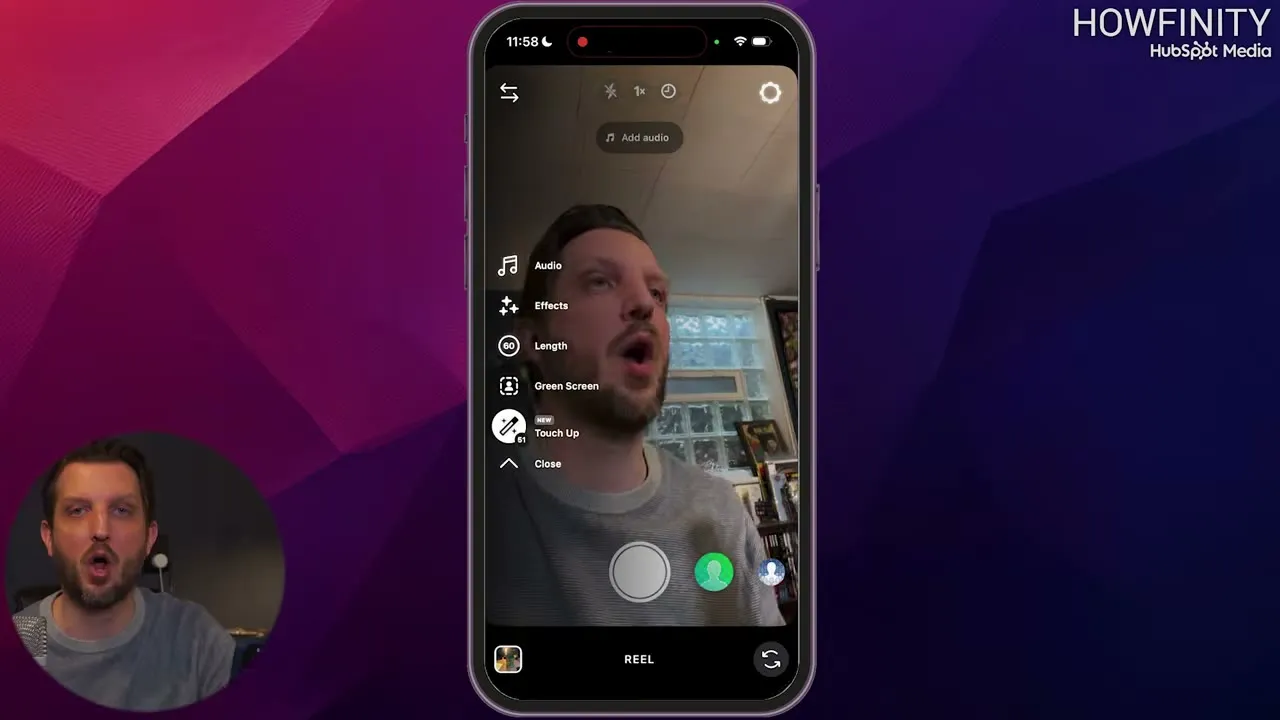
On the left side:
- Audio. Pick music that plays in the background while you record. You can add music afterward instead, but you may need it here if you are singing along to a track.
- Effects. Tap one to preview it on screen. The video tries a sunglasses effect, then goes back to no effect.
- Length. Choose 15 seconds, 30 seconds or 60 seconds. 60 seconds is the default, and there is a longer option too.
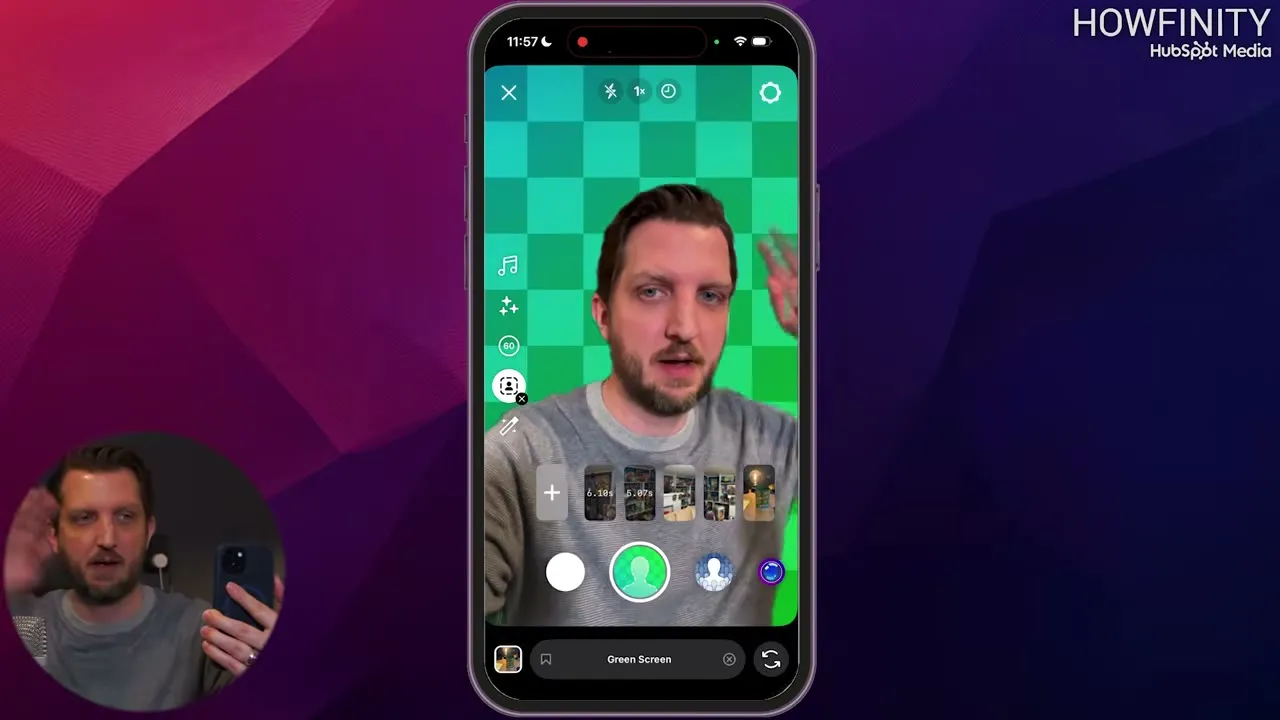
- Green Screen. Puts a photo or video from your phone behind you, so you can talk over it.
- Touch Up. A slider for touching up how you look. The video leaves it at about 50 to keep it natural.
Tap the arrow under these icons to show the name of each one.
With Green Screen on, Instagram shows what it will keep and what it will replace. Then you pick the photo or video to put behind you.
Slide the record circle to the side to swipe through your frequently used effects. The video records with no effects and adjusts things after shooting, but that is up to you.
Record, pause and undo clips
- Press and hold the record circle. The ring around it fills up to show the time you have left.
- While you hold, slide your finger up to zoom in and back down to zoom out.
- Release to stop recording.
- Press and hold again to record the next clip. It picks up where you left off, so you can take a break or get a new angle between clips.
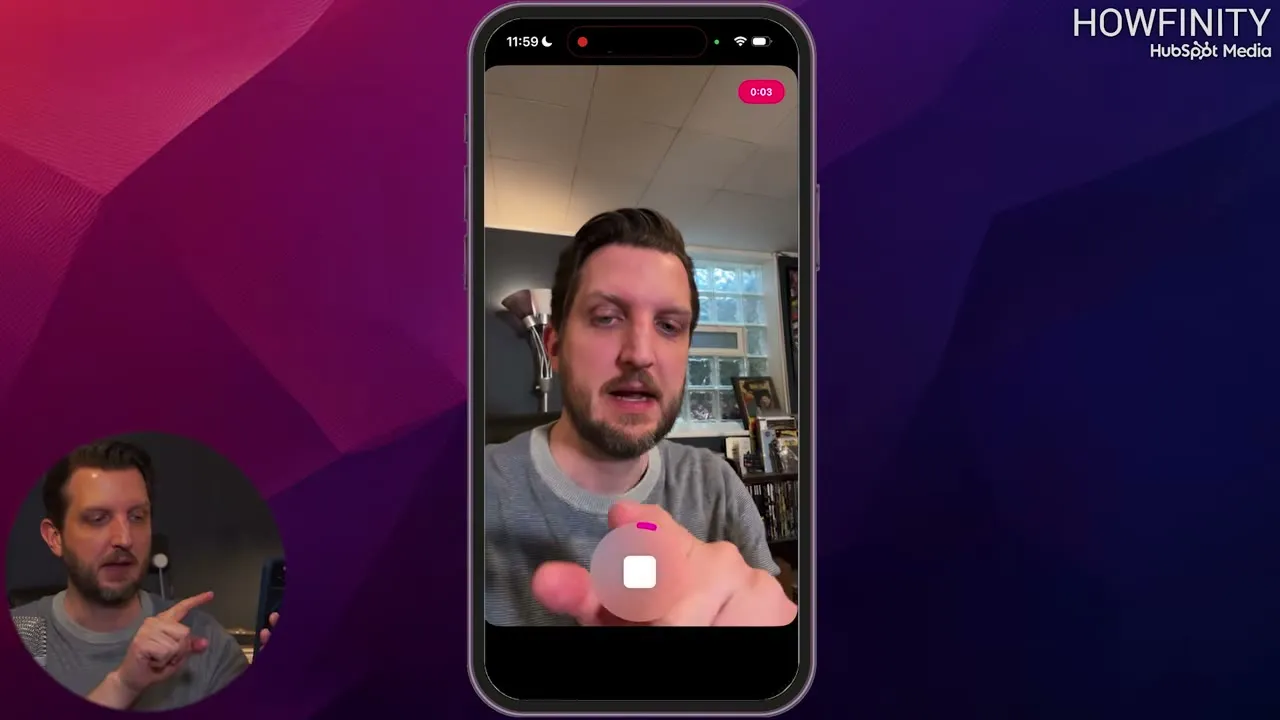
Nothing goes live while you do this. You are only recording the material.
If you don’t like a clip, tap Undo, then Discard. It removes only the last clip you recorded, and the time goes back.
When you have everything you want, tap Next.
Trim and reorder clips in the editor
The next screen plays your reel back and has a few quick editing options. For the full editor, swipe up. If you have used CapCut, the layout is very similar.
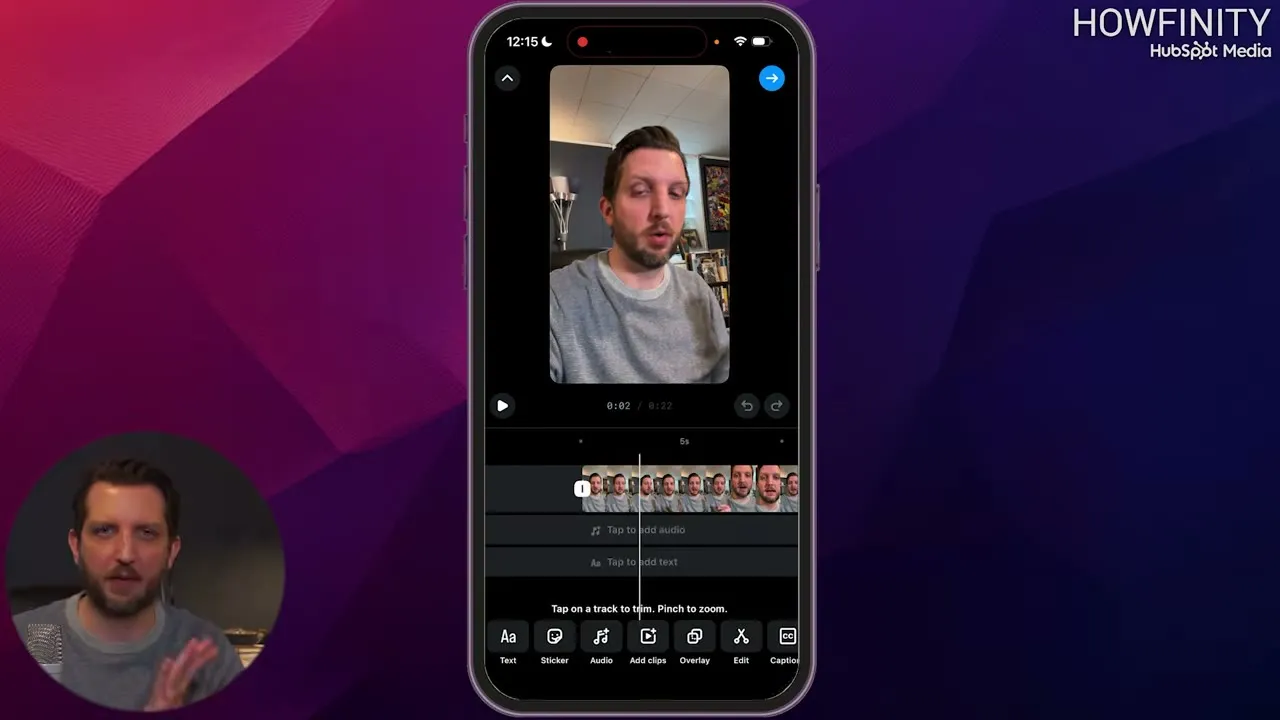
- Slide the timeline with your finger to scrub through the reel, or tap the play button to play it back.
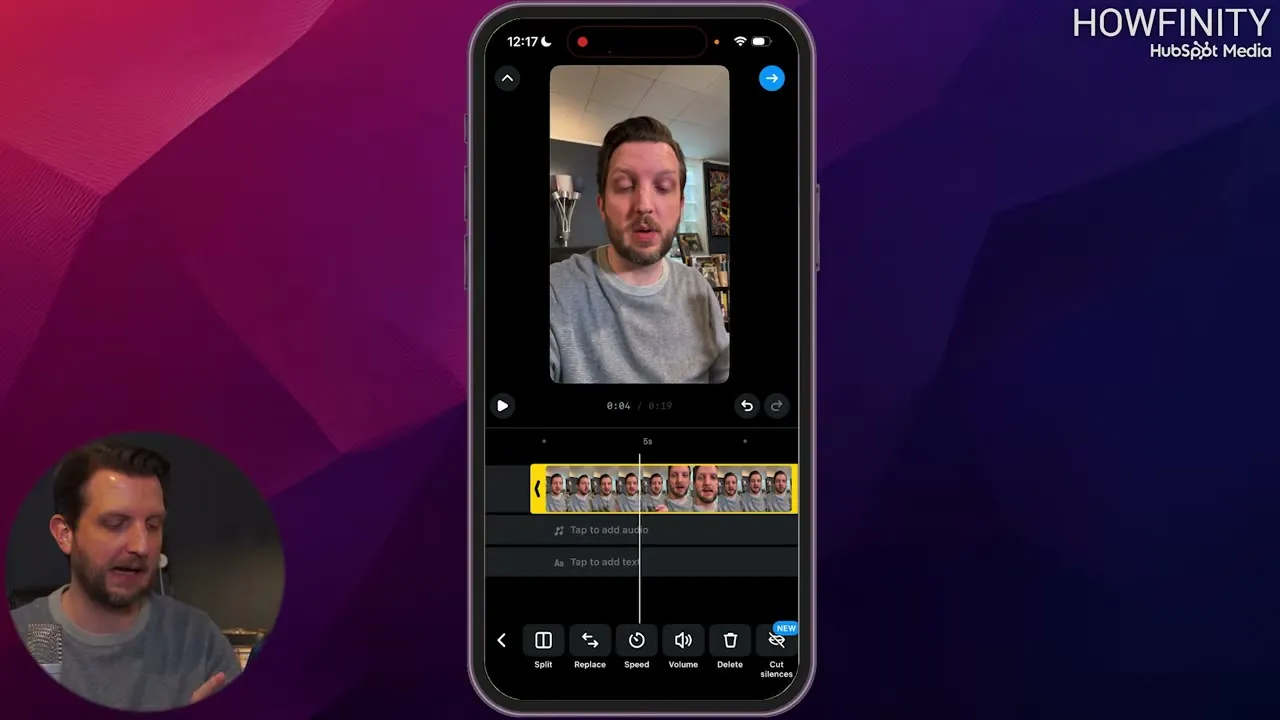
- Tap a clip to select it. Handles appear on each side. Drag the handle at the start or the end inward to cut that part out.
- Tap and hold a clip to lift it, then drop it in a new place. In the video, the second clip recorded is moved to the beginning.
Add clips and overlays
To add another clip at the end:
- Slide across the bar at the bottom and tap Add clips.
- Record another clip, or tap the bottom left corner to open your camera roll.
- Tap a photo or video. It is added at the end of the reel.
To cut away to something else while you keep talking, use an overlay:
- Tap Overlay and pick a photo or video. The video picks a short video of a shelf.
- Resize it. The video makes it full screen.
- Tap Done.
The reel now cuts to that clip while your voice keeps playing.
Add text and stickers
- Go back to the beginning of the reel and tap Text.
- Type your words. The video adds the name “Andy”.
- Tap the letter icon next to the keyboard to choose a style. The video picks Strong.
- Change the color if you want. The video uses yellow. There are also animation effects, such as a jump.
- Tap Done.
The text now has its own bar under the clips in the timeline. In the preview, press on the text and drag it where you want it. The video moves it down to the bottom.
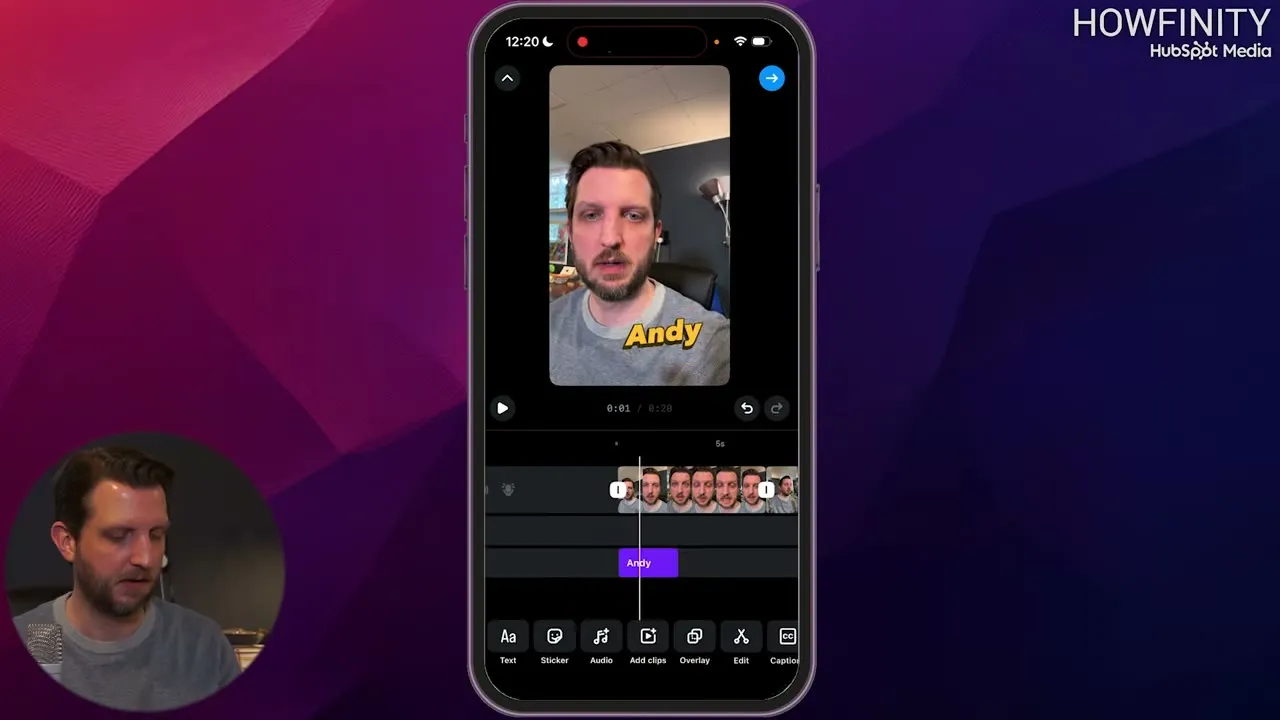
If the text is hard to see where you put it, open the text again and add an offset, then tap Done. That made it easier to read in the video.
To add a sticker, tap Sticker and pick one. The video adds a heart. Pinch to resize it, slide it into place and tap Done.
When you are finished editing, tap the blue arrow at the top.
Pick a cover, add a caption and share
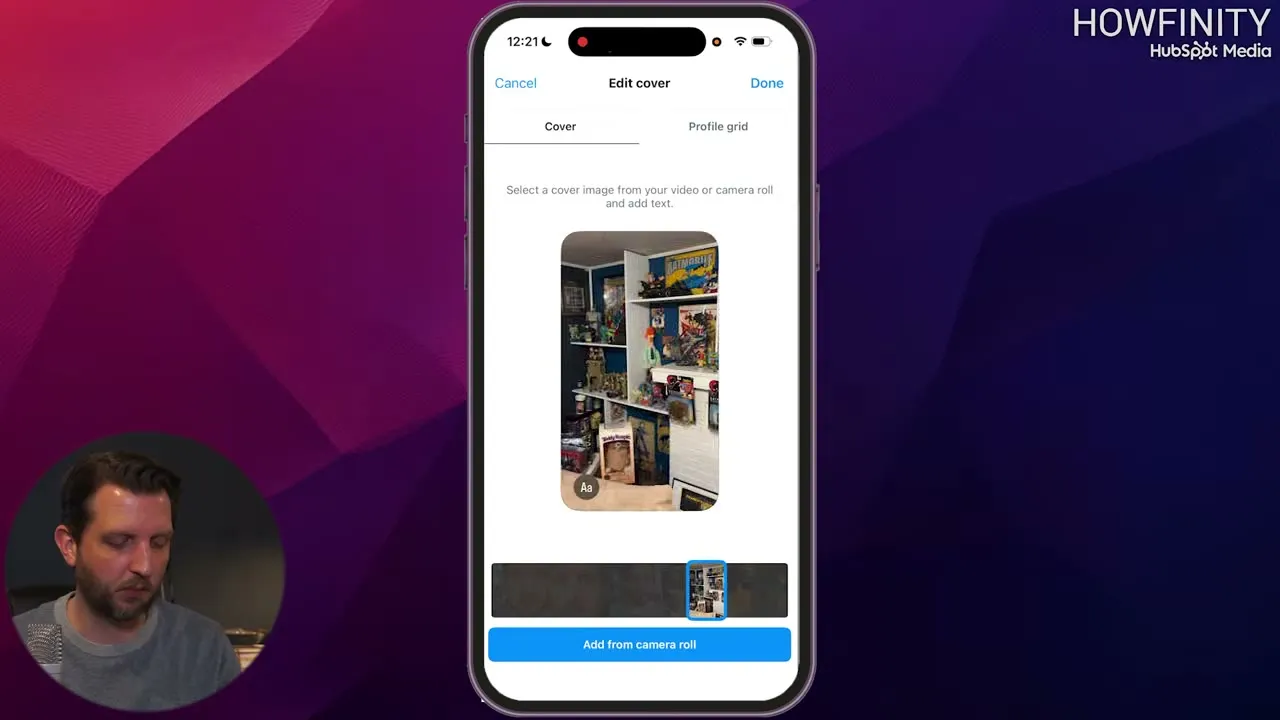
- On the preview, tap Edit cover.
- Slide along the video and stop on the frame you want. The video goes for a close-up of the face.
- Tap Done. This is the thumbnail people see when your reel comes up.
- Write a caption and tap OK.
- Use Tag people and Add location if you want them.
- Tap Share.
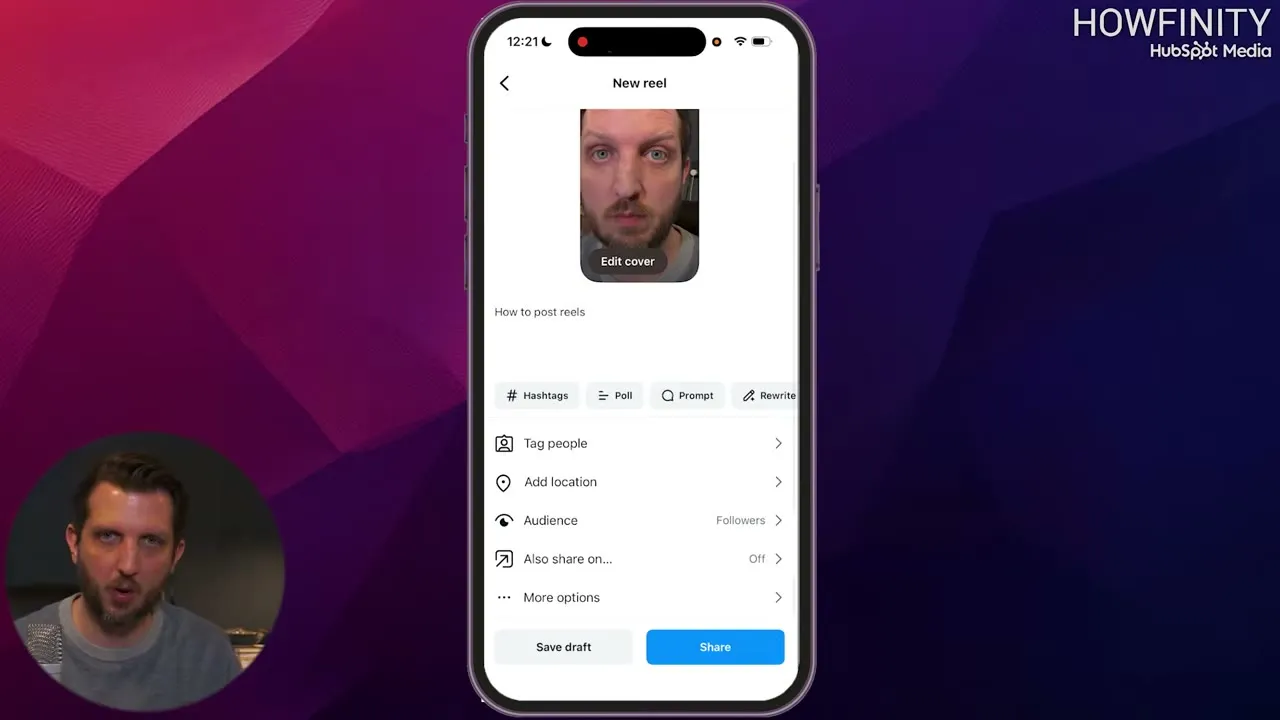
It takes a few seconds to post. After that the reel is live and people can see it.
Common questions
How do you make a reel on Instagram?
Tap the plus sign in the top left corner and choose Reel. Pick a video you already recorded, or tap the camera button and press and hold the record circle to film one. Then tap Next, edit it, and tap Share.
How do you make high quality Instagram Reels?
Open the menu from your profile, scroll to Data usage and media quality, and turn on Upload at highest quality. It is off by default. With it on, Instagram uploads what you record at the highest quality.
How do you edit an Instagram Reel?
After recording, tap Next and swipe up to open the full editor. Tap a clip to trim it with the handles on each side, tap and hold a clip to move it, and use the bar at the bottom to add clips, overlays, text and stickers.
Can you record a reel in more than one clip?
Yes. Recording stops whenever you release the record circle. Press and hold again and it picks up where you left off, so you can take a break or change the angle between clips.
How do you delete the last clip you recorded?
Tap Undo, then Discard. Only the last clip you recorded is removed, and the timer goes back by that amount.
How do you change the cover of a reel?
On the last screen before you post, tap Edit cover on the preview. Slide along the video to pick the frame you want and tap Done. That frame is the thumbnail people see for your reel.
Beginner's Guide to Meta Marketing
A free guide to marketing on Instagram and Facebook.
Beginner's Guide to Meta Marketing
A free guide to marketing on Instagram and Facebook.
Get the free guide