CapCut is a powerful, free video editing tool available on both Mac and PC. In this step-by-step tutorial, you’ll learn how to use CapCut effectively — from creating your first project to exporting a polished final video. While CapCut is designed to be user-friendly, the editing process can still be a bit overwhelming at first. That’s why it’s important to follow each step carefully for the best results.
Introduction to CapCut
CapCut (an intuitive video editing software) is designed for both beginners and experienced editors. Its user-friendly interface and robust features make it ideal choice for creating engaging videos for social media platforms, YouTube and more. With a variety of editing tools at your disposal, CapCut allows you to transform (your raw footage) into polished content effortlessly. However, some may find it challenging at first, because the multitude of options can be overwhelming. This doesn’t diminish its effectiveness, but rather enhances the overall experience for users, although learning curve exists.
Why Choose CapCut?
- Free to Use: CapCut is completely free, offering a range of features that rival many paid editing software options.
- Cross-Platform: Available on Mac, PC, and mobile devices, it ensures you can edit your videos anywhere.
- Beginner Friendly: The learning curve is minimal, making it accessible for those new to video editing.
- Comprehensive Tools: From trimming and cutting to adding effects and music, it covers all your editing needs.
Getting Started: Downloading CapCut
To commence the editing process with CapCut, the initial step involves downloading the application. Follow these straightforward instructions: however, ensure that your device meets the necessary requirements, because this will facilitate a smoother experience. Although the process might seem daunting at first, it’s quite manageable if you pay attention to the details.
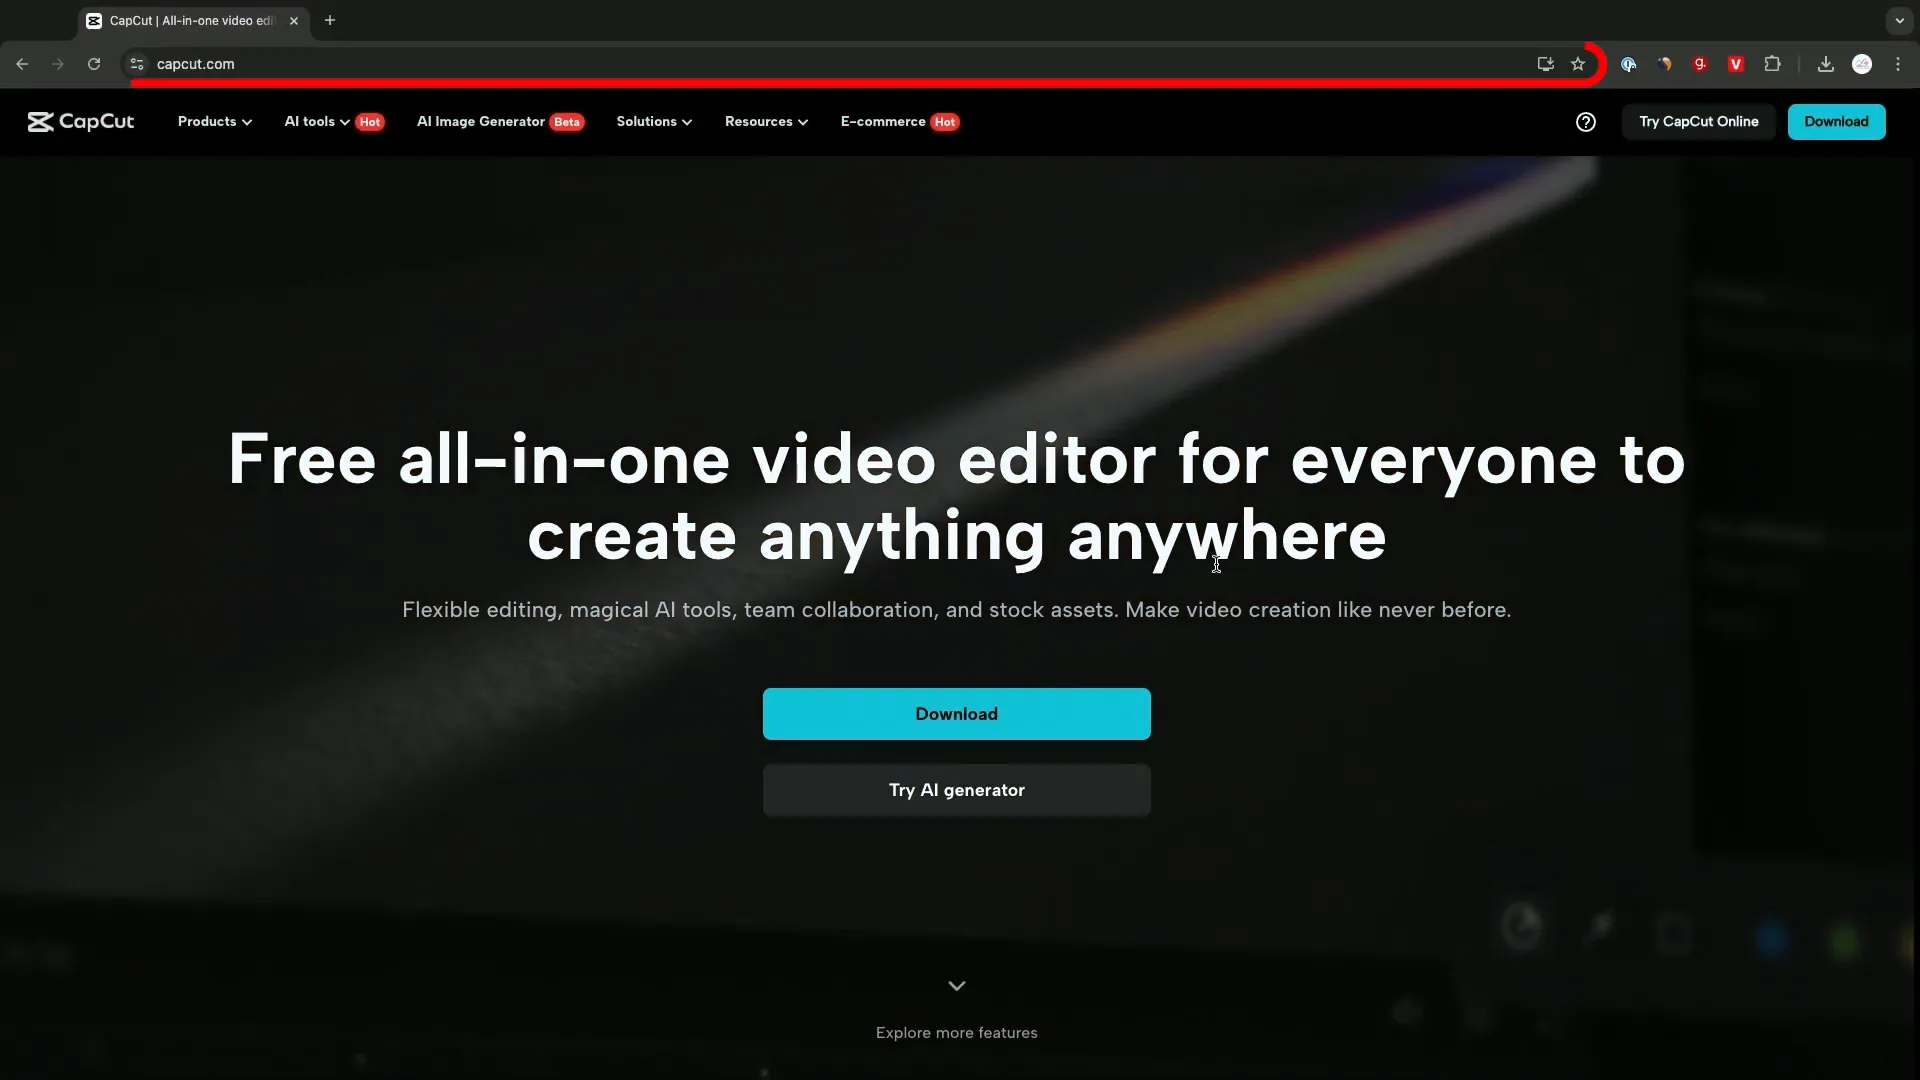
- Visit the official website at capcut.com.
- Choose the download option for your operating system (Mac or PC).
- Once downloaded, open the installer and follow the on-screen instructions to complete the installation.
Creating a New Project
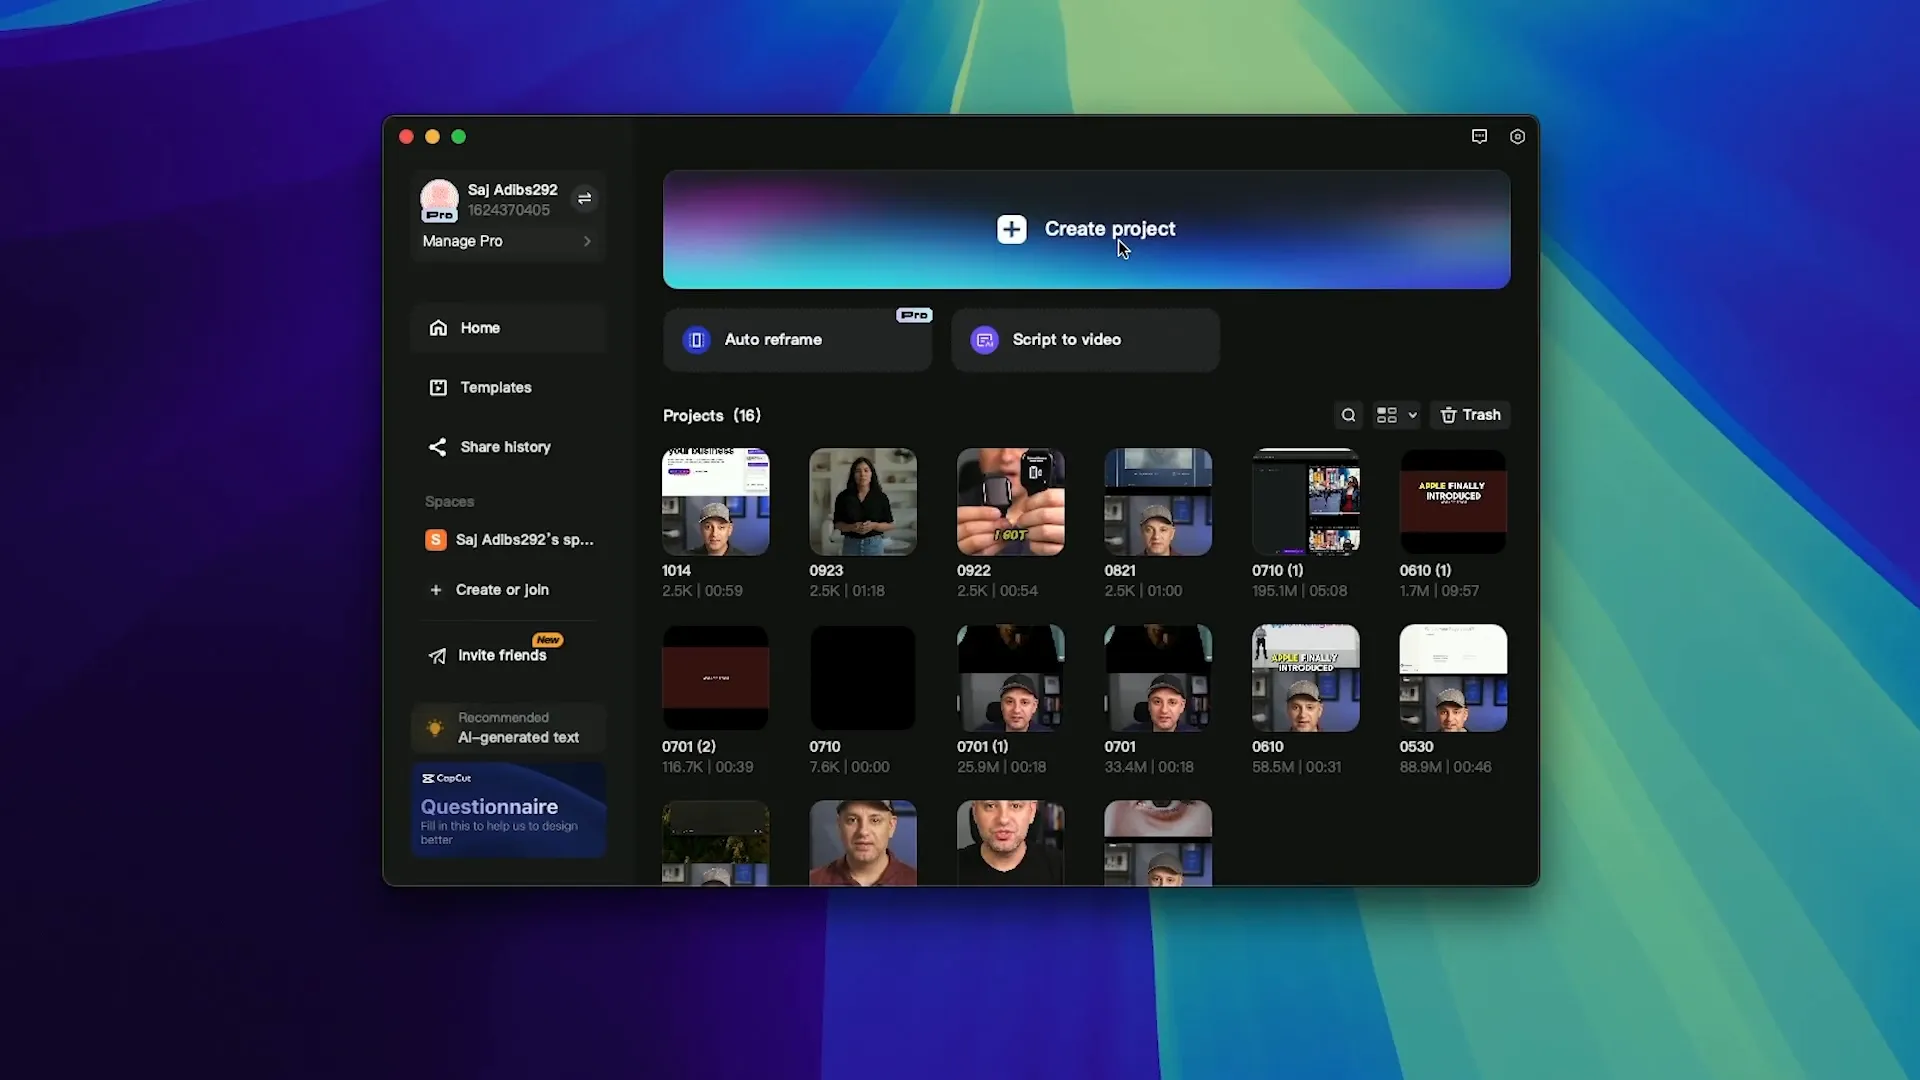
After installing CapCut, (the next step) is to create a new project. Here’s how: however, you must first navigate through the interface. Although it may seem daunting at first, this process is quite intuitive. You can easily access various features (and tools) that will enhance your project. 1. Begin by selecting a template; but remember, customization is key. Because of this, take some time to explore your options.
- Launch the CapCut application.
- On the homepage, click on “Create a New Project”.
- You can view all your previous projects on the sidebar, which allows you to revisit and edit them at any time.
Importing Media Files
With your project established, it’s now time to import media files (you might be wondering how). Here’s the process: first, navigate to the appropriate directory; however, you must ensure that the files are in a compatible format. This step is crucial because it will save you time later on. Although it may seem straightforward, be cautious (as mistakes can occur).
- Locate the import option in the application interface.
- Click on it to open your file explorer.
- Select the media files you wish to use, such as videos, images, or audio.
- Organize your files in folders for easy access. For instance, keep your footage, music, and graphics in separate folders.

Setting the Aspect Ratio
Before diving into editing (which can be complex), it’s essential to establish the correct aspect ratio for your project: this ensures it fits the platform’s requirements. However, many overlook this step because they are focused on content. Although it may seem minor, this detail significantly impacts the final presentation.
- Select any clip in your media library.
- Press the plus sign to add it to the timeline.
- Look for the “Ratio” option and choose the desired aspect ratio based on your target platform:
- 16:9 for YouTube
- 9:16 for TikTok and Instagram Reels
- Adjust the scale as needed to ensure your video fits perfectly.
Basic Editing Techniques
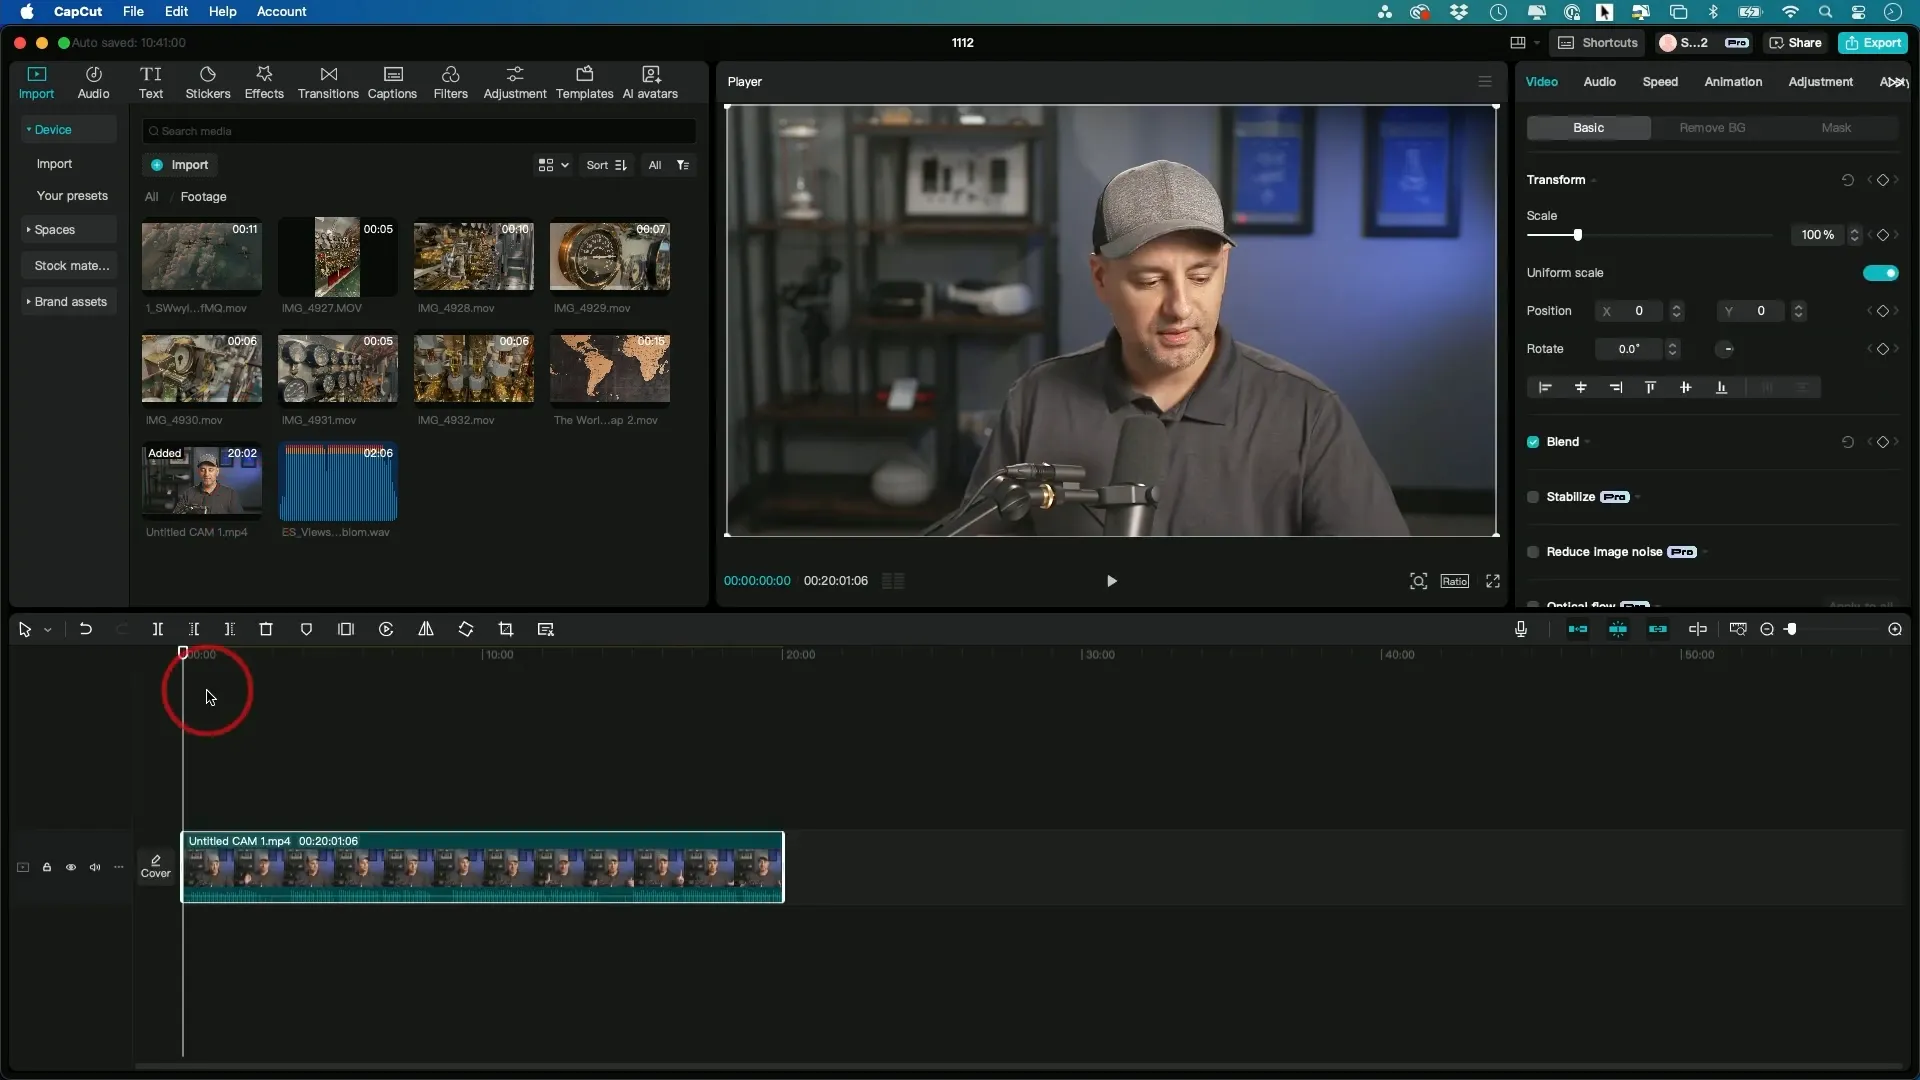
Now that (your) media has been imported and the aspect ratio is set, it’s time to begin editing. Here are several fundamental techniques: however, one must be mindful of the nuances involved, because even minor adjustments can lead to significant changes. Although the process may seem straightforward, it requires patience and precision. This is especially true when considering (different) styles and transitions, but experimentation can yield surprising results.
Adding Clips to the Timeline
To add clips to your timeline:
- Press the plus sign on any clip in your media library to add the entire clip to the timeline.
- Alternatively, you can select a portion of the clip by adjusting the in and out points, then pressing the plus sign to add just that section.

Trimming and Reordering Clips
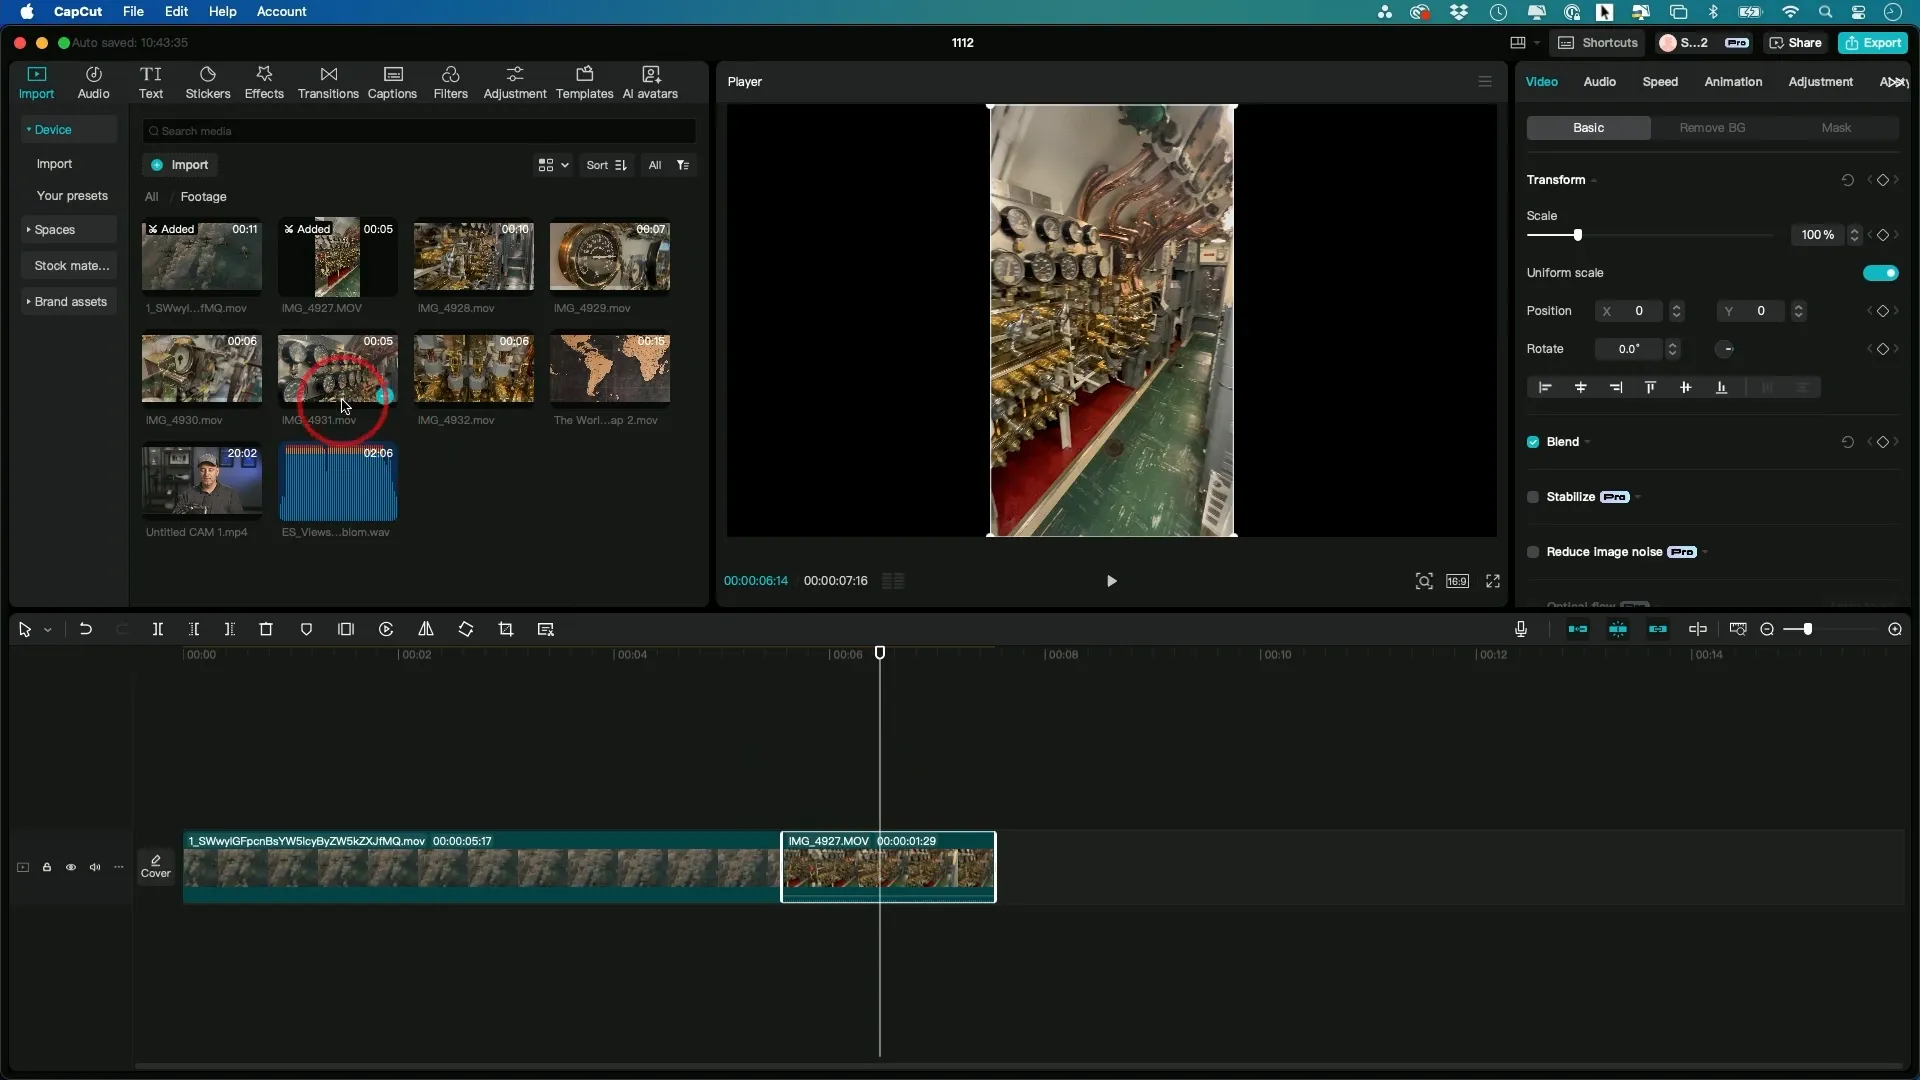
Trimming clips (1) is essential for creating seamless flow in your video. To trim and reorder—however, this process can be nuanced. Although it may seem straightforward, you might encounter challenges. Because of this, pay attention to details. The skills you develop (2) will enhance the overall quality.
- Click on the clip in the timeline that you want to trim.
- Use the cut tool to split the clip at desired points.
- Select the section you want to delete and press delete on your keyboard.
- To reorder clips, simply drag them to your desired position in the timeline.
Using B-Roll
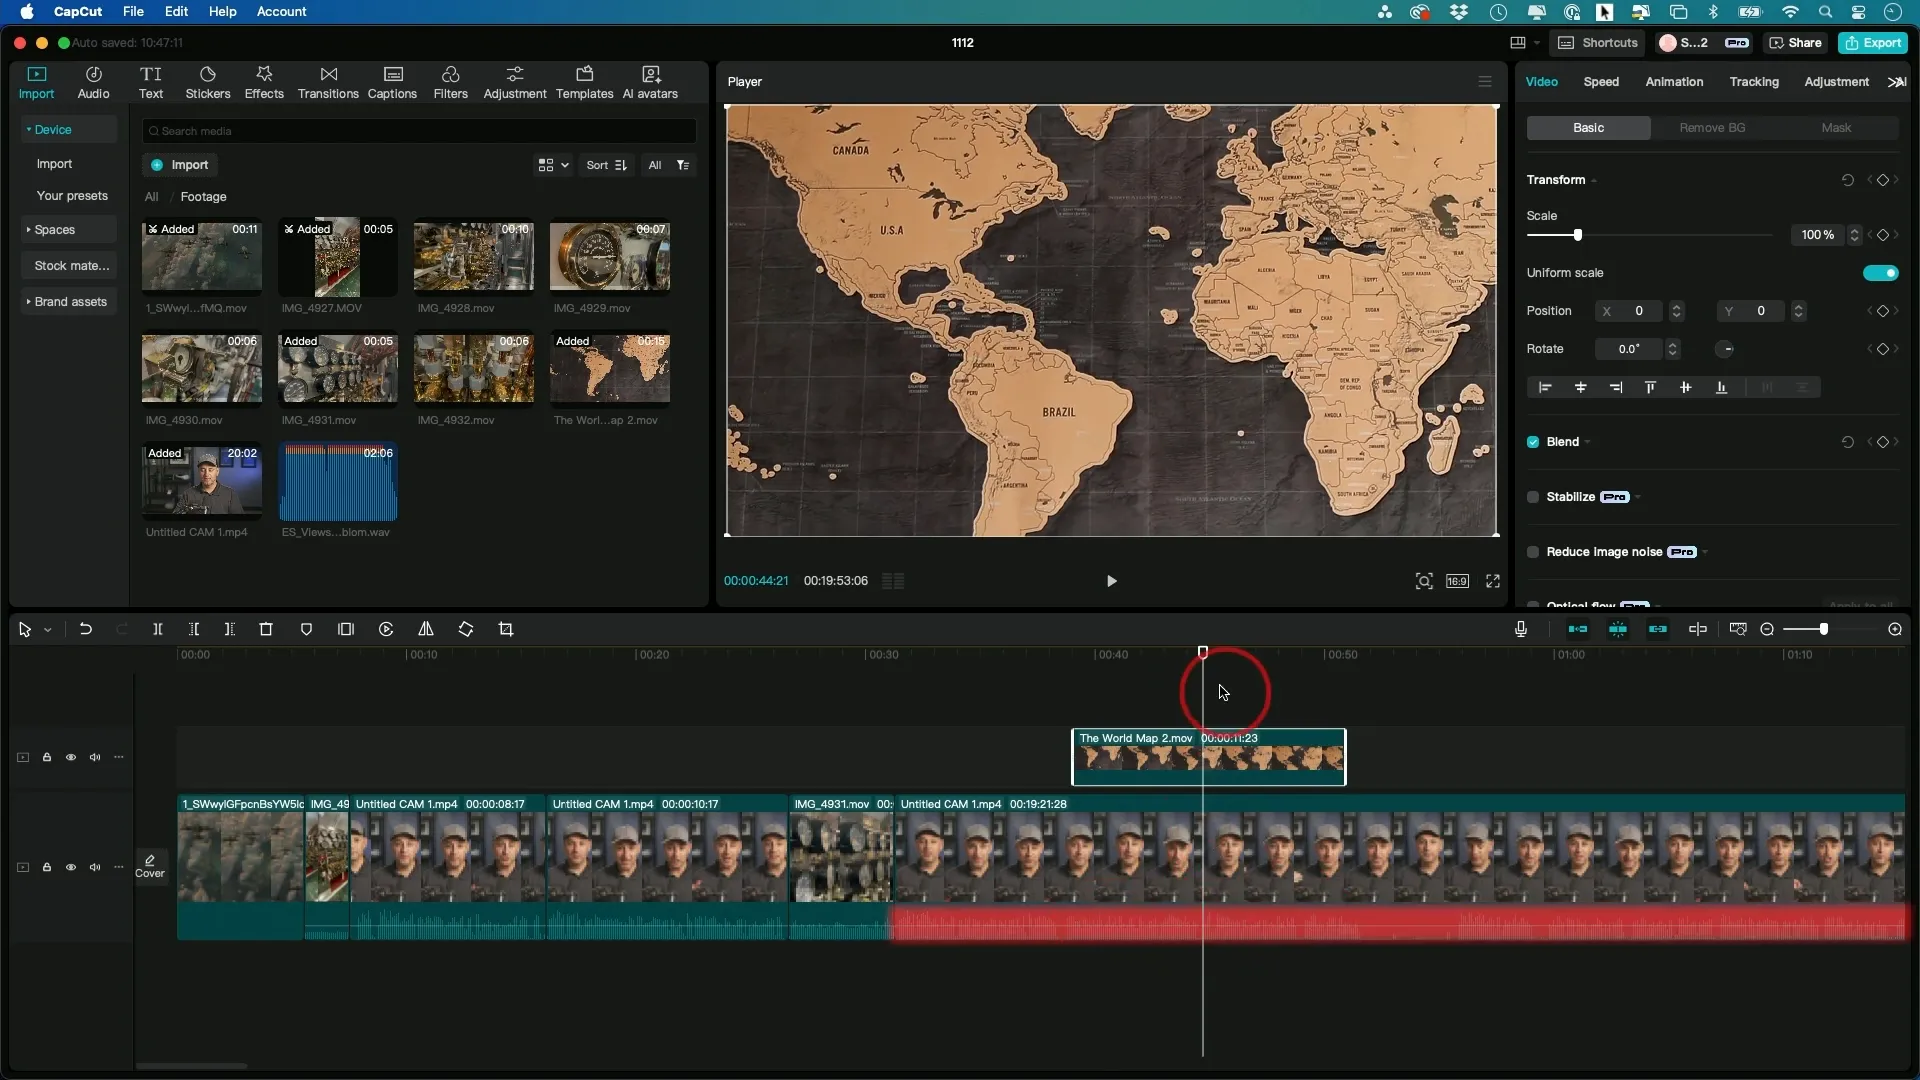
B-roll enhances (your) storytelling by providing supplementary footage. Here’s how to (add) it: however, one must consider several factors. Although it may seem straightforward, the integration of B-roll requires careful attention to detail. This is because the right footage can significantly enrich a narrative. 1. First, identify key moments that would benefit from additional visuals. 2. Next, gather footage that complements the primary content. But remember, too much B-roll can overwhelm the audience. Therefore, balance is crucial. As you proceed, keep in mind the pacing, as it can affect overall engagement.
- Drag your B-roll clip onto a new track above the main clip in the timeline.
- Trim the B-roll as needed to fit the context of your main audio.
- This allows you to show what you’re talking about while keeping the main audio intact.
Adding Music
Music can significantly enhance (the) emotional impact of your video. To add music: first, consider the mood you wish to convey—however, be mindful of copyright issues. You might find it beneficial to explore various genres, because different styles can evoke distinct feelings. This choice can ultimately shape your audience’s experience; although it may seem trivial, the right soundtrack is crucial. Furthermore, you should select a track that complements your visuals, but ensure it doesn’t overpower the narrative you’re presenting.
- Import your chosen music file into CapCut.
- Add it to the timeline as a separate audio track.
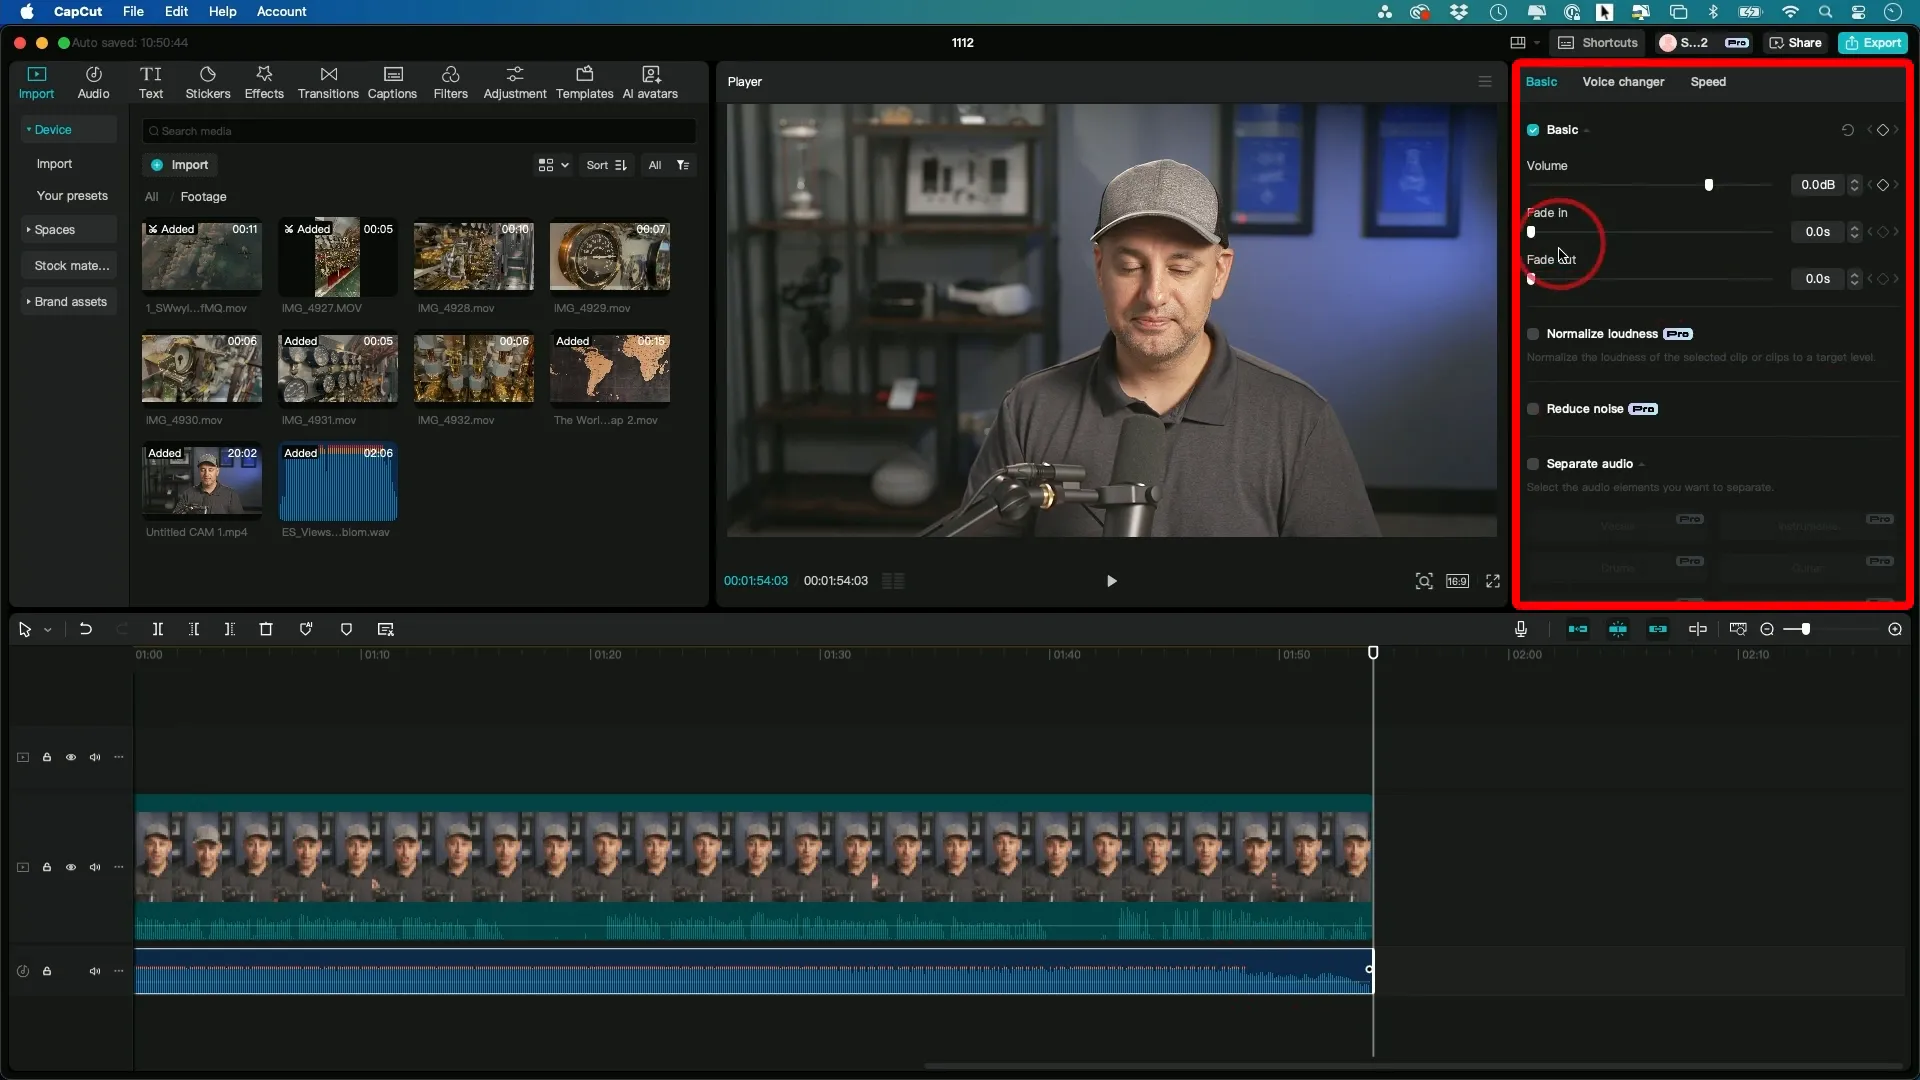
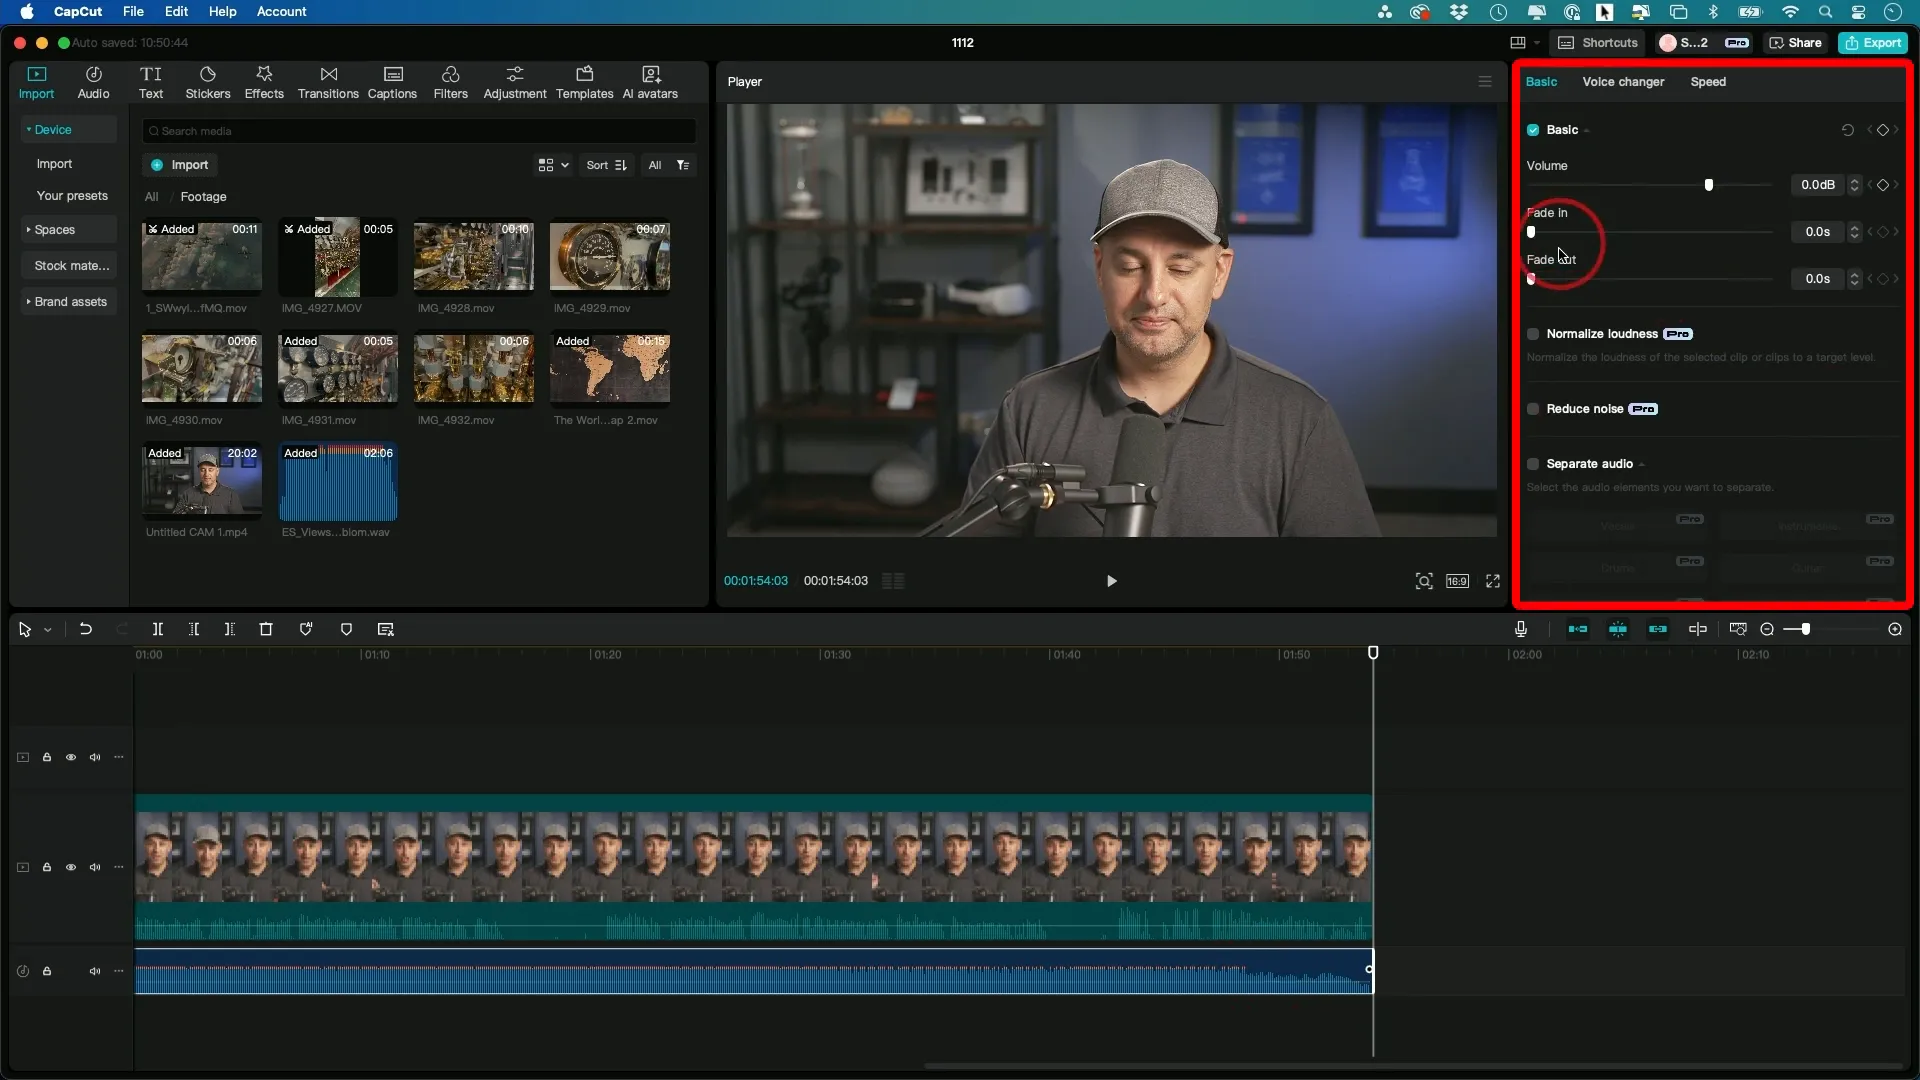
- Adjust the length of the music track to match your video, and consider adding fade-in and fade-out effects for a smoother transition.
Mixing Audio Levels
Balancing audio levels is crucial (indeed) to ensure dialogue and music complement one another: however, achieving this can be challenging. Many factors influence audio balance; for instance, the dynamics of sound can shift dramatically. This requires careful adjustment, because even slight variations might disrupt the overall harmony. Although it’s a complex task, the end result is worth the effort. In sum, maintaining proper audio levels is essential for a polished final product, but it demands attention to detail.
- Select the audio track and adjust the volume slider to mix it with the main audio track.
- Listen to the playback and make further adjustments as necessary to achieve a balanced mix.
Adding Text and Captions
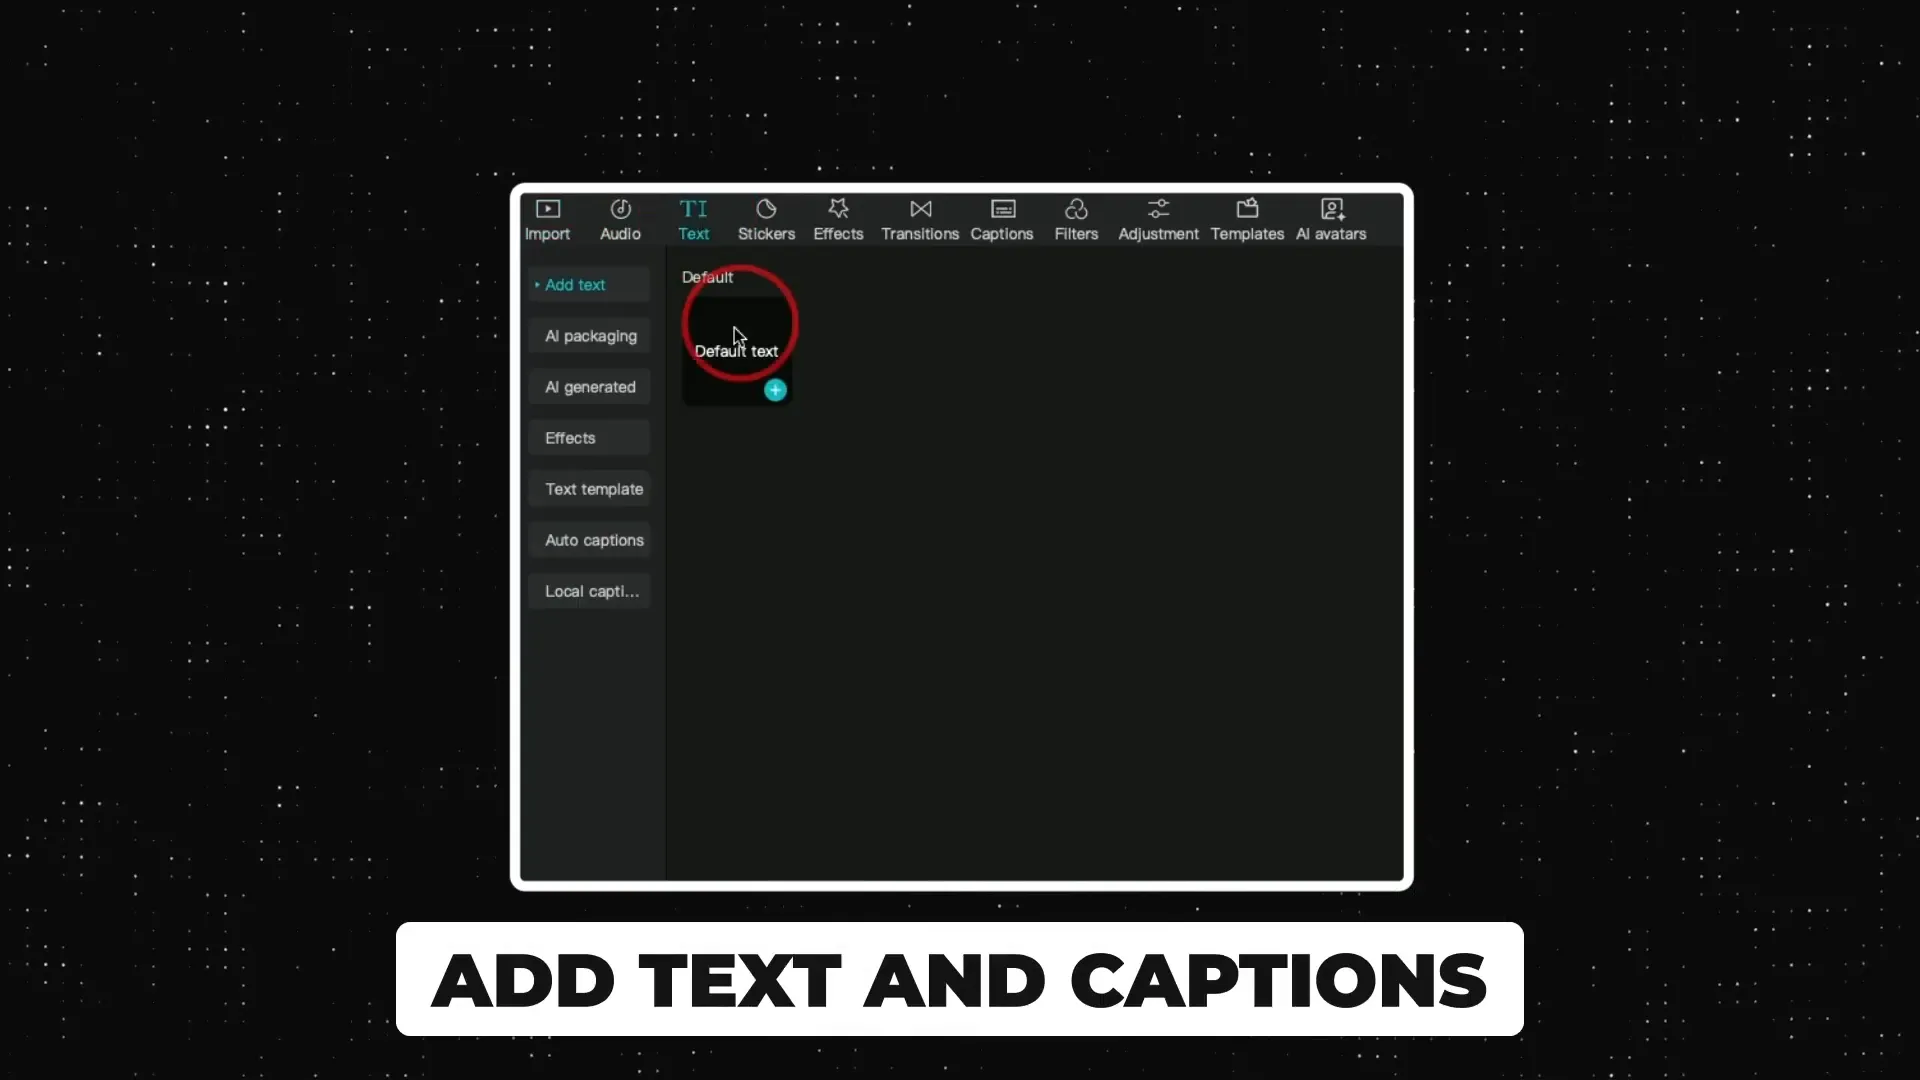
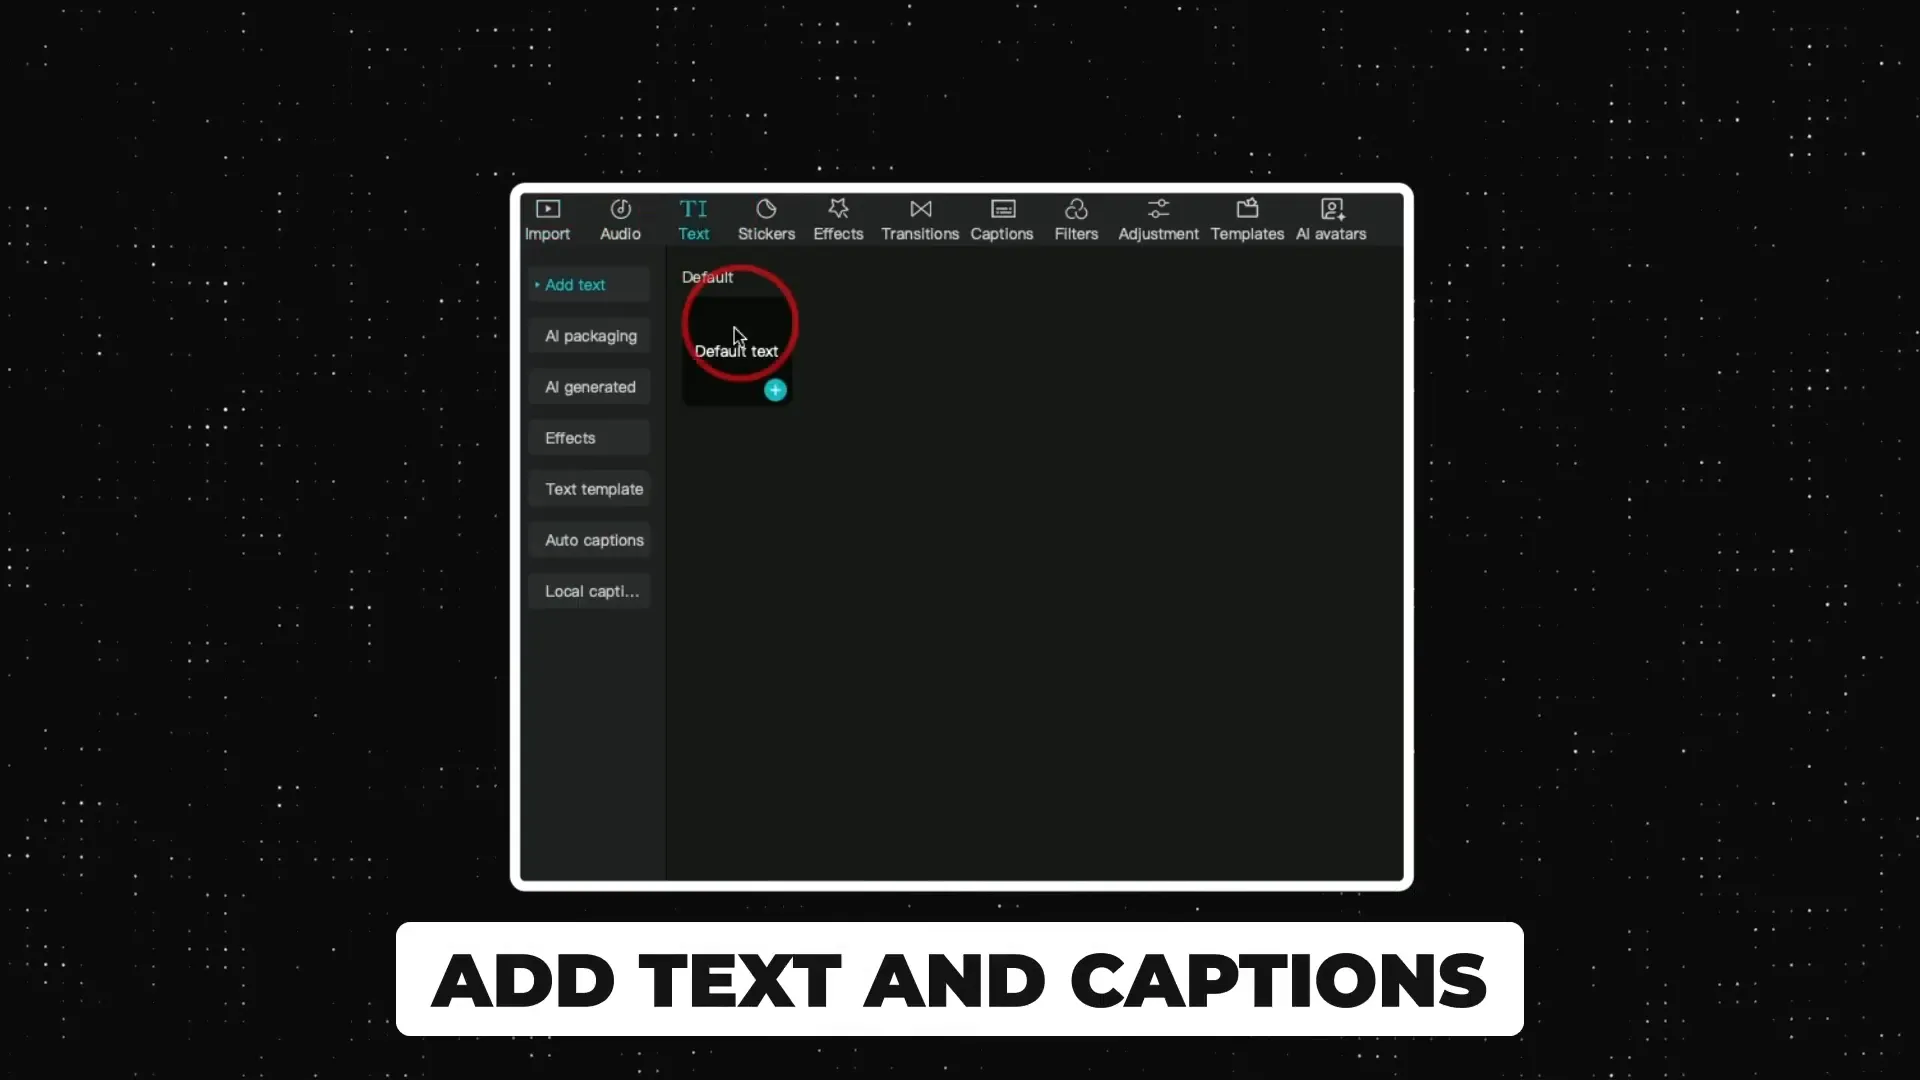
Text (and captions) can assist in conveying your message with greater efficacy. To include text: however, it is crucial to consider the context (because clarity is paramount). Although many overlook this aspect, it significantly influences audience engagement. This underscores the importance of thoughtful integration.
- Select the text tool and choose from various templates or create your own.
- Type your desired text and position it on the screen.
- For captions, you can use the auto-caption feature if you have the Pro version.

Using Effects and Transitions
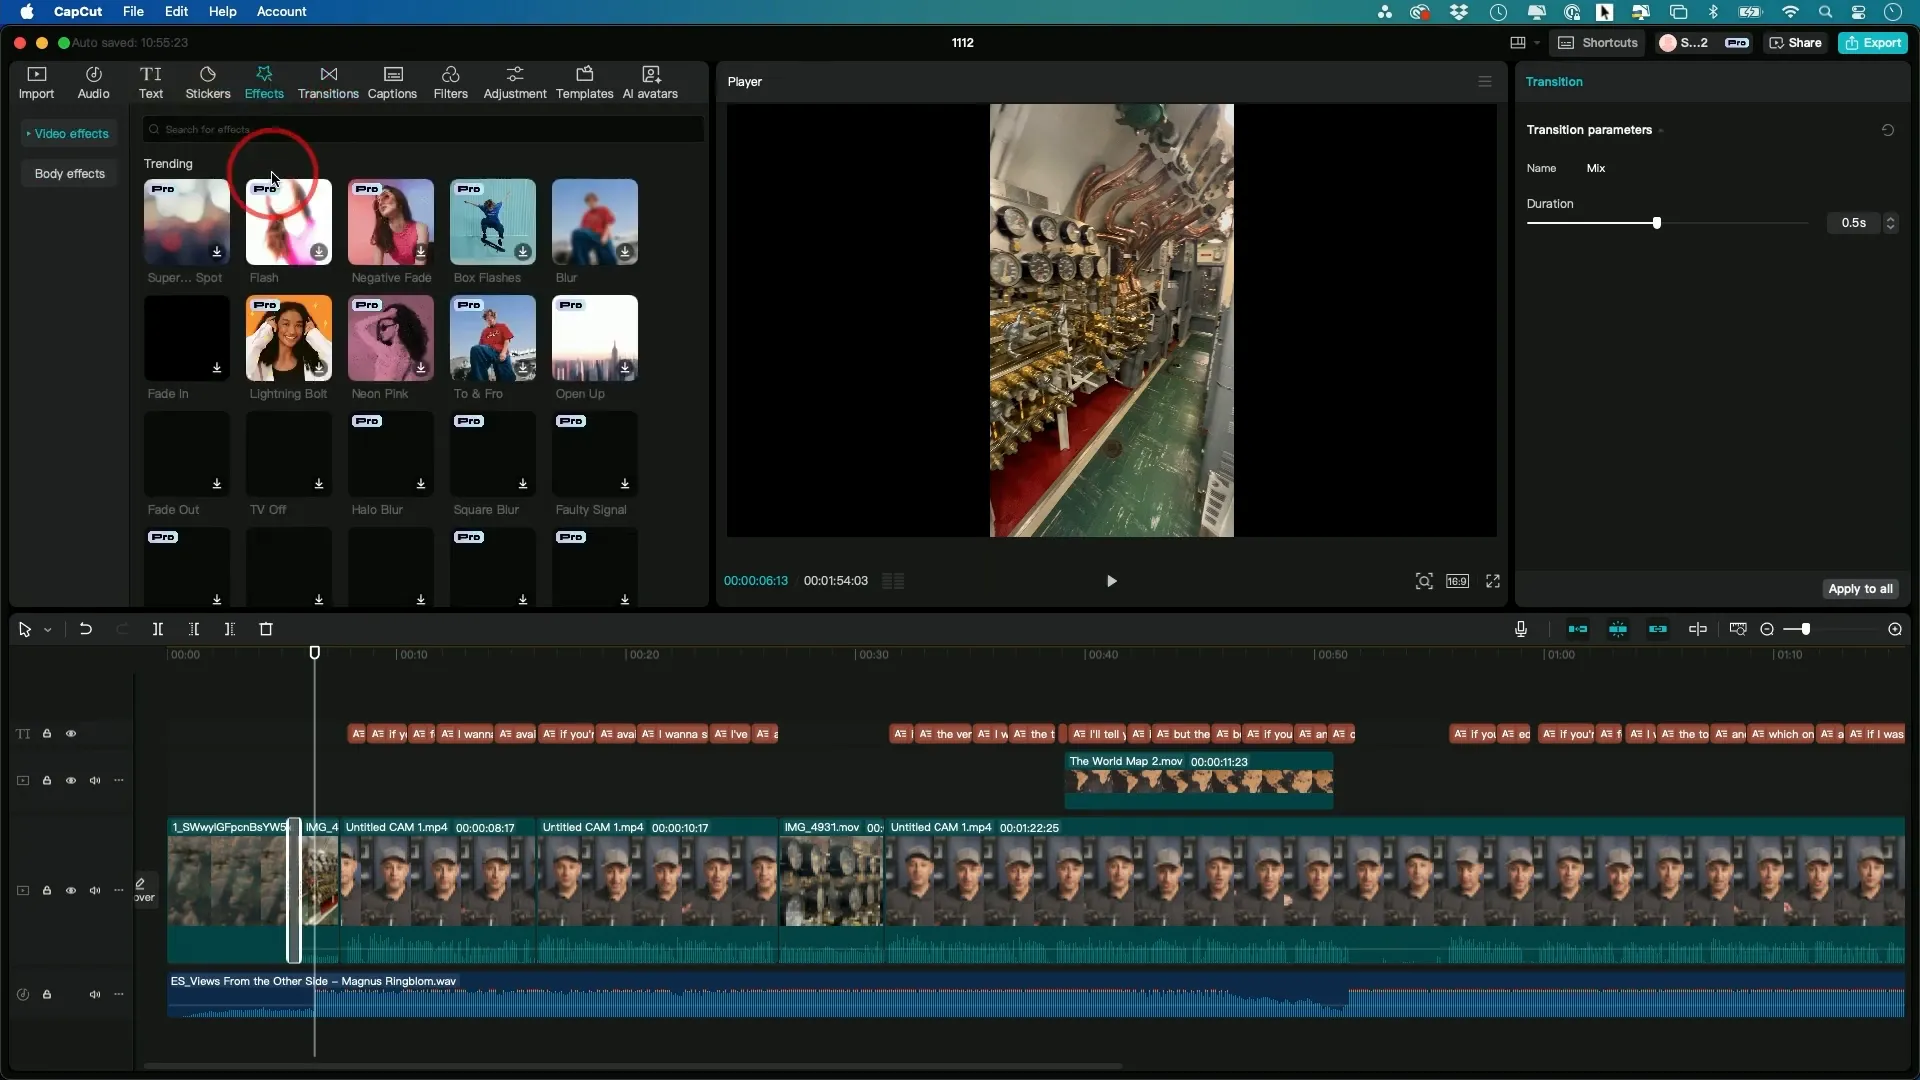
Effects (and transitions) can enhance *the* flair of your video; however, understanding their application is crucial. Here’s how you can effectively use them: although many creators underestimate their importance, these elements can transform a mundane presentation into something captivating. This is particularly true because the right effects (when used judiciously) can engage your audience more deeply.
- Select a clip and explore the effects library to apply filters or effects that enhance visual appeal.
- For transitions, choose one to apply between clips for a smoother flow.
Adding B-roll for Enhanced Storytelling
B-roll (an essential element in video editing) adds depth and context. It allows viewers to visually engage with the content, supporting the main narrative. In CapCut, adding B-roll is straightforward; however, it can enhance the overall experience significantly. Although it may seem simple, the impact of well-placed B-roll cannot be overstated. This technique helps maintain audience interest, because it complements the primary footage.
- Drag your B-roll footage from the media library onto a new track above the main video clip in the timeline.
- Trim the B-roll to match the relevant sections of your main audio. This ensures that the visuals align with the narrative.
- Keep your main audio intact while overlaying the B-roll, enhancing the storytelling without losing the spoken content.

Incorporating Music into Your Edit
Music plays (indeed) a crucial role in shaping the tone of your video. To incorporate music in CapCut: however, one must ensure that the selection aligns with the intended mood. Although there are various options available, not every track will fit seamlessly. This is important, because a dissonant choice can detract from the overall impact. Therefore, take your time to explore (the possibilities) and find the perfect match.
- Import your selected music file into CapCut by using the import button.
- Drag the music track to the timeline, positioning it on a separate audio track.
- Adjust the length of the music to fit your video. Utilize fade-in and fade-out effects for a seamless integration.
Mixing Audio for Professional Sound
Achieving (an) optimal audio mix is crucial for professional results. Here’s how to mix audio in CapCut: however, understanding the nuances of sound is essential, because this can (significantly) enhance the final product. Although many users think they can just adjust levels, it requires careful attention to detail. The tools are available, but mastering them takes time and practice.
- Select the audio track you want to adjust. Use the volume slider to balance the levels between the main audio and background music.
- Listen to the playback and make necessary adjustments. Ensure that dialogue is clear and that music complements rather than overwhelms the audio.
Adding Text and Captions
Text (and captions) can significantly enhance your video’s accessibility and engagement. Here’s how you can add them in CapCut: however, you must navigate the interface carefully (because it can be somewhat complex). First, you’ll need to locate the appropriate option; this may take some time. Although the process seems straightforward, many users encounter challenges. But, with persistence, you will succeed. It’s essential to remember that effective text integration can transform your content (in ways you might not expect).
- Select the text tool and choose from various templates or create custom text.
- Type your desired text and position it where it best fits in the video frame.
- For captions, you can utilize the auto-caption feature if you have the Pro version. This will generate captions based on your spoken words.

Applying Effects and Transitions
Effects (and transitions) can add unique touches to your videos; however, the application process can be intricate. Here’s how to apply them: although it may seem daunting at first, because with practice, you’ll master the techniques. This, in turn, will enhance the overall quality of your content.
- Explore the effects library to find filters or effects that enhance your footage visually.
- To apply a transition, select the clip and choose a transition effect to place between two clips for smoother scene changes.

Exporting and Sharing Your Final Video
Once your video is complete, (exporting it correctly) is essential; however, this process can be intricate. You must consider various factors, (e.g.,) the format and resolution. Although it may seem straightforward, many encounter challenges. Because of this, it’s vital to verify settings before finalizing the export. In addition, you should pay attention to the file size, as it can impact storage and sharing capabilities. Therefore, (careful planning) is crucial for a successful outcome; but, with practice, you’ll become more proficient.
- Click on the export icon at the top of the interface.
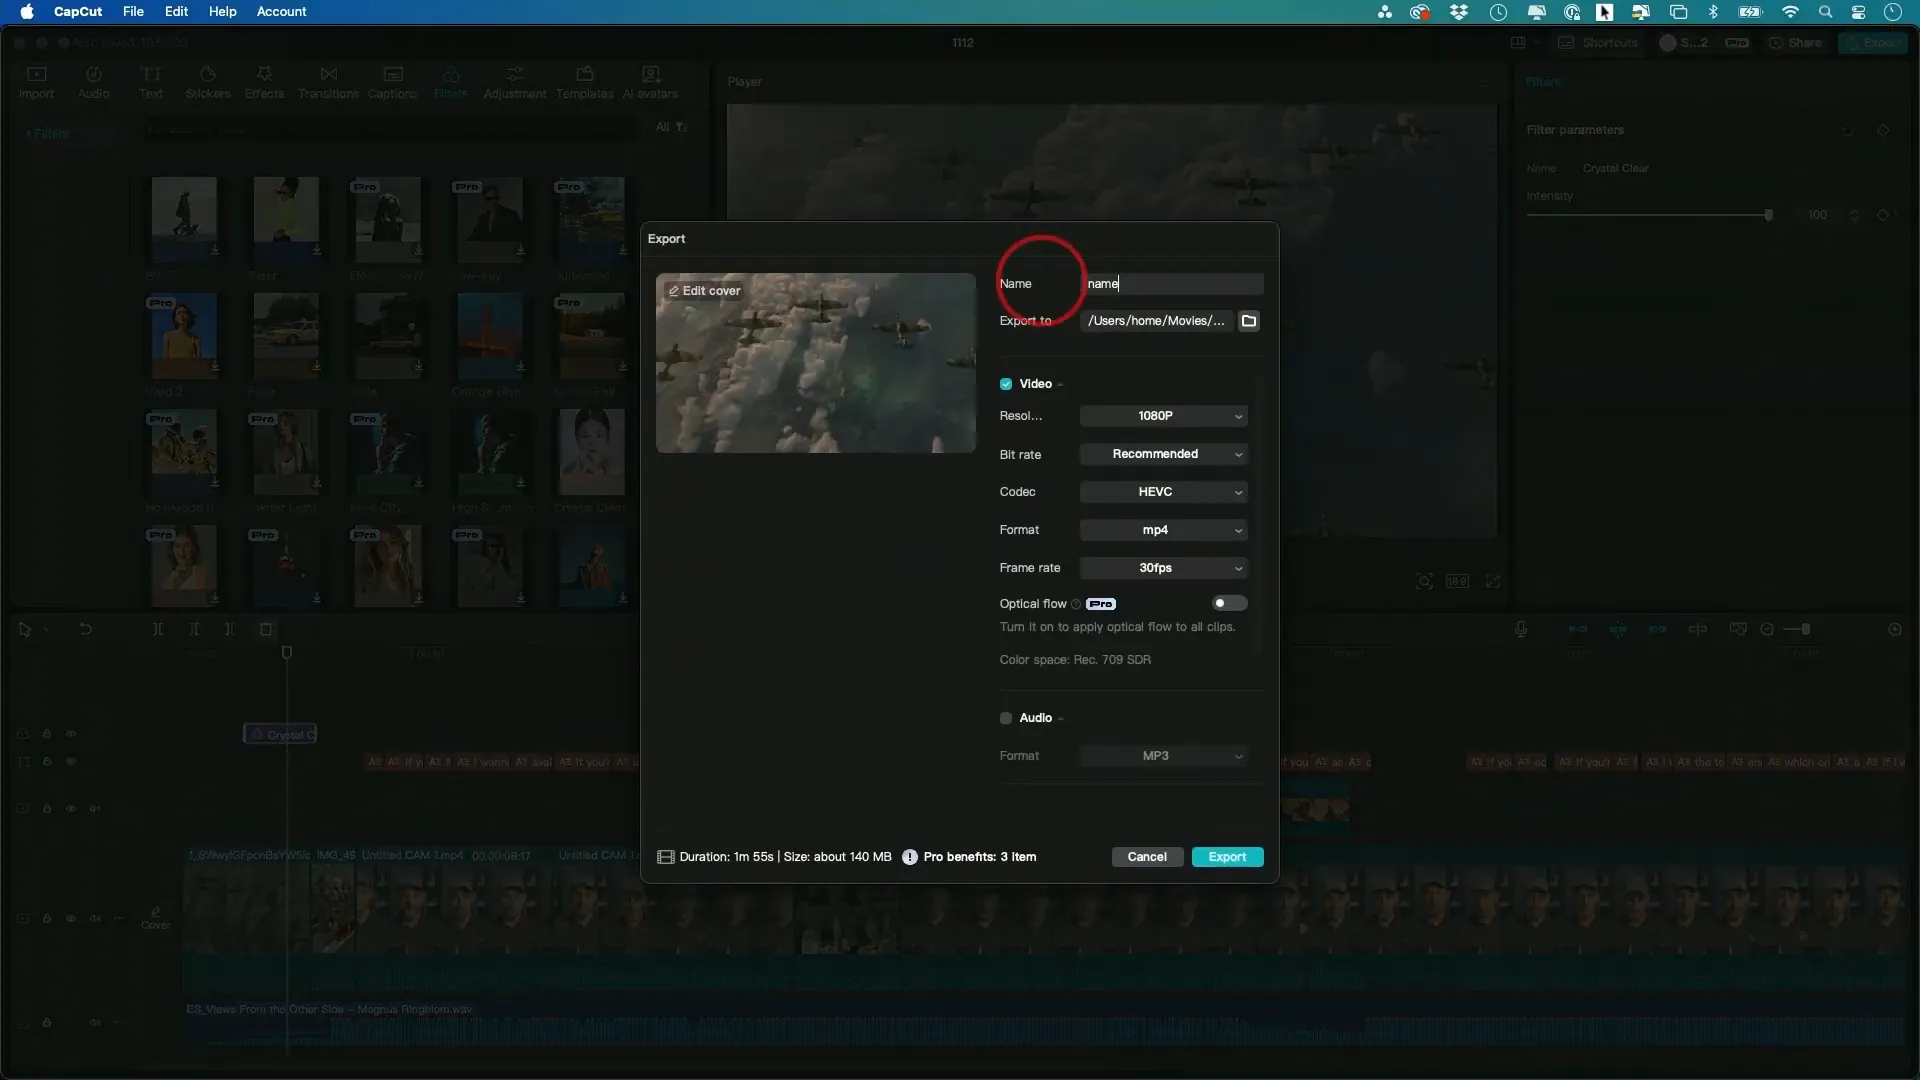
- Name your video for organization and select the desired resolution, typically MP4 is recommended.
- Choose a folder on your computer to save the video, ensuring easy access for future uploads or edits.
