
If you want to keep your Facebook photos completely private without deleting them, here’s a simple, step‑by‑step method I use that locks every existing album and prevents tagged photos from appearing publicly on my profile. I walk through two parts: making each album private so only you can see the photos you uploaded, and adjusting your Profile & Tagging settings so photos others tag you in are private too. These changes are done from the Facebook mobile app and take just a few taps per album.
In this guide I’ll show exactly what I do, why it works, and a few extra tips and troubleshooting ideas so you can lock down your photos quickly and confidently.
Quick overview: What you’ll accomplish
- Make existing photo albums private so only you can view them (no deleting required).
- Prevent photos and posts you’re tagged in from appearing publicly on your profile.
- Create private albums for anything you want to keep hidden going forward.
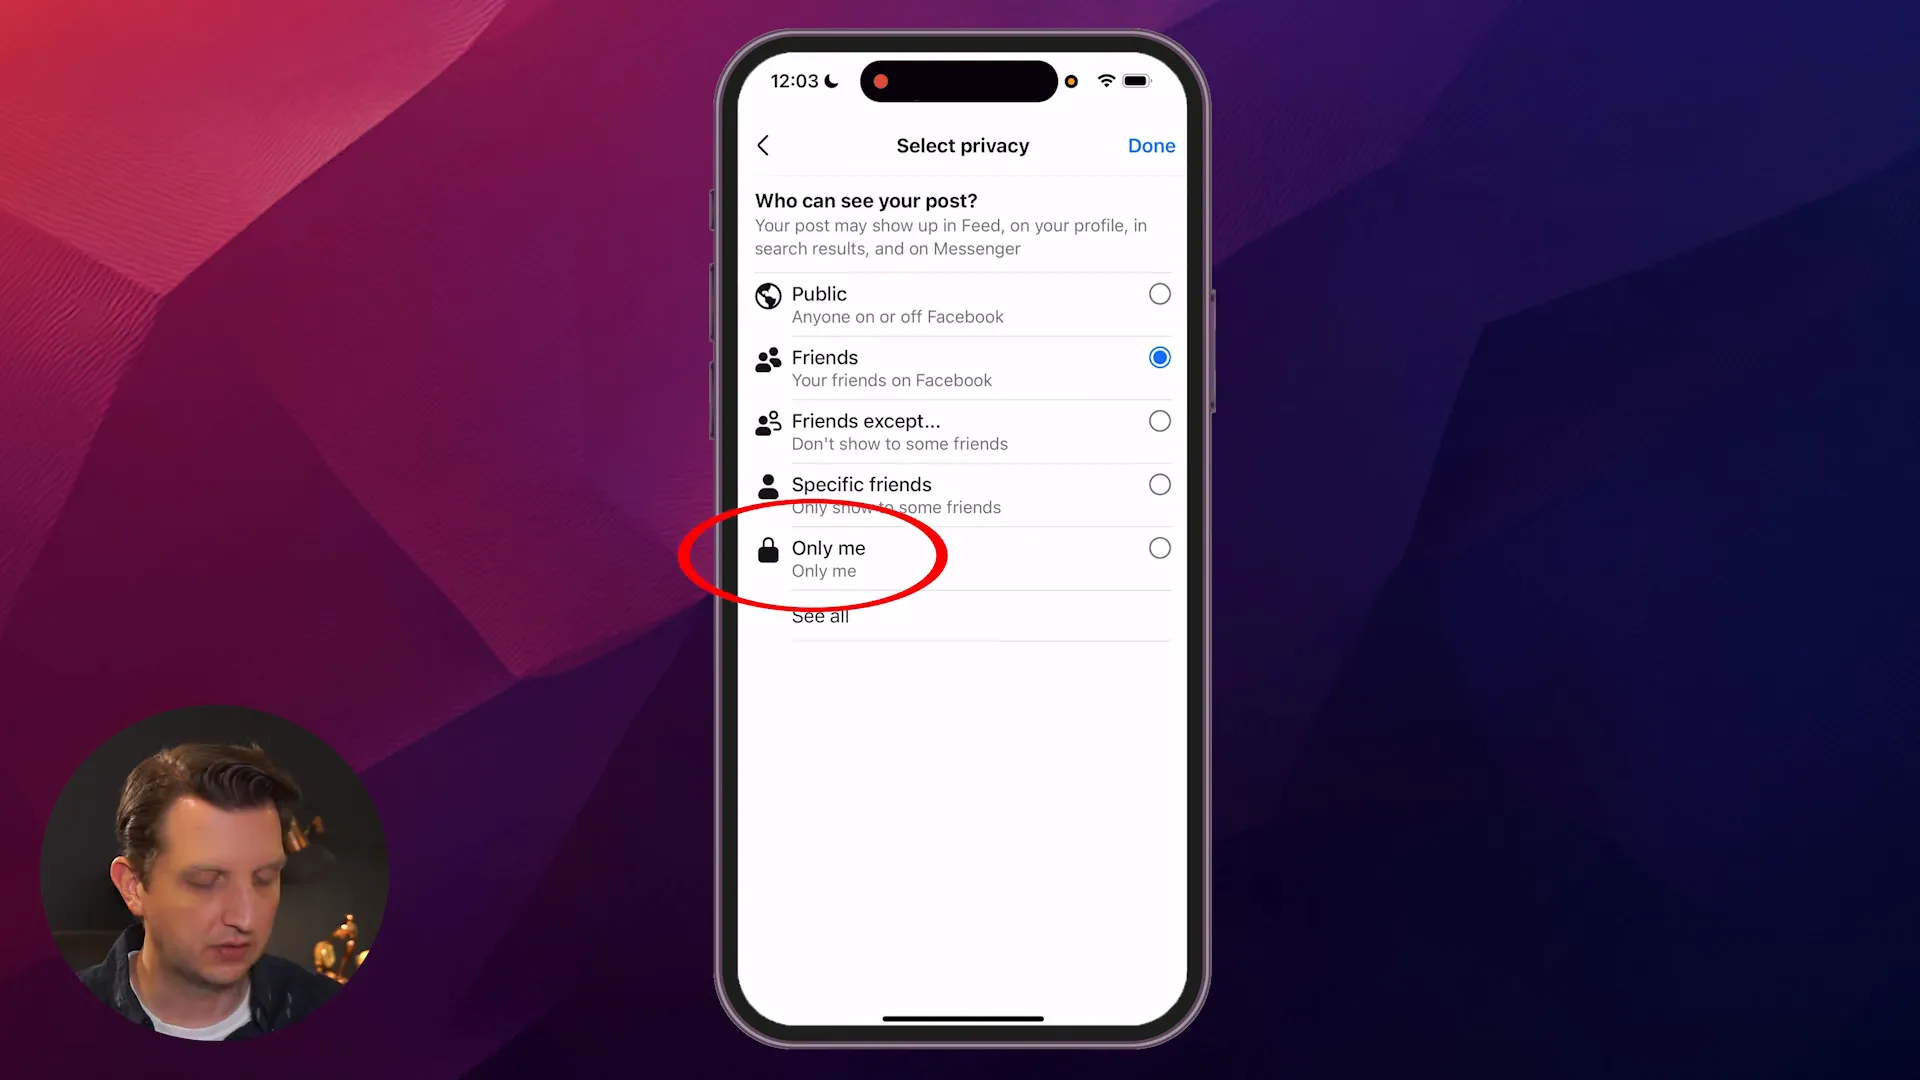
- Understand the difference between “Only Me”, “Friends”, and public visibility on Facebook photos.
Why make your Facebook photos private?
People choose to hide photos for different reasons:
- Privacy concerns — you don’t want old photos visible to new acquaintances or the public.
- Professional reasons — you’re cleaning up your online presence for job hunting.
- Organization — keeping sentimental or personal photos visible only to you.
The method below is careful: nothing gets deleted. Instead, visibility is changed to Only Me, which hides content from everyone else while keeping it accessible to you.
Part 1 — Make each album private (mobile app)
Follow these steps on the Facebook mobile app. I do everything from my phone; the layout shown here matches the mobile interface.
- Open the Facebook app and tap the menu button in the bottom right corner.

- Tap your profile (your profile picture near the top of the menu).
- On your profile, scroll to find the Photos section — tap Photos.
- Within Photos, choose Albums to see all albums you’ve created and that Facebook has organized for you.
- Open an album you want to make private (for example: a holiday album).

- Tap the three dots in the top right of the album and select Edit album.
- Under the album settings, look for the current audience setting (for many it will show Friends). Tap that and choose Only Me, then tap Done and Save.
Once saved, the album title will display a small lock icon and the text Only Me beneath it — that signals the album is private and hidden from everyone else on Facebook.
Repeat these steps for every album you have. Depending on how many albums are on your account, this will take a little time, but each album only needs to be set once.
Why this doesn’t delete photos
When you switch an album to Only Me, Facebook doesn’t remove or delete the images — it only changes who can view them. You retain full access to your photos; they’re simply hidden from other users, search, and public browsing.
Tip: Create private albums for new photos
Instead of uploading photos to a public album and changing visibility later, you can create an album that’s already set to Only Me. When creating a new album in the Photos > Albums area, choose Only Me as the audience so anything you add stays private from the moment you upload.
Part 2 — Make tagged photos private (Profile & Tagging settings)
Albums you own are one part of the picture. Photos other people tag you in can still show up on your profile unless you adjust tagging and profile settings. Here’s how to lock those down.
- Open the Facebook menu again (bottom right) and scroll to Settings & Privacy, then tap Settings.
- Scroll to the Profile and Tagging section and open it.
- Review the list and update each option to reflect your desired privacy. The key settings to change are under tagging and implied mentions:
- Who can see posts you’re tagged in on your profile? — change to Only Me if you want tagged posts and photos to be visible only to you on your profile.
- When you’re tagged in a post, who do you want to add to the audience of the post if they can’t already see it? — set this to Only Me as well, to prevent Facebook from expanding the audience of a tagged post.
With those changes, any existing or future photos that include tags of your name will not be added to your profile’s visible audience. In short: tagged photos are now private to you unless you manually change the audience later.
Other useful privacy tweaks
Beyond albums and tagging, consider these additional adjustments to control how people see things on your timeline:
- Change Who can see your future posts to Friends or Only Me depending on whether you want to keep future uploads private.
- Use Timeline review so you can approve tags before they appear on your profile.
- Review old posts with Facebook’s Manage Activity tool to archive or delete content you no longer want online.
Common questions and troubleshooting
Will these steps remove photos from Facebook?
No. Changing an album’s audience to Only Me or adjusting tagging settings does not delete photos. It only hides them from other users while keeping them available in your account.
What about photos that were shared by others?
If someone else uploaded a photo of you and shared it publicly, changing your album settings won’t remove that photo from their account. Setting tagging visibility prevents it from appearing on your profile, but doesn’t remove the original post. If you want the photo removed from someone else’s account, you must ask them to delete it or use Facebook’s reporting tools in cases of misuse.
I changed album visibility but people still see photos — why?
Possible reasons:
- The album you changed wasn’t the one containing those photos — double‑check all albums (including mobile-only and system albums).
- The photo might exist in multiple places (e.g., someone else posted it and tagged you).
- Facebook cache can take a short time to reflect changes; log out and back in to verify.
Can I make these changes on desktop?
Yes — similar options exist on Facebook’s desktop site. Navigate to your profile, Photos, Albums, then edit each album’s visibility. The wording and interface may differ slightly, but the audience options are the same.
Best practices and final tips
- Go album by album — it’s the simplest reliable way to ensure everything you uploaded is private.
- Use private albums from now on for sensitive content instead of changing visibility after uploading.
- Check tags regularly and enable Timeline Review to prevent unwanted tags from appearing on your profile.
- Make a local backup of any photos you want to keep off Facebook entirely — just in case.
- If you’re cleaning up for a job search or other reason, consider running Facebook’s Privacy Checkup to review other settings like friend lists and public info.
Wrapping up
Making all of your Facebook photos private is straightforward: edit each album and set the audience to Only Me, then adjust Profile & Tagging options so posts and tagged photos don’t show up publicly on your profile. This approach preserves your photos while removing them from view for friends, friends‑of‑friends, and the public.
It may take a little time to go through every album, but once you’re done you’ll have peace of mind knowing your images are visible only to you. If you’d like, create a private album for future uploads so everything sensitive stays hidden from the start.
Follow these steps and you’ll have a much more private Facebook presence in just a few minutes.
“That means this is totally private… I can still see it, so it doesn’t delete anything.” — a simple way to keep your photos safe without losing them.
Extra checklist and next steps
If you want a quick checklist to finish locking down your photos, use the steps below. These are meant to be done after you’ve changed album audiences and updated Profile & Tagging settings.
- Enable Timeline Review so you approve tags before they appear on your profile.
- Set Who can see your future posts to Friends or Only Me depending on your preference.
- Run a one-time Manage Activity sweep: archive or delete old posts and photos you no longer want associated with your account.
- Make a local backup: go to Settings > Your Facebook Information > Download Your Information to export photos you want to keep off Facebook entirely.
- If someone else posted a photo of you and you want it removed, ask the person to delete it or use Facebook’s reporting tools for removal requests.
Quick troubleshooting tips: log out and back in after making privacy changes to confirm they’ve taken effect; double-check system and mobile-only albums; and remember that changes to tagging settings stop photos from appearing on your profile but do not remove copies on other people’s accounts.
If you’d like, I can also produce a printable one-page checklist or a step-by-step mobile screenshot guide you can follow while changing settings—tell me which you prefer.