
The Instagram Edits app is a lightweight, phone-first editor that makes it easy to create eye-catching short videos. It works on iPhone and Android, and while you sign in with Instagram, you can export finished clips to TikTok, YouTube Shorts, or anywhere else. This guide walks through the app’s layout and the essential editing steps so you can start producing polished clips quickly.
Install and sign in
Download the Edits app from your device’s app store and sign in with your Instagram account. Once you log in, the app takes you to the main screen where most tools are one tap away. You need an Instagram login to access the editor, but you do not need to publish there — export and share wherever you like.
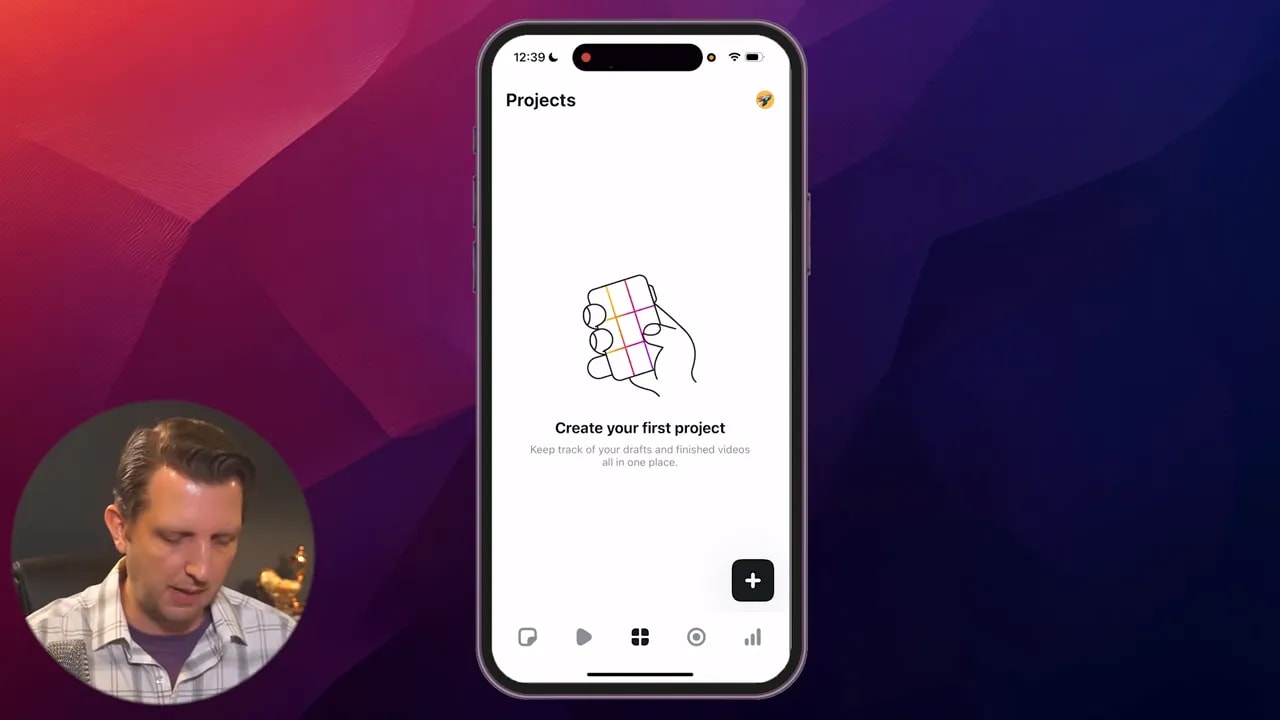
Understanding the main navigation
The navigation bar runs along the bottom and centers on Projects — where you’ll create and store edits. Flanking that are helpful sections: inspiration templates, an ideas library, a built-in recorder, and account insights. Learning where each item lives saves time when building a clip on your phone.
Inspiration and templates
Tap the play-arrow icon to browse inspiration pieces. These show example layouts and transitions you can replicate. If you like a particular edit, save or bookmark it to reuse the same timing, music, or visual structure for your own clips.
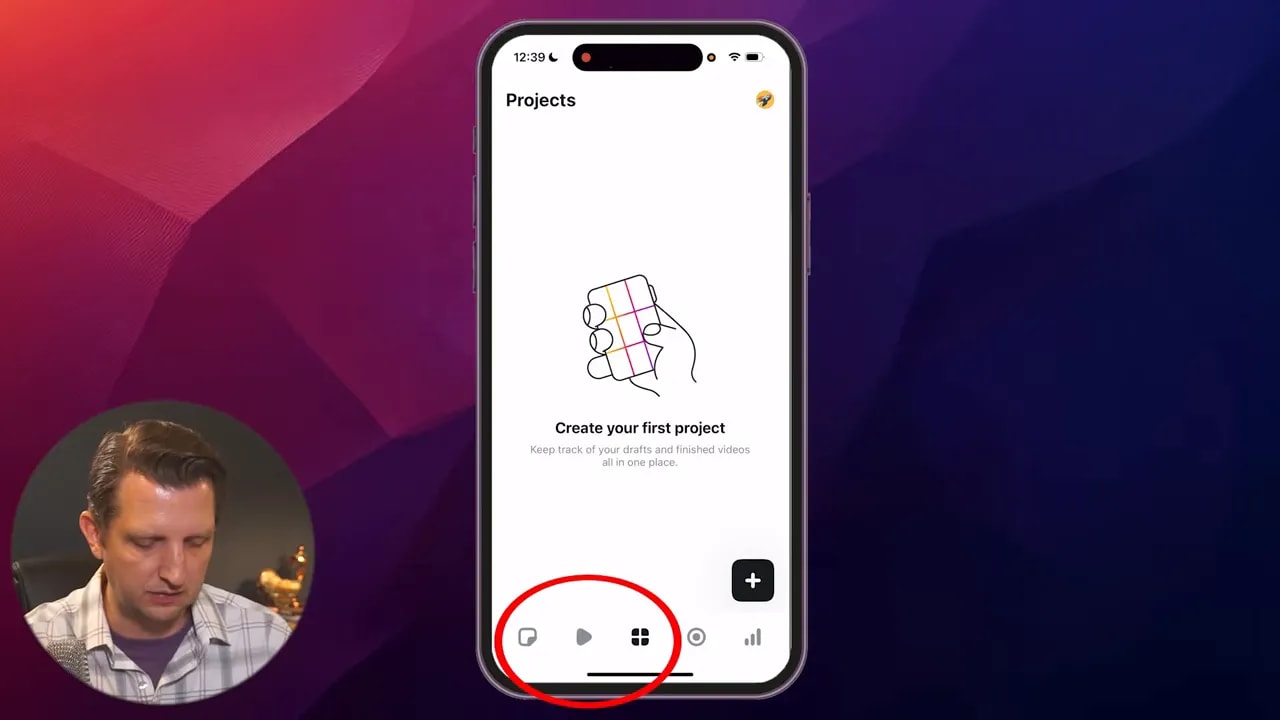
Ideas, stickers, and saved audio
The app includes a compact ideas area that holds stickers, saved reels, audio, and collections. Use it as a quick-access library for recurring assets — especially handy when you want consistent branding across several videos.
Create your first project
To start a project, tap the plus button on the Projects screen. You can import an existing clip from your gallery or record directly inside the app. Recording in-app keeps everything in one place and speeds up the transition from capture to edit.
Record and trim — the basics
After recording (or importing), the clip lands in the editor. The essentials here are trimming and splitting: drag the start and end handles to remove extra footage, or split clips to rearrange or drop unwanted segments. These are simple gestures, but they form the backbone of fast mobile editing.
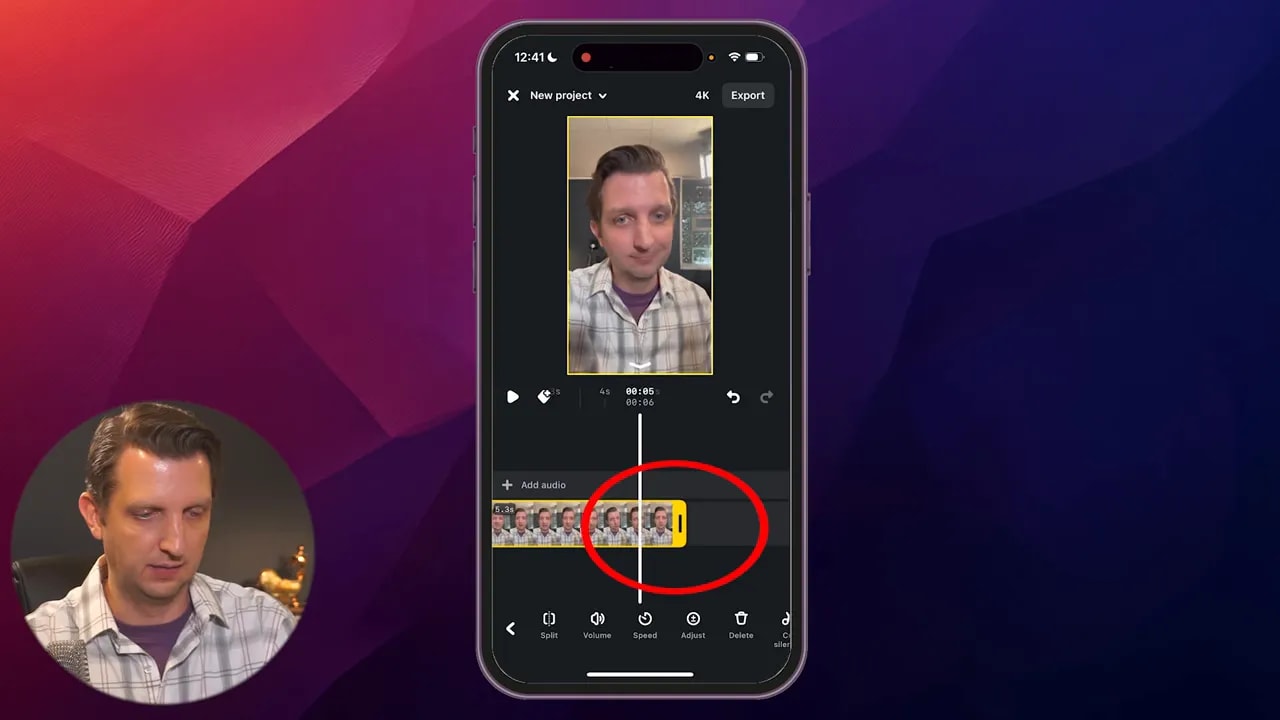
Step-by-step trimming
- Set the in point: slide the left handle to where you start speaking or the action begins.
- Set the out point: drag the right handle to cut off excess at the end.
- Split if needed: position the playhead and use Split to divide a clip for reordering or deleting small mistakes.
Add music and balance audio
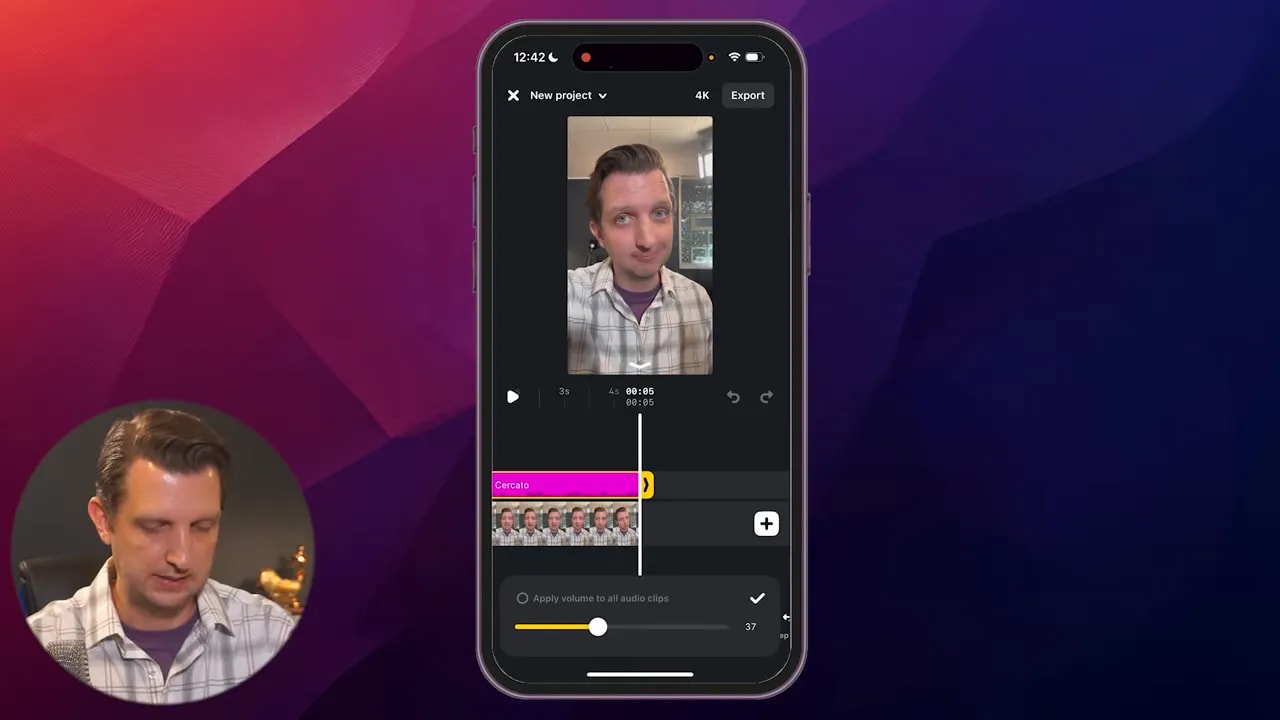
Background music is an instant way to lift a short. Pick a track from the built-in audio library or import your own. Once added, reduce the music volume so it supports rather than competes with speech. The app provides quick volume controls to get this right in a couple of taps.
Filters, green screen, and effects
The Edits app includes common visual tools: filters to change tone, lightening and color tweaks, and effects like black-and-white fades. There’s also a green screen feature so you can composite yourself over another video or image — a fun way to introduce reactions or layered storytelling.
Other handy options include voice adjustments to clean up spoken audio and standard crop controls to change aspect ratio for Instagram Reels, TikTok, or YouTube Shorts.
Exporting and sharing
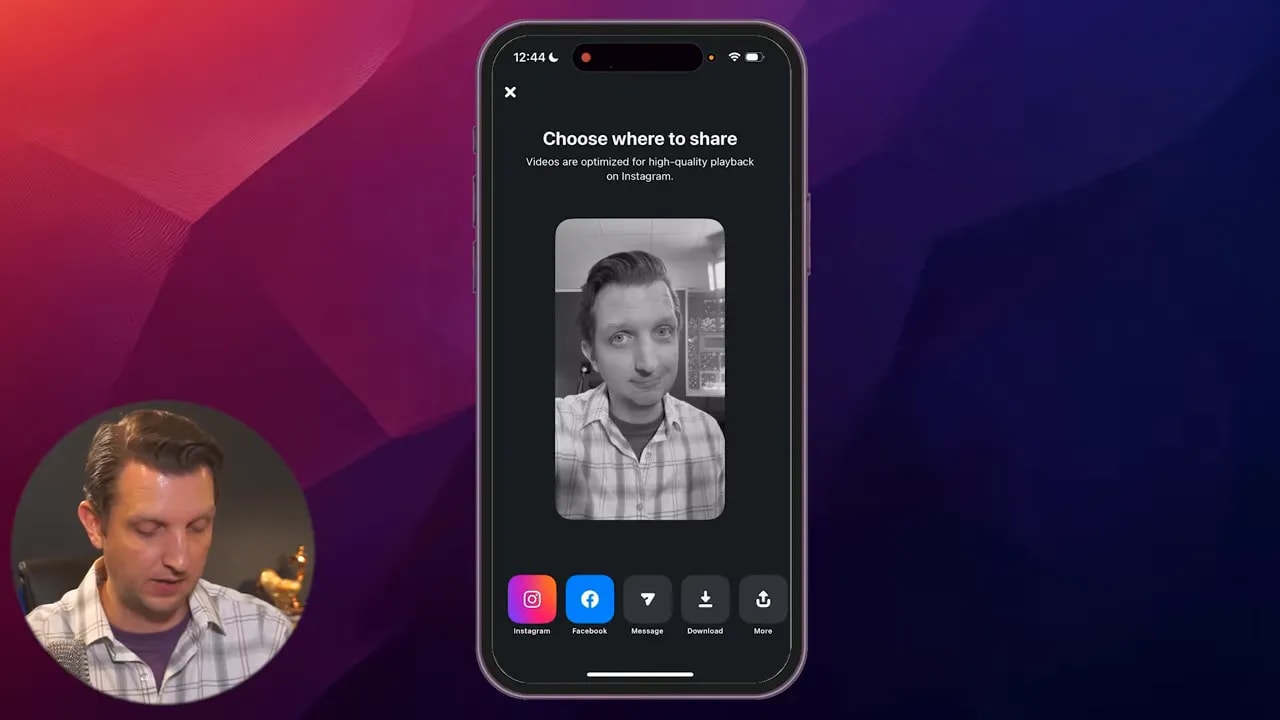
When the edit looks right, tap Export. The app lets you post directly to Instagram or Facebook, message the file, or save it to your device. Because export preserves common aspect ratios, you can repurpose the same render for different platforms with minimal rework.
Workflow tips to edit faster
- Use templates for consistency: save a structure you like in Inspiration and reuse it to maintain a uniform look across videos.
- Keep an ideas library: store commonly used stickers, audio, and cuts in Collections so you do not have to hunt for assets.
- Balance audio first: set voice and music levels early so visuals can be adjusted around the pacing rather than the other way around.
- Save projects: keep unfinished edits in Projects — you can revisit and tweak without starting over.
- Export once, adapt later: save a master file and crop or re-export for specific platforms instead of rebuilding separate versions.
Quick editing checklist
- Sign in and open Projects.
- Import or record footage in-app.
- Trim start and end; split where necessary.
- Add background music and lower its volume under your voice.
- Apply a filter, crop, or green screen effect if needed.
- Preview, export, and save to Projects for future edits.
Final thoughts
The Instagram Edits app is designed for quick, mobile-first editing. It gives you everything you need for short-form content without opening multiple apps. Start with simple trims and a background track, then experiment with filters, green screen, and templates as you get comfortable. The faster you iterate, the easier it is to find a style that fits your content and audience.
Keep a small library of saved audio and templates, balance your sound early, and use Projects as your creative workspace. With a few sessions, you can produce clean, shareable videos directly from your phone.
Additional tips and resources
If you expected links to app downloads or tutorials, none were provided with this request. Here are extra, actionable tips to help you get started quickly:
- Search your device app store for “Edits” or “Instagram Edits” to find the official app.
- Watch short tutorials on trimming, green screen, and audio mixing to speed up learning.
- Create a template library by saving a starter project that contains your brand assets and common transitions.
If you provide URLs, I can insert them directly into the article using 1–3 word anchor text and place them where they fit best.