
Uploading a video from your iPhone to YouTube is fast and straightforward once you know the steps. Whether you want to post a quick Short or share a full-length clip from your camera roll, the YouTube app handles everything — recording, selecting, editing, and publishing — right from your phone. Below is a clear, step-by-step guide that walks through the process and offers practical tips to avoid common hiccups.
What you need before you start
- An iPhone with the latest YouTube app installed.
- Signed in to the correct Google/YouTube account on the app.
- Permission granted for YouTube to access your camera and photos if you plan to record or upload from your camera roll.
- A reliable internet connection — Wi-Fi is best for larger files.
Step-by-step: Upload from your iPhone
-
Open the YouTube app and make sure you are signed into the account you want to upload to. If you have multiple Google accounts, double-check you’re using the right one.
-
Tap the plus (+) icon at the bottom of the screen to start a new upload or recording. This is the hub for creating content inside the app.

-
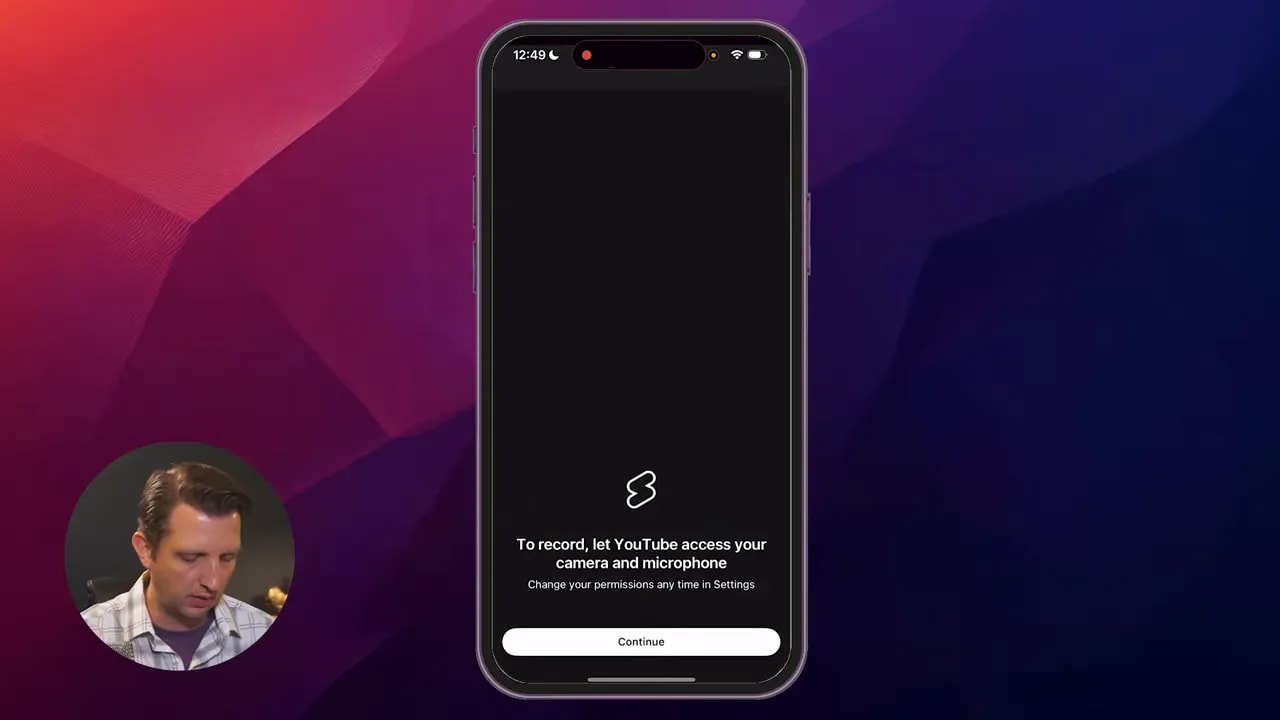
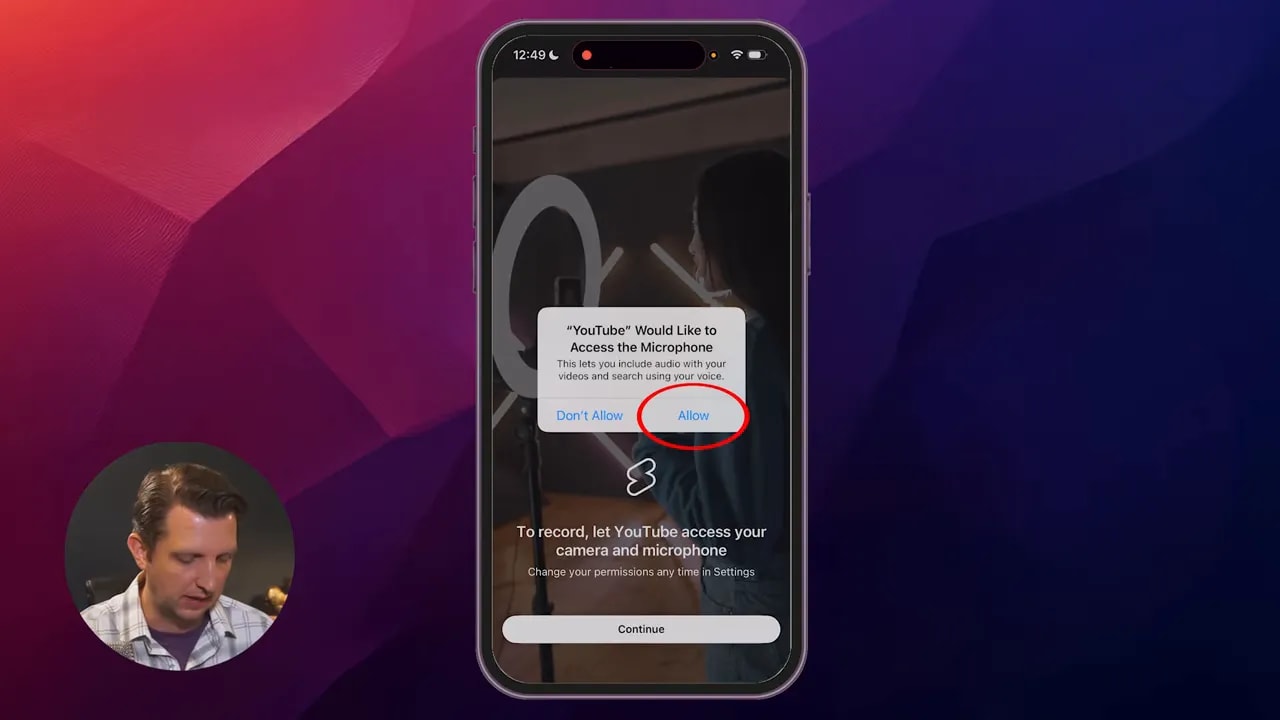
If it’s your first time using the create tools, the app will ask for permissions to access your camera and microphone. Tap Allow so you can record directly inside the app. Granting access to your photos is required if you want to upload videos already saved on your phone.
-
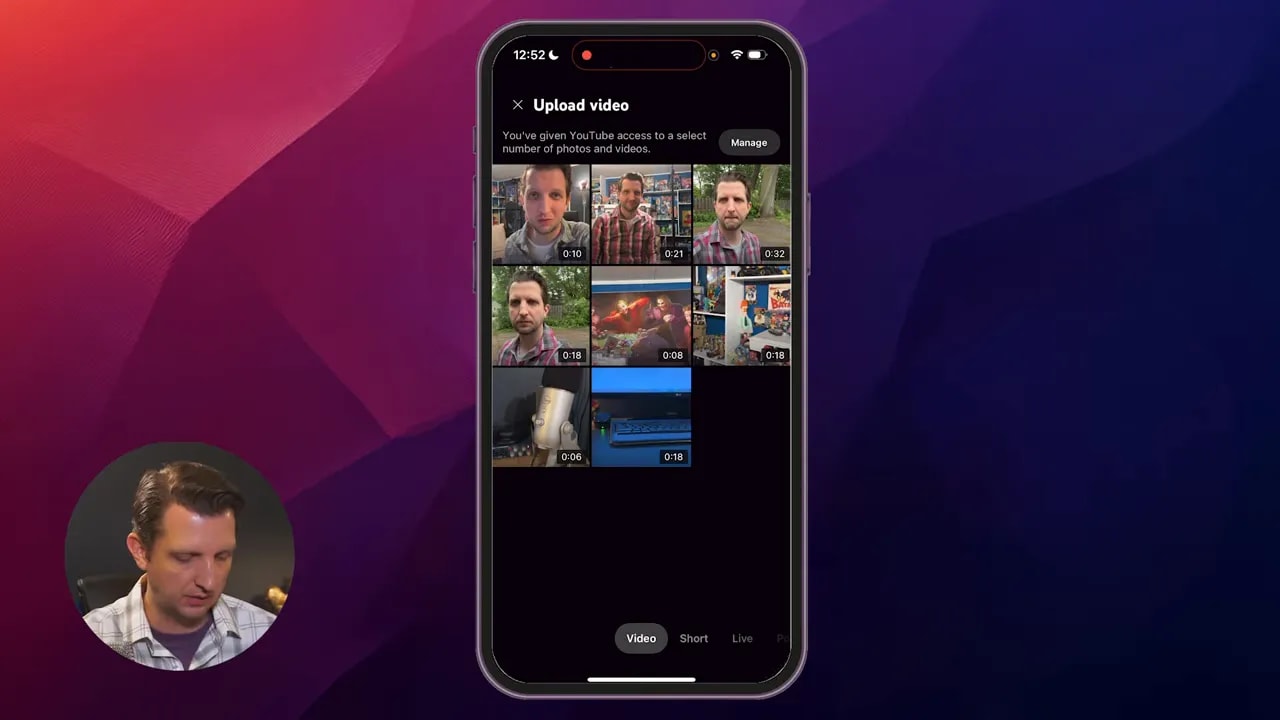
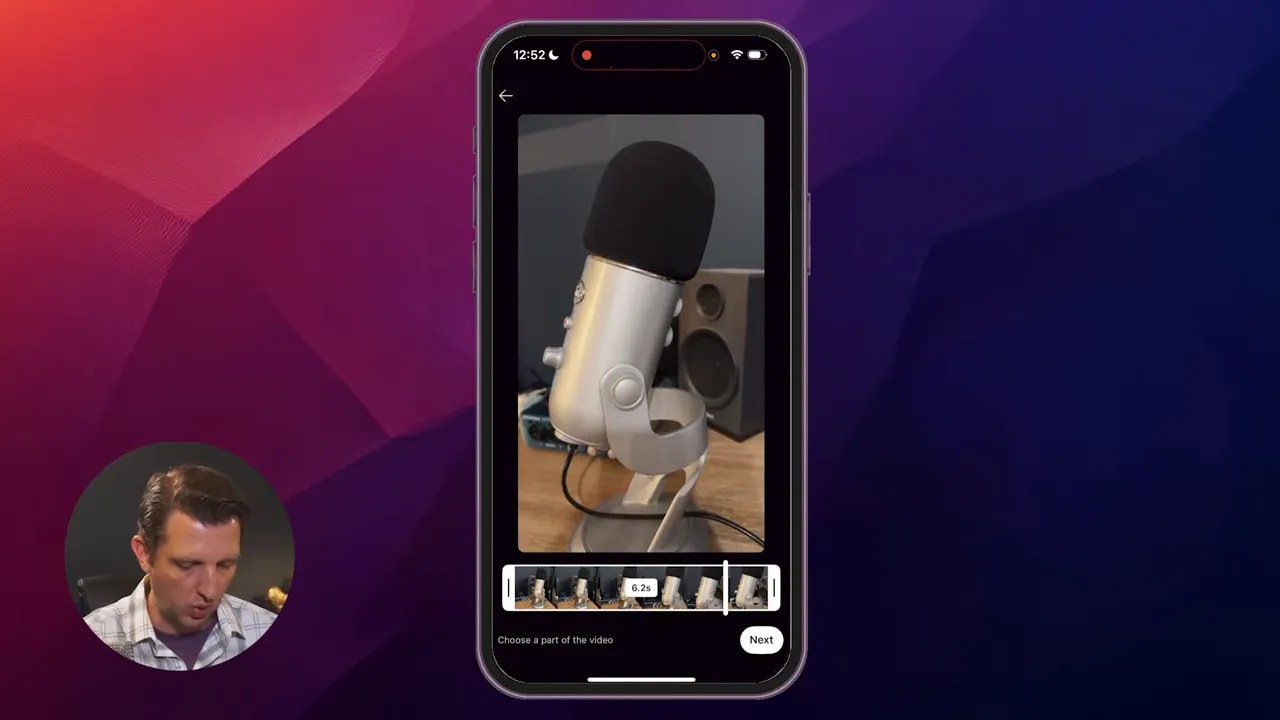
To use a clip already saved on your phone, tap Add (usually shown in the bottom-left) to open your camera roll. Select the video you want to upload. You’ll see a quick preview and you can trim or select a segment if you only want to upload part of the clip.
-
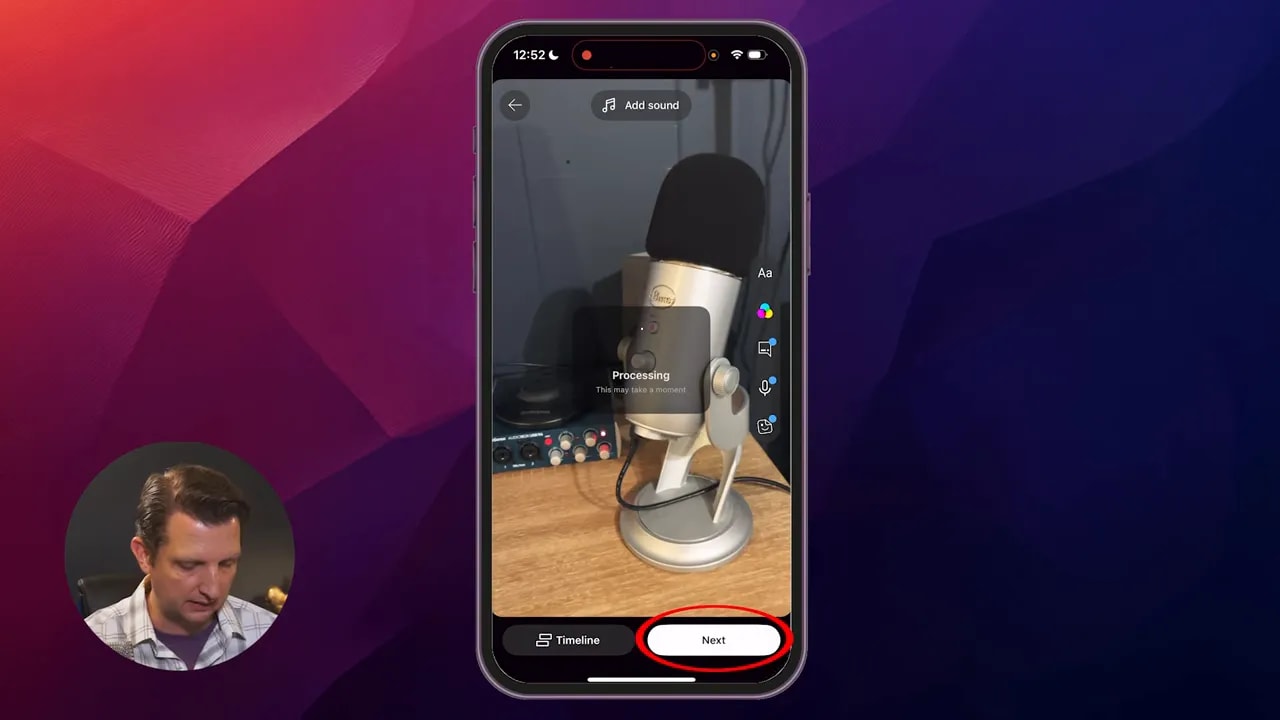
After selecting the clip, YouTube will process it briefly. That processing step prepares the file for the editing/options screen.
-
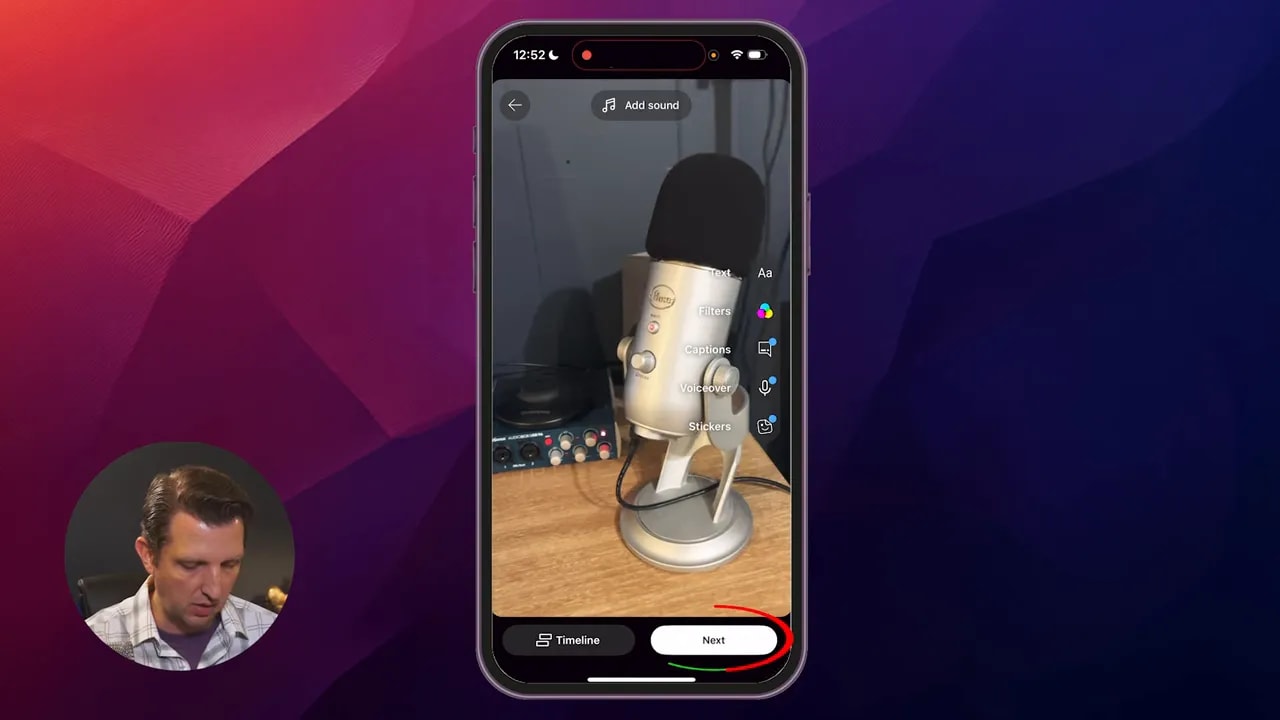
Edit, add text, or apply filters if desired. This is a quick way to polish or add context before publishing. If the clip is ready, tap Next to open the publishing options.
-
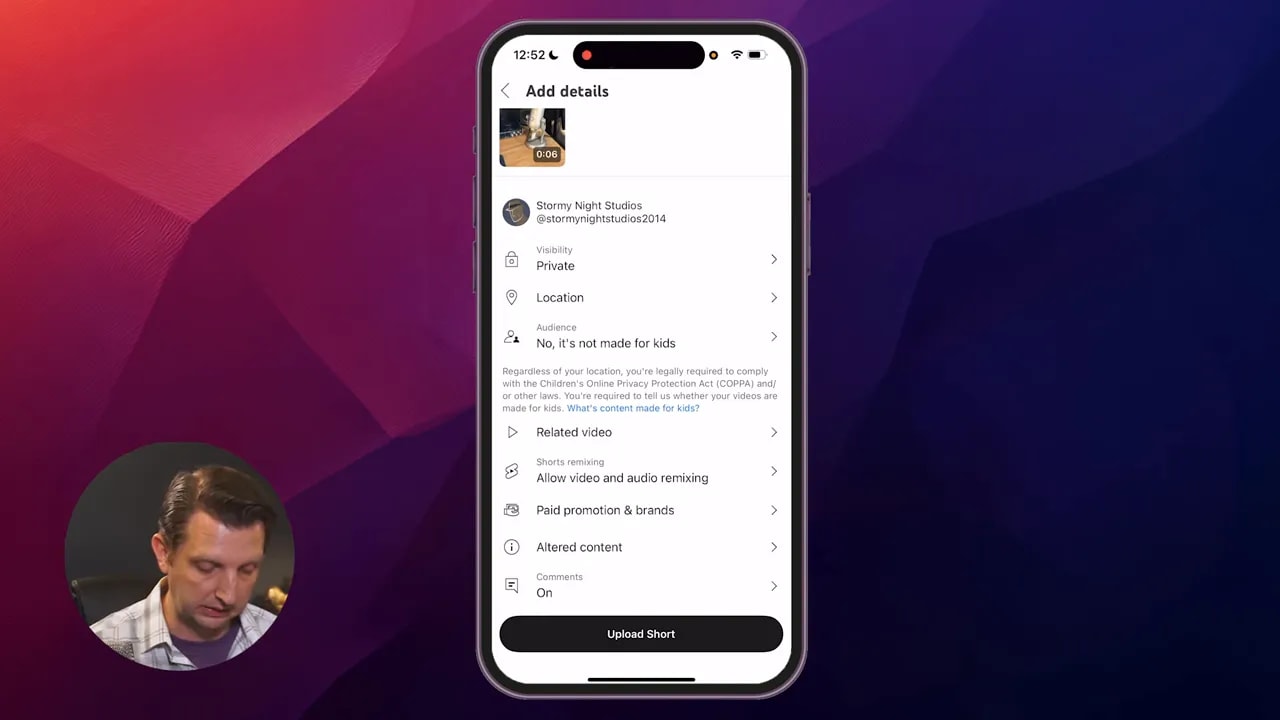
Fill in the essential details:
- Title — Make it clear and searchable. Use keywords that describe the content.
- Related video — Link to another video on your channel to increase watch time.
- Audience — Set whether the video is made for kids or not, and choose privacy settings like public, unlisted, or private.
-
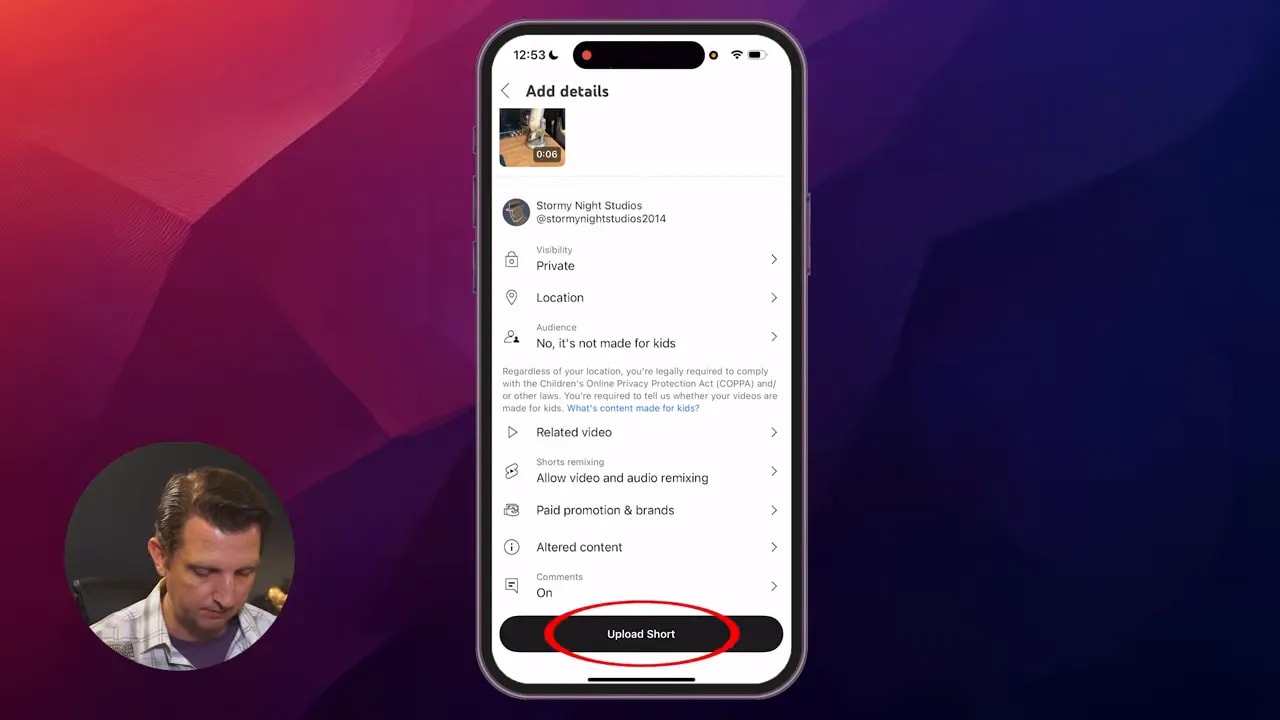
Tap Upload (or Upload Short if you are posting a Short). The app will show upload progress and then publish the video when finished.
Shorts vs Regular uploads — what to choose
Shorts are vertical, quick videos often under 60 seconds and are an effective way to reach new viewers. Uploading a Short from your camera roll or recording it inside the app follows the same steps above but select the Short option if prompted.
For longer videos that require a custom thumbnail, chapters, or advanced metadata, consider uploading as a regular video. The mobile app supports most basic publishing features, but some advanced edits are easier to do on desktop after upload.
Practical tips to make uploads smoother
- Use Wi-Fi for large files — saves cellular data and generally speeds up uploads.
- Name your file before uploading — a descriptive title helps search algorithms and keeps your uploads organized.
- Trim unnecessary footage within the app if you only need a small portion of a longer recording.
- Check permissions in iPhone Settings > Privacy if you can’t access camera or photos. Re-enable YouTube access if it was denied.
- Set the correct audience to comply with platform rules and avoid unnecessary restrictions.
- Preview after upload — tap the published video to confirm it displays and functions as expected.
Troubleshooting common issues
Permission prompts missing
If the app never asks for camera or photo access, open iPhone Settings, scroll to YouTube, and grant Camera and Photos access manually.
Upload failing or stuck
A slow or dropped connection is the usual culprit. Try reconnecting to Wi-Fi, restart the app, or toggle airplane mode to reset the phone’s network. For stubborn cases, restart the iPhone.
Video looks low quality after upload
YouTube may show a lower resolution during initial processing. Allow time for the platform to finish all processing stages. If the file itself is low quality, export a higher-bitrate file from your editor before uploading.
Quick checklist before tapping Upload
- Title is clear and contains relevant keywords
- Audience and privacy settings are correct
- Any desired trims, text, or filters are applied
- Related video links are set if you want to promote other content
- You’re on a stable connection
Uploading straight from your iPhone is designed to be fast, convenient, and mobile-first. With a few permission checks and a short set of steps, you can get content live in minutes. Practice a couple of times to make the workflow second nature — then focus on creating the content people want to see.
Ready to upload your next clip? Follow the steps above and you’ll have it on the channel in no time.
More tips and resources
Here are a few extra tips to help your uploads look and perform their best when uploading from an iPhone.
- Recommended export settings: Use MP4 (H.264), 1080p (or 4K if available), 30–60 fps. Higher bitrates improve quality—export from your editor with a higher bitrate if possible.
- Custom thumbnails: Create a 1280×720 thumbnail on your phone and use the YouTube Studio app to upload it. If the mobile app restricts thumbnail uploads, add the thumbnail later from desktop.
- Use YouTube Studio: Install the YouTube Studio app to edit metadata, schedule uploads, add end screens, and view analytics after publishing.
- Captions and subtitles: Let YouTube generate captions automatically, then review and edit them in YouTube Studio for accuracy. You can also upload an SRT file from desktop or the Studio app.
- Upload stability: Plug your phone into power and connect to reliable Wi‑Fi for large files. Avoid force-closing the app during upload and consider enabling Background App Refresh so uploads can continue if you switch apps.
- Orientation and framing: For Shorts record vertically (9:16); for regular videos use horizontal (16:9) where appropriate. Preview before publishing to confirm cropping and orientation.
Append this section to the end of your post to give readers a quick reference for improving upload quality and post-publishing management.