How to use Mailchimp
To use Mailchimp, sign up for a free account at mailchimp.com with a business email address, verify it and add your business address. Build a signup landing page under Forms to collect contacts, then open Campaigns, design an email from a layout, send yourself a test, add a subject line and click Send.
Quick steps
- Go to mailchimp.com, open Pricing and sign up for the free plan with a business email address.
- Verify your email, then enter your business details and a business address.
- In the sidebar, open Forms, then Other forms, and create a signup landing page.
- Customize the page, choose which fields to collect, publish it and share the link.
- Open Campaigns, click Create, choose Design Email and pick a layout.
- Add your content, preview it on desktop and mobile, and send yourself a test.
- Add your contacts and a subject line, clear the content warnings and click Send.
Email Marketing Growth Playbook
A free playbook on list growth and engagement, based on data from more than 600 email marketers.
Mailchimp does two jobs for a beginner: it collects email subscribers, and it sends them your newsletter. This guide starts from nothing, with no list and no website, and follows the video’s example of a small studio that opens a free account, builds a signup landing page and sends a first welcome email.
The plan names, prices and screens here are the ones shown at the time of the video, May 2026.
Look at the plans and pick the free account
- Go to mailchimp.com and click Pricing at the top.
- Scroll down to the list of plans.
At the time of the video, May 2026, the pricing page showed four plans with the contacts drop-down set to 0-500:
- Free at $0 a month, with a limit of 250 contacts
- Essentials, free for 14 days, then starting at $13 a month
- Standard, free for 14 days, then starting at $20 a month
- Premium at $297.50 a month for 12 months, then starting at $350 a month
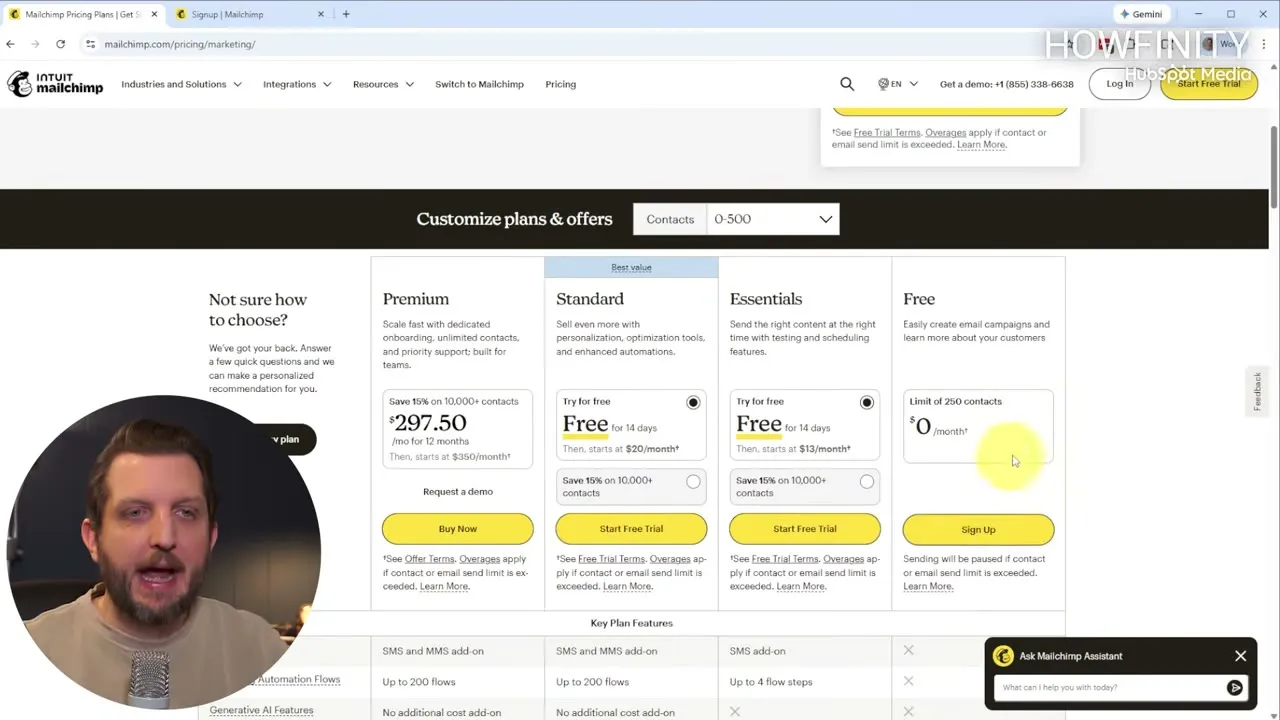
The free plan limits the number of contacts you can have and the number of emails you can send. That may be enough to get started, and it is what the rest of this guide uses. Some of the paid plans usually have a trial you can try instead.
Sign up and set up your account
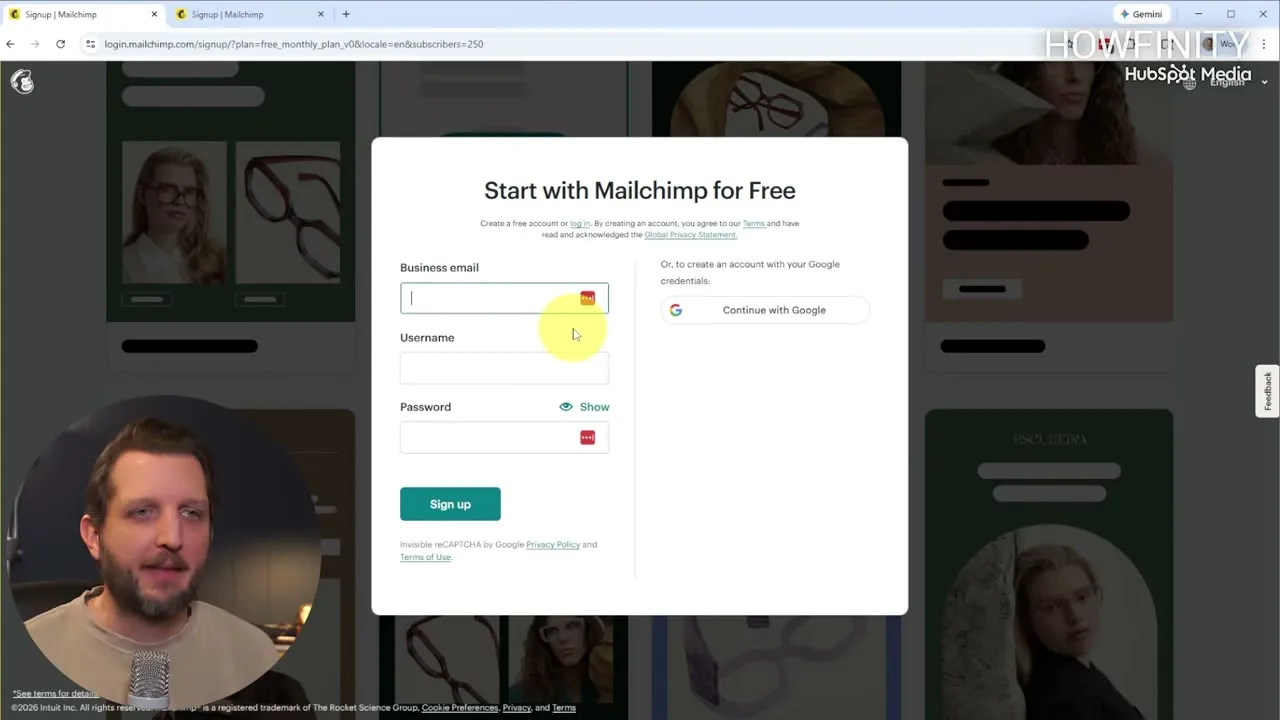
- Under the Free plan, click Sign Up.
- Enter your Business email. This also becomes your username. Use an address at your business’s own domain if at all possible. The video says a personal address, such as one ending in @gmail, is more likely to land in spam folders when you send your emails.
- Add a password and click Sign up.
- Mailchimp sends you an email to verify that you own the address. Open it and click Activate Account.
- Fill in a little more information about you and your business and click Next.
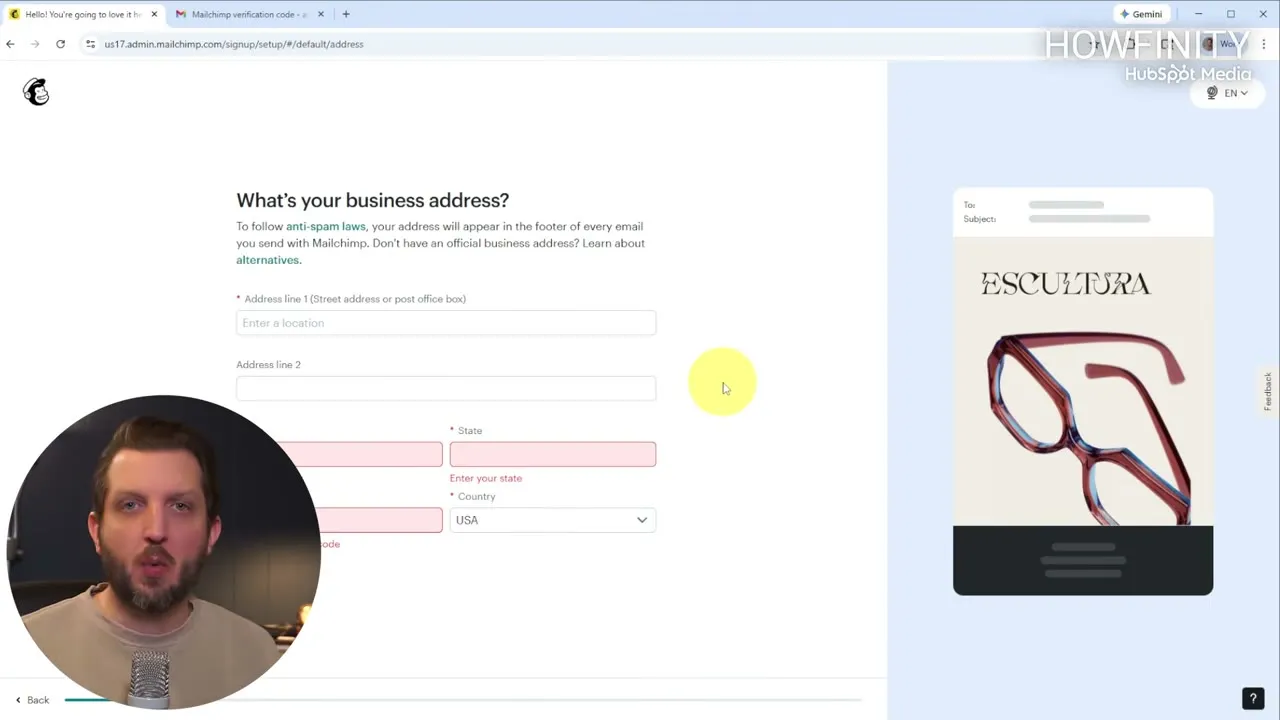
- Enter your business address and click Next. This is required for anti-spam laws, and it appears at the bottom of all of your emails, so use a legitimate address. If you run your business out of your home, you can use a PO box or another address like that.
- Answer the questions Mailchimp uses to tailor your account: what best describes your organization, which channels matter most to your business, and which tools you use now.
- On Import your brand, enter your website so Mailchimp can pull in your logo, images and colors. Click Next.
- Confirm your industry, choose how many email contacts you have and click Next.
Mailchimp prepares the account and lands you on the dashboard.
At this point the video mentions a free email marketing playbook from HubSpot, based on data from over 600 email marketers, with a link in the video’s description.
Create a signup landing page to collect contacts
The next step is collecting email subscribers, which Mailchimp calls contacts. If you already have a list, you can import it. If you have a website, you can add a pop-up form to it. This guide assumes you have neither, so you will create a landing page you can send people to.
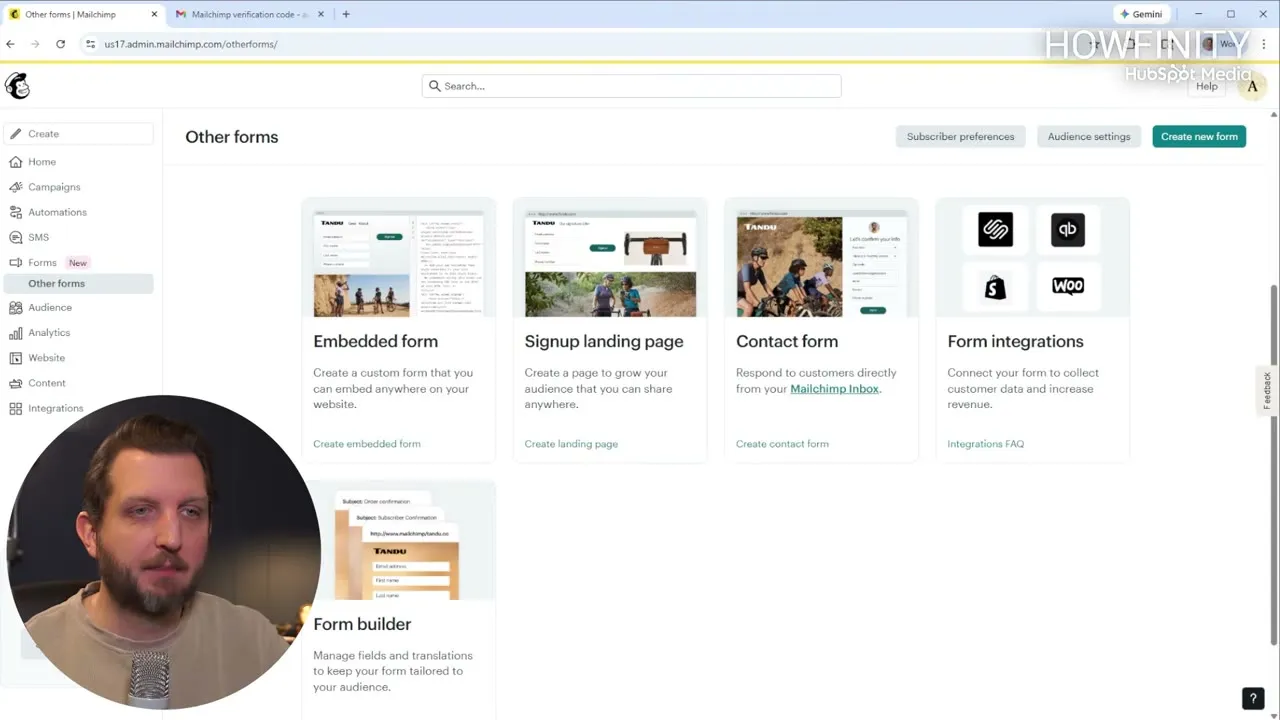
- In the sidebar, click Forms, then Other forms just below it.
- Find Signup landing page and click Create landing page.
- Type a Landing page name. This is only for you, so you can keep track of which page is which.
- Choose your Audience. In Mailchimp, an audience is your email list. The free account only lets you create one audience. Higher plans let you have more than one, so you can have different campaigns going at once.
- Click Continue to builder.
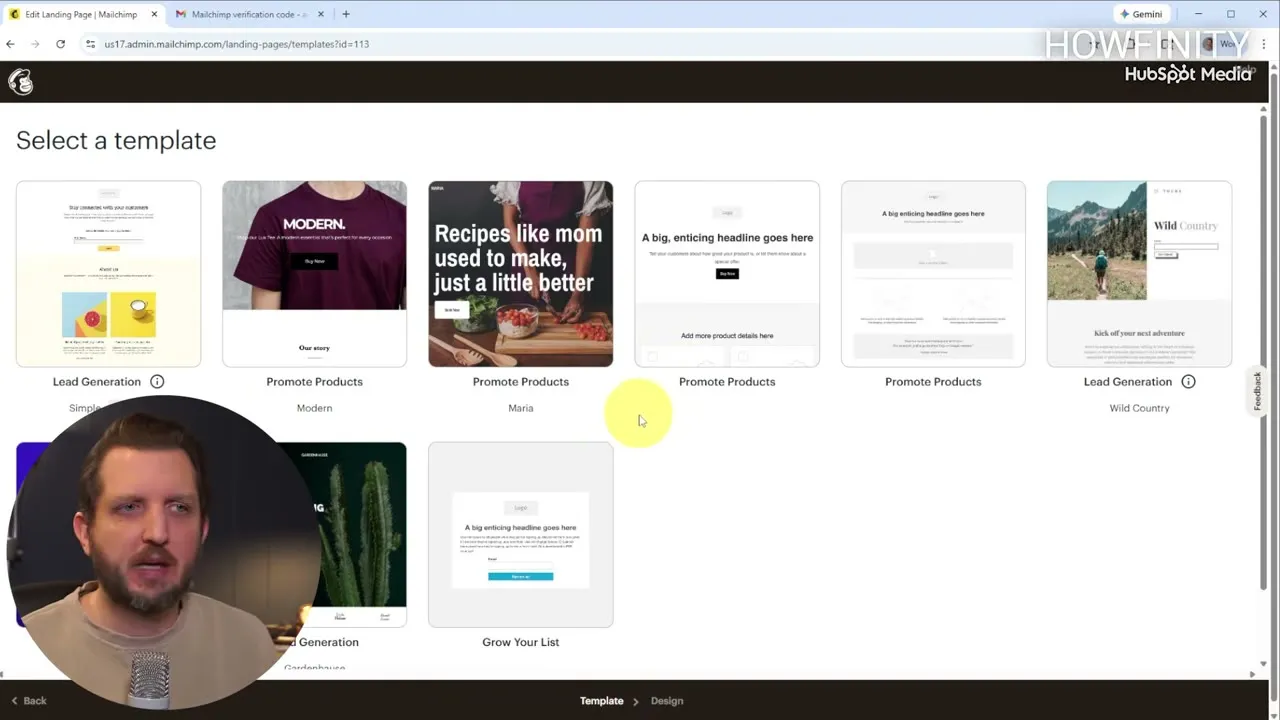
- Pick a template. There are only a few, because Mailchimp is focusing on its pop-up builder right now, but one of them should meet your needs when you are starting out. The video uses a Lead Generation template.
- The template’s images are provided by Shutterstock. Click I Accept on the notice.
Customize the landing page
Hover over any part of the page in the builder and that area is highlighted. Click the pencil icon on a block to open its settings in the sidebar. Remember to save each block when you are done with it.
- Background. Hover over the background and use the controls that appear at the bottom left. Choose Color to pick any color, or Image to add a photo, which is a nice way to draw the viewer’s attention. Pick an image from your files, or upload one, and click Insert. You can also change how the image fits, such as tiling it or filling the screen.
- Logo. Click the pencil icon on the header image. Drag Image display size to make the logo bigger. On the Style tab you can add a border and round the corners, which helps if your logo is hard to see against the background.
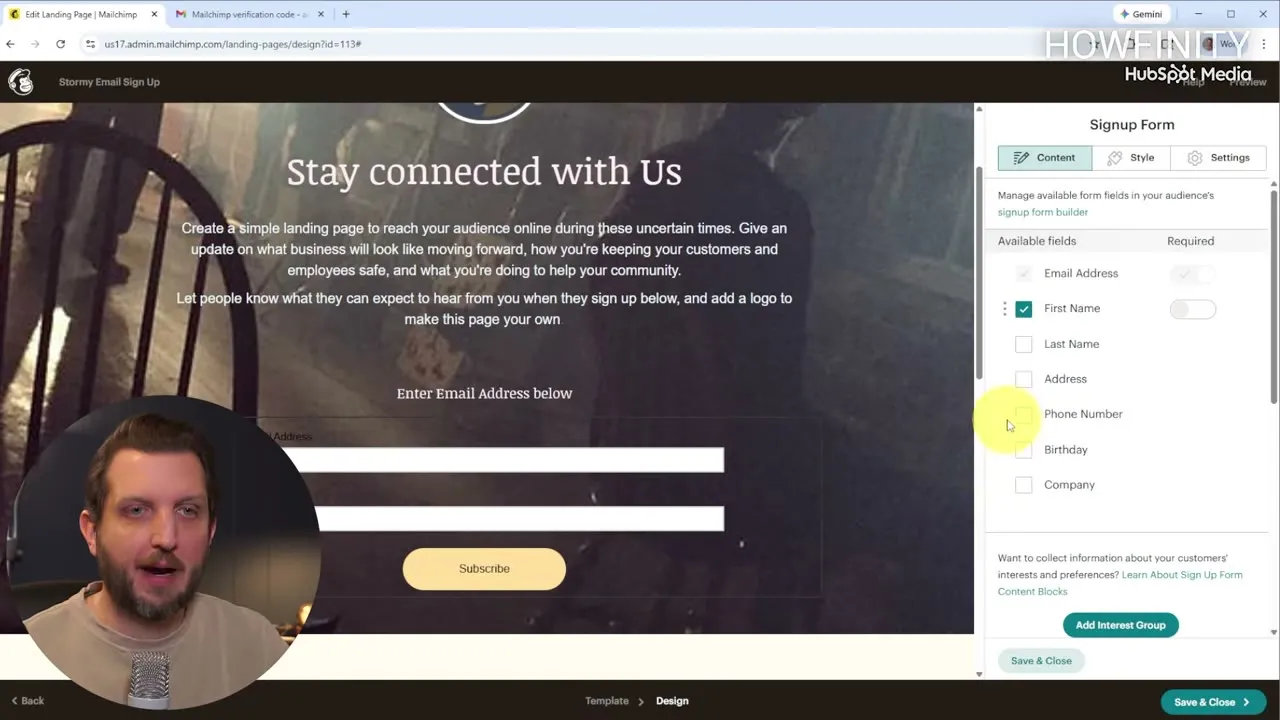
- Headline. Click the headline and type your own. The video changes “Stay connected with your customers” to “Stay connected with Us”. If it is hard to read over your background, highlight the text and change its color and size.
- Description. The text box under the headline is where you say what people will get from your mailing list and why they should subscribe.
- Signup form. By default the form only asks for an email address. The video recommends asking for at least a first name too, so you can personalize your emails. You can also tick fields such as phone number or birthday, but limit how much you ask for.
- Button. Change the Button text if you want it to say something other than Subscribe.
Everything up to here is “above the fold”, what people see when they first land on the page. Scroll down and you can add more below it: links, articles, pictures, more about who you are and your social media sites.
When the page looks the way you want, click Save & Close at the bottom right.
Finish the page settings and publish
Like any web page, the landing page needs a little more information behind it. The next screen lists it:
- Page title and site icon. By default it uses the name you gave the page.
- Social share preview. The title, description and image that show when the link is shared on social media sites.
- URL. On the free plan Mailchimp generates the URL for you. On the paid plans you can decide what it is.
- Audience and tags. The audience new contacts are added to. The free plan has only the one audience.
- Content. What people see after they subscribe. The video says a higher plan lets you customize this confirmation page.
Then check it and put it live:
- Click Preview to see the page on desktop, then click Mobile to see it on a phone.
- Close the preview. The page is still a draft.
- Click Publish.
The page is now live. Share its link on your social media sites, in your email or wherever you like, so people can sign up for your mailing list.
Design your first email
- In the sidebar, click Campaigns, then click Create at the top.
- Under Regular email, choose Design Email.
- Mailchimp offers to import an email design you already have. To start from nothing, click Skip for now.
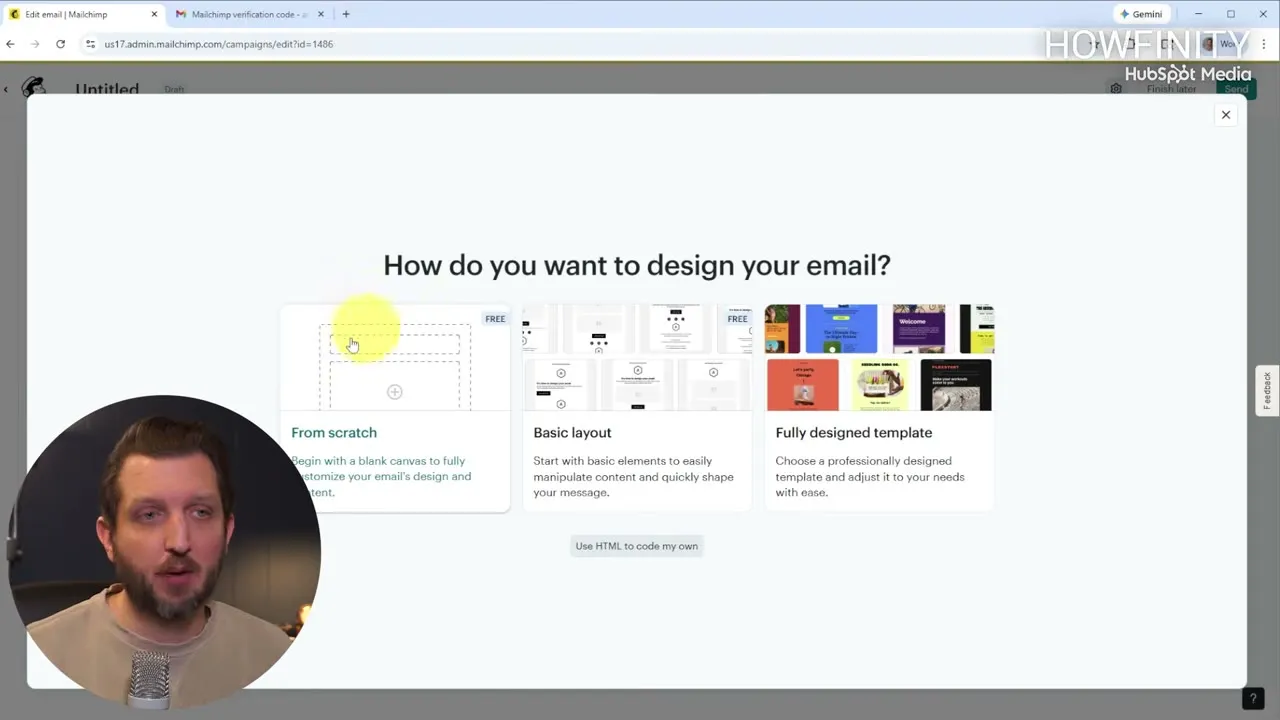
- Choose how to design the email: From scratch, Basic layout or Fully designed template. This is your preference. The video picks Basic layout, because full-color newsletters seem less common now and can feel a little salesy.
- Pick a layout and click Apply. The video uses Minimal.
That opens the email builder. Work down the email and replace each placeholder:
- Logo. Click it to add your own logo or brand kit, and add a link so a click takes people to your website.
- Heading and text. Type the title of the email, such as “Welcome to our Newsletter”, then write the body underneath.
- Image. Click the image block and add a photo.
- Button. This is your call to action: a new product, a link to a podcast, or a free tool as a thank you. Add the text for the button and where the link goes.
- Social links. Click the bar of icons near the bottom and add the links to your social media accounts.
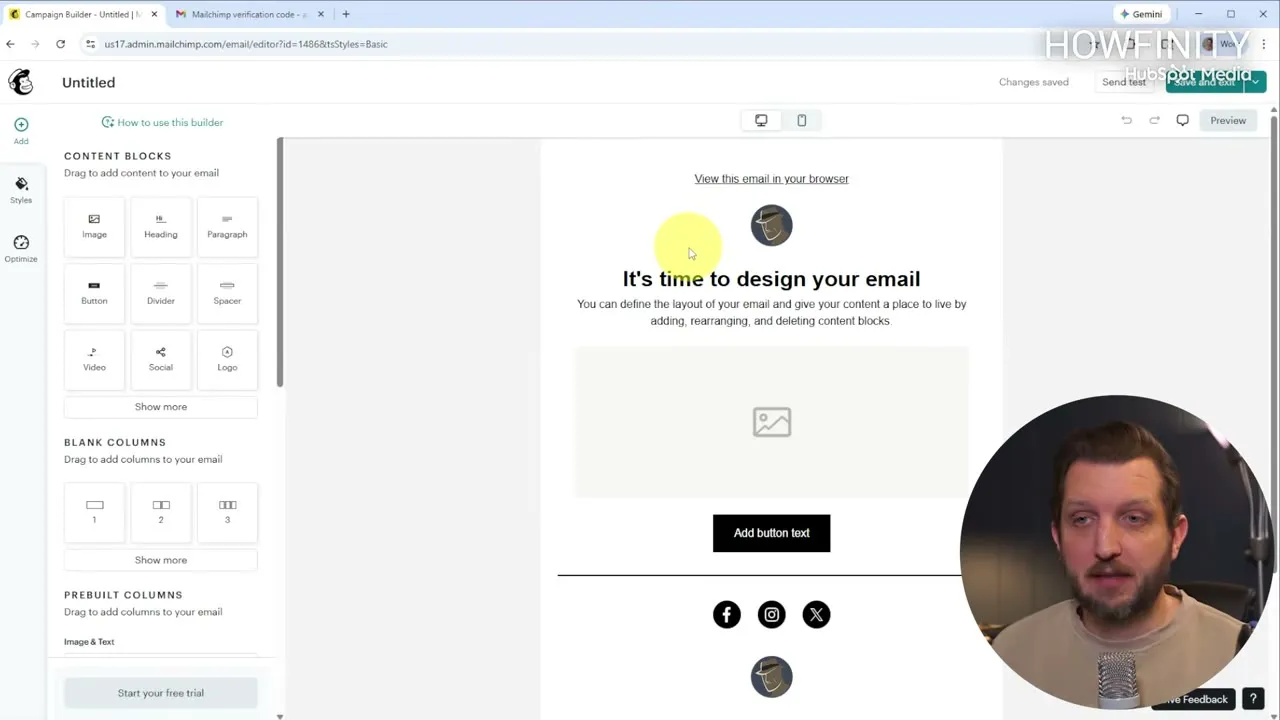
On the free plan, the bottom of the email says it is powered by Mailchimp. You can remove that once you are on one of the paid tiers.
To add more, click off the email so the list of blocks shows on the left. It has blocks such as Image, Heading, Paragraph and Button, plus blank columns. Drag one into the email and fill it in.
Preview the email and send yourself a test
- Click Preview. It opens on Desktop.
- Click Mobile. A lot of people read email on their phone, so make sure the formatting works there too.
- Click Inbox to see how the email will look in a Gmail or Outlook mailbox, including the subject line. The video says this needs a paid account.
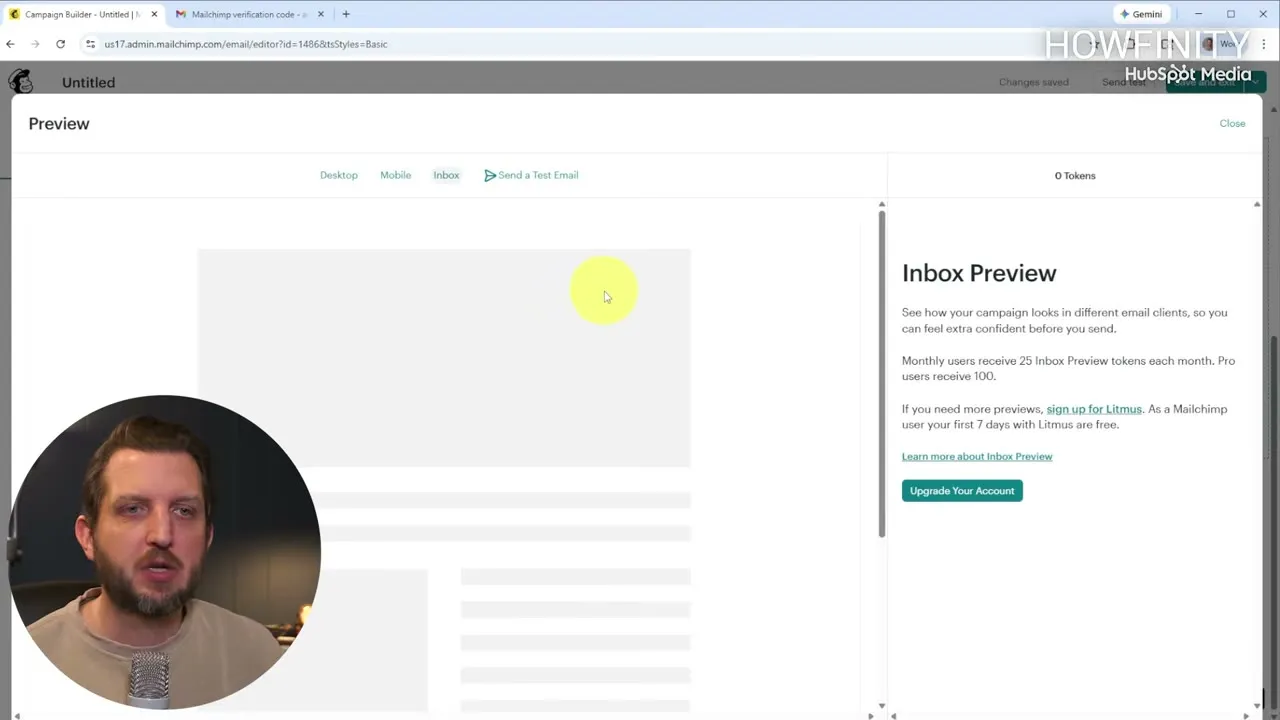
- Click Close.
- Click Send test, enter your own email address and click send. Look at the email when it arrives. This is how you catch a problem before your whole list sees it.
- If there are no issues, click Save and exit.
Add your contacts and a subject line, then send
The next page is a checklist for the email:
- To. Click it and choose who gets the email: import contacts, or use the list your signup page has been collecting.
- From. By default it sends from the email address you made the account with.
- Subject. Add the subject line people will see in their inbox.
- Content. Read the warnings here. In the video there were three: a note that upgrading removes the Mailchimp badge at the bottom, a note that a plain-text version of the email is included, and a warning that some blocks still had the default placeholder text. Replace any placeholder text before you send.
- Optional: create a social post, so followers who are not on your email list can see the email too, for example on Facebook.
- When everything is the way you want it, click Send.
Check how the email did
Come back to the Campaigns page about an hour after the email has gone out and open the analytics for it. You will see:
- the open rate
- the click-through rate
- the bounce rate, meaning addresses the email could not be delivered to
- the unsubscribe rate, meaning how many people clicked unsubscribe when they got it
Use those numbers when you write your next email. Once you have sent a few, it is easier to tell what is working and what you might need to change.
Common questions
Is Mailchimp free to use?
There is a free plan, and it is the one used in the video. It limits how many contacts you can have and how many emails you can send. At the time of the video, May 2026, the pricing page showed the Free plan at $0 a month with a limit of 250 contacts.
What is an audience in Mailchimp?
An audience is your email list, and Mailchimp calls the subscribers on it contacts. The free account only lets you create one audience. Higher plans let you have several, so you can run different campaigns at once.
Do I need a website to collect email subscribers with Mailchimp?
No. You can build a signup landing page inside Mailchimp and share its link on social media, in your email or anywhere else. If you do have a website, Mailchimp also has pop-up forms you can add to it.
Why does Mailchimp ask for a business address?
It is required for anti-spam laws, and the address appears at the bottom of every email you send. If you run your business from home, the video suggests using a PO box or another address like that.
Can I remove the Mailchimp badge from my emails?
Not on the free plan. Emails sent from a free account say they are powered by Mailchimp at the bottom. The video says you can remove the badge once you are on one of the paid tiers.
How do I know if my Mailchimp email worked?
Go back to the Campaigns page about an hour after the email goes out and look at its analytics. It shows the open rate, the click-through rate, the bounce rate and the unsubscribe rate.
Email Marketing Growth Playbook
A free playbook on list growth and engagement, based on data from more than 600 email marketers.
Email Marketing Growth Playbook
A free playbook on list growth and engagement, based on data from more than 600 email marketers.
Get the free playbook