

Have you ever uploaded the perfect YouTube video only to realize afterward that you need to blur out a face, a logo, or an object that shouldn’t be visible? Maybe there’s a sensitive piece of information or a person who didn’t consent to appear in your content. Instead of deleting your video and going through the hassle of reuploading it, there’s a much simpler way to fix this directly within YouTube’s own tools.
In this guide, I’ll walk you through YouTube’s built-in blur tool, which allows you to blur faces or custom objects in your videos even after they’ve been posted. This method is quick, effective, and doesn’t require any third-party software or video re-uploads. It’s perfect for creators who want to maintain the integrity of their content while protecting privacy or complying with legal requirements.
Accessing the YouTube Video Editor
The first step is to navigate to your YouTube Studio, where all your uploaded videos are managed. Here’s how you do it:
- Log in to your YouTube account and go to YouTube Studio.
- Click on the Content tab on the left sidebar to see a list of your uploaded videos.
- Find the video you want to edit and click on the pencil icon labeled Details.
- In the video details panel, look for the Editor option on the sidebar and click it.
This will open the YouTube video editor, which offers several editing options such as trimming, cutting, removing audio, and adding end screens. But for our purpose, we will focus on the blur tool.
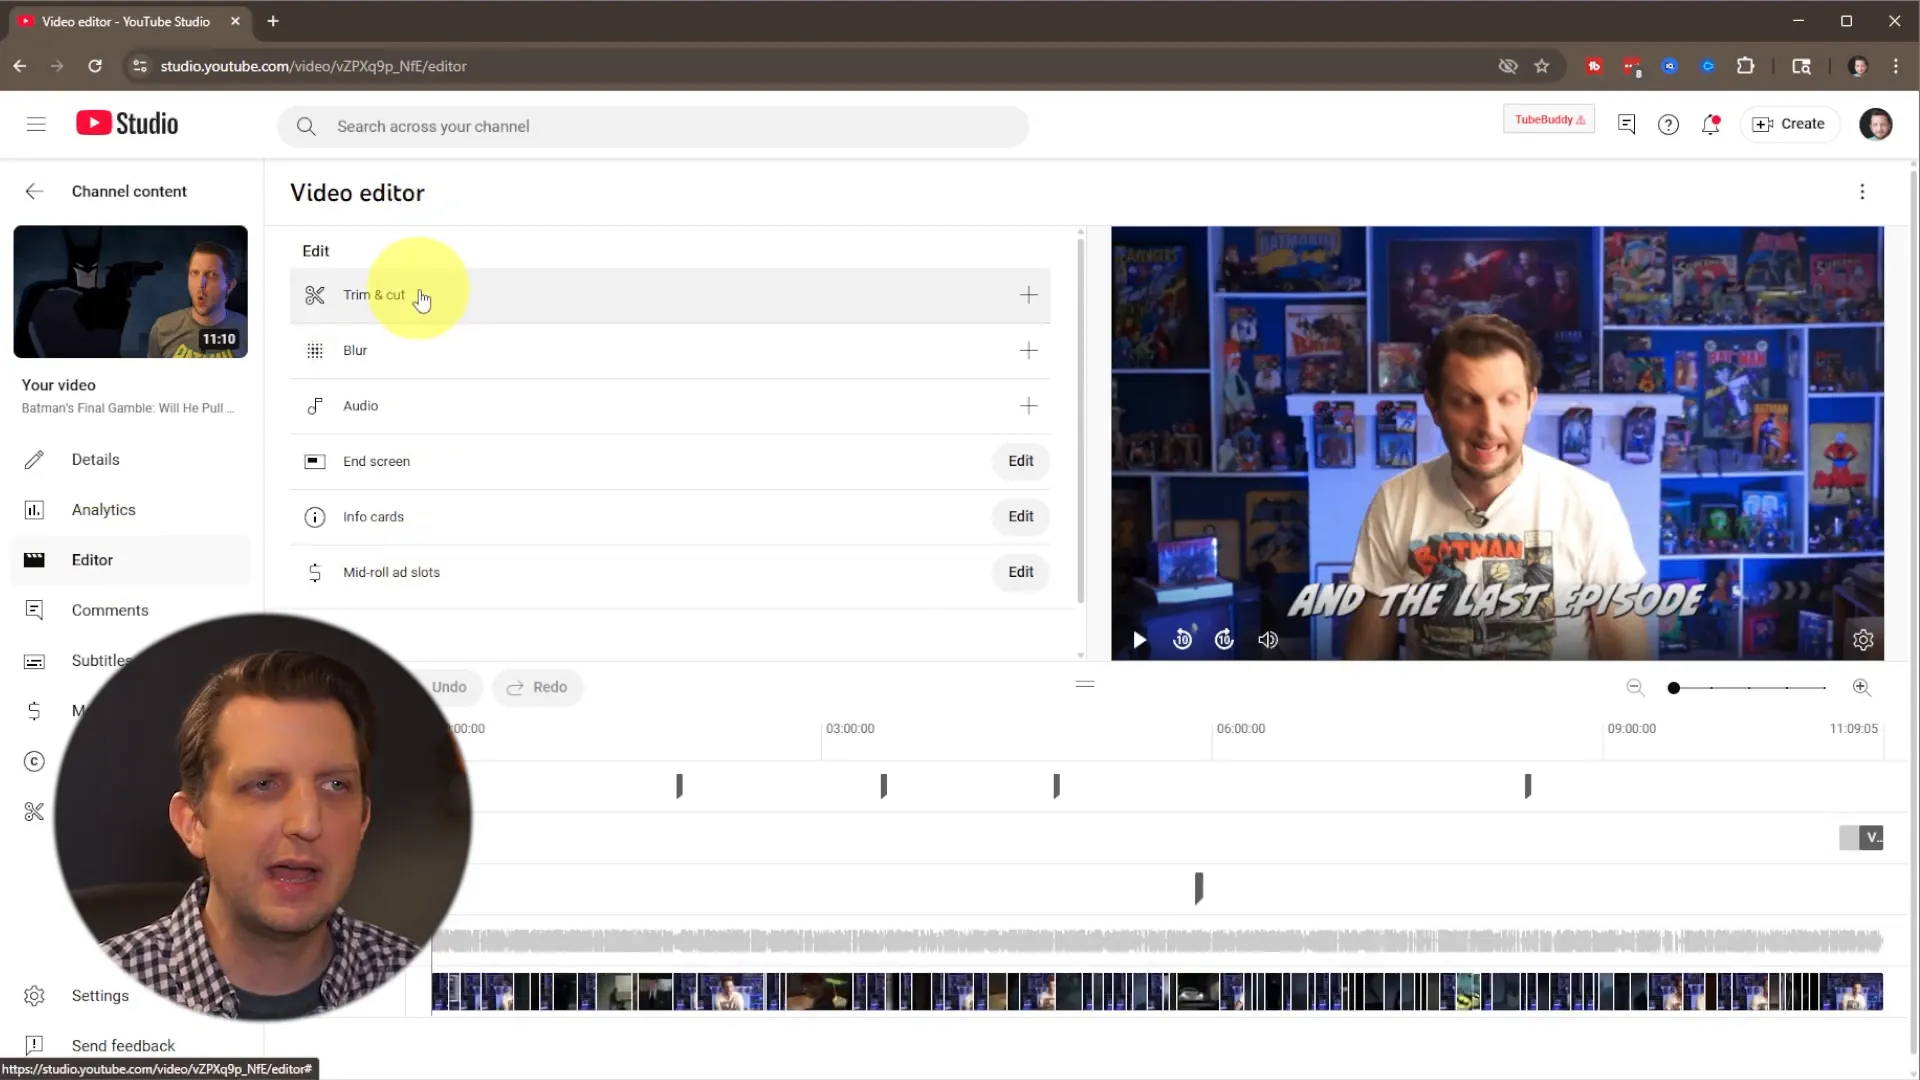
Using the Blur Tool: Face Blur vs. Custom Blur
Once you’re inside the editor, look for the blur tool. You’ll find a plus button (+) to add a blur effect. Clicking it reveals two main options:
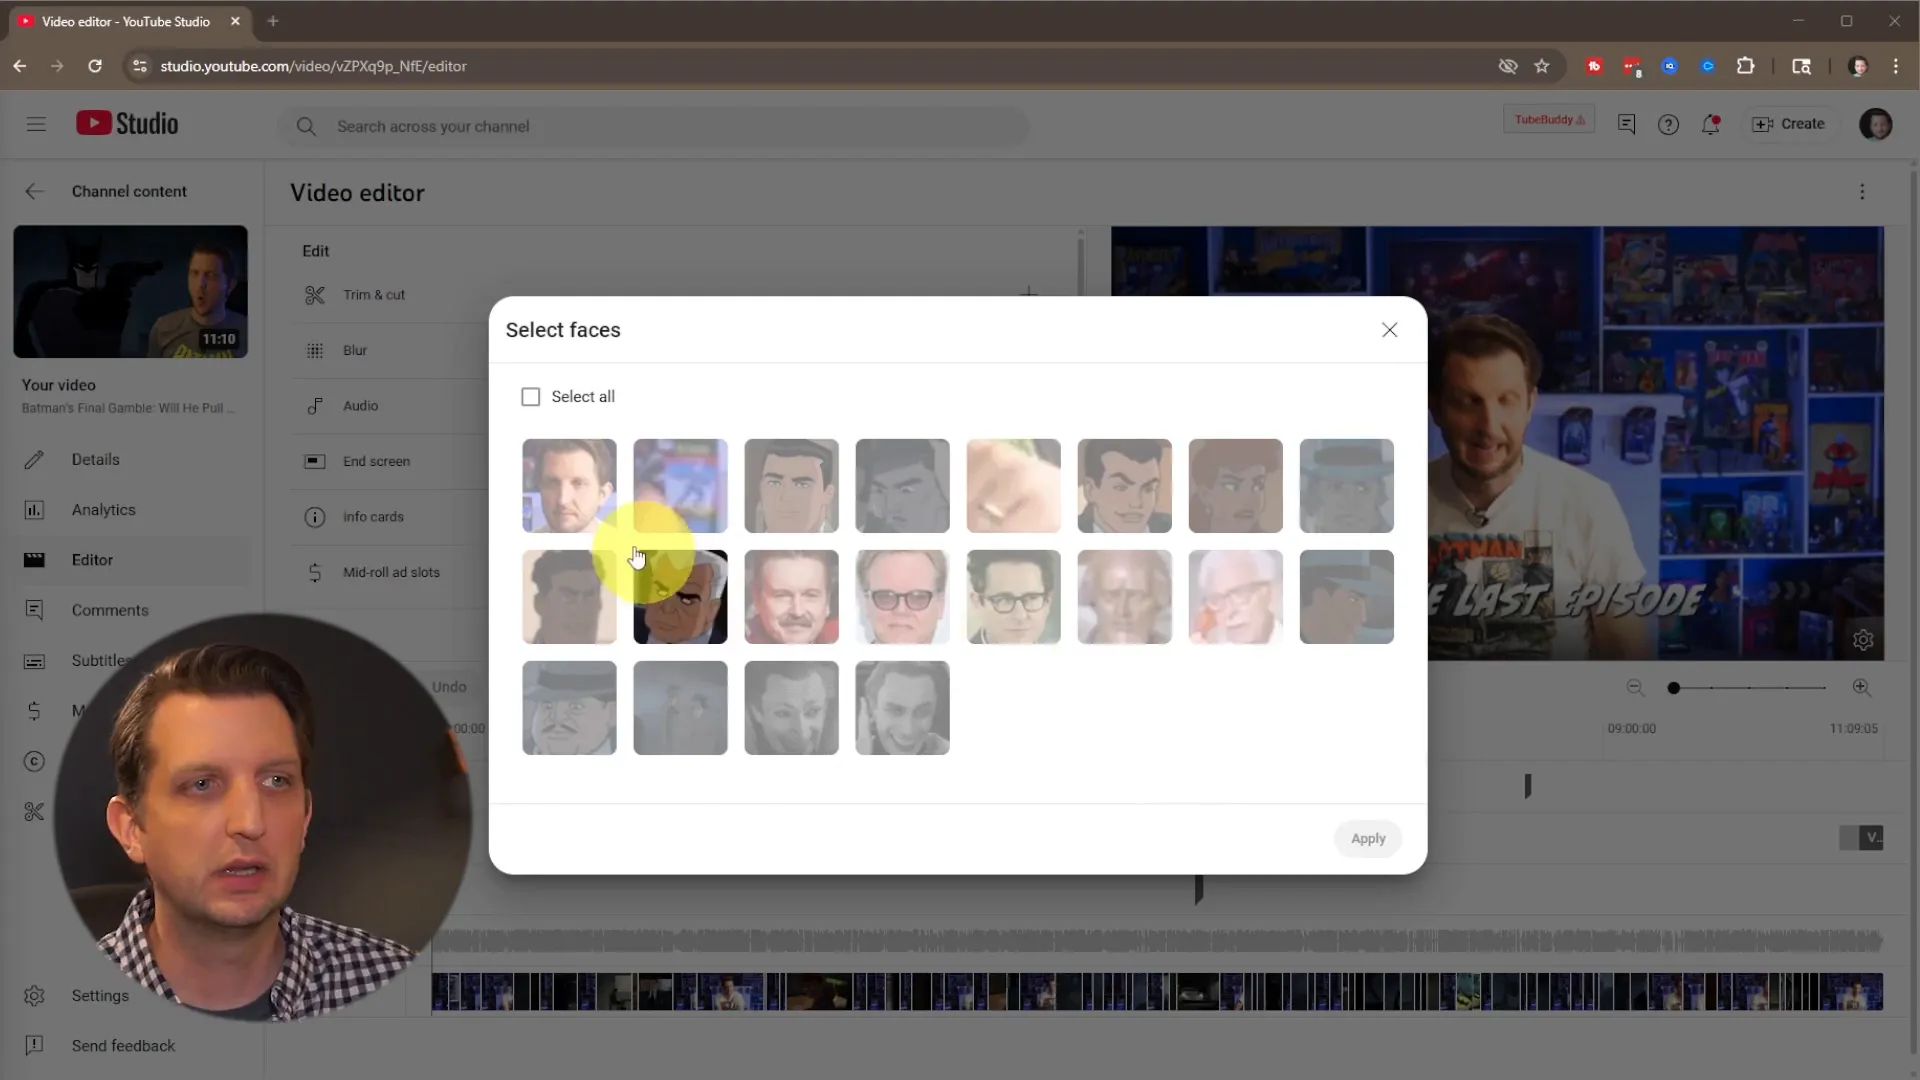
- Face Blur – Automatically detects faces in your video and allows you to blur any that you select.
- Custom Blur – Lets you select any object or area in the video to blur, such as logos, text, or other sensitive elements.
For most cases where privacy is a concern, face blur is the fastest and simplest option. YouTube’s advanced algorithms scan the video, detect faces, and present you with small thumbnails of each detected face. You can choose which faces to blur with just one click.
If your concern is not a face but rather an object like a license plate or a brand logo, the custom blur option lets you select the specific area to blur. You click on the object, and YouTube will track it throughout the video, applying the blur effect automatically as the object moves.
How the Face Blur Detection Works
When you select face blur, YouTube takes a moment to analyze the entire video to detect all faces present. This process usually only takes a few seconds, depending on the length of your video. After processing, you get a set of thumbnails representing each face detected in the footage.
You simply select the faces you want to hide, and YouTube applies the blur effect seamlessly. This makes it incredibly easy to protect identities without manually tracking faces frame-by-frame yourself.
Adjusting the Blur Effect
After applying the blur, you can preview how it looks directly in the editor. You’ll notice that the blur tracks the face or object as it moves within the frame, which is a huge time saver compared to manual editing.
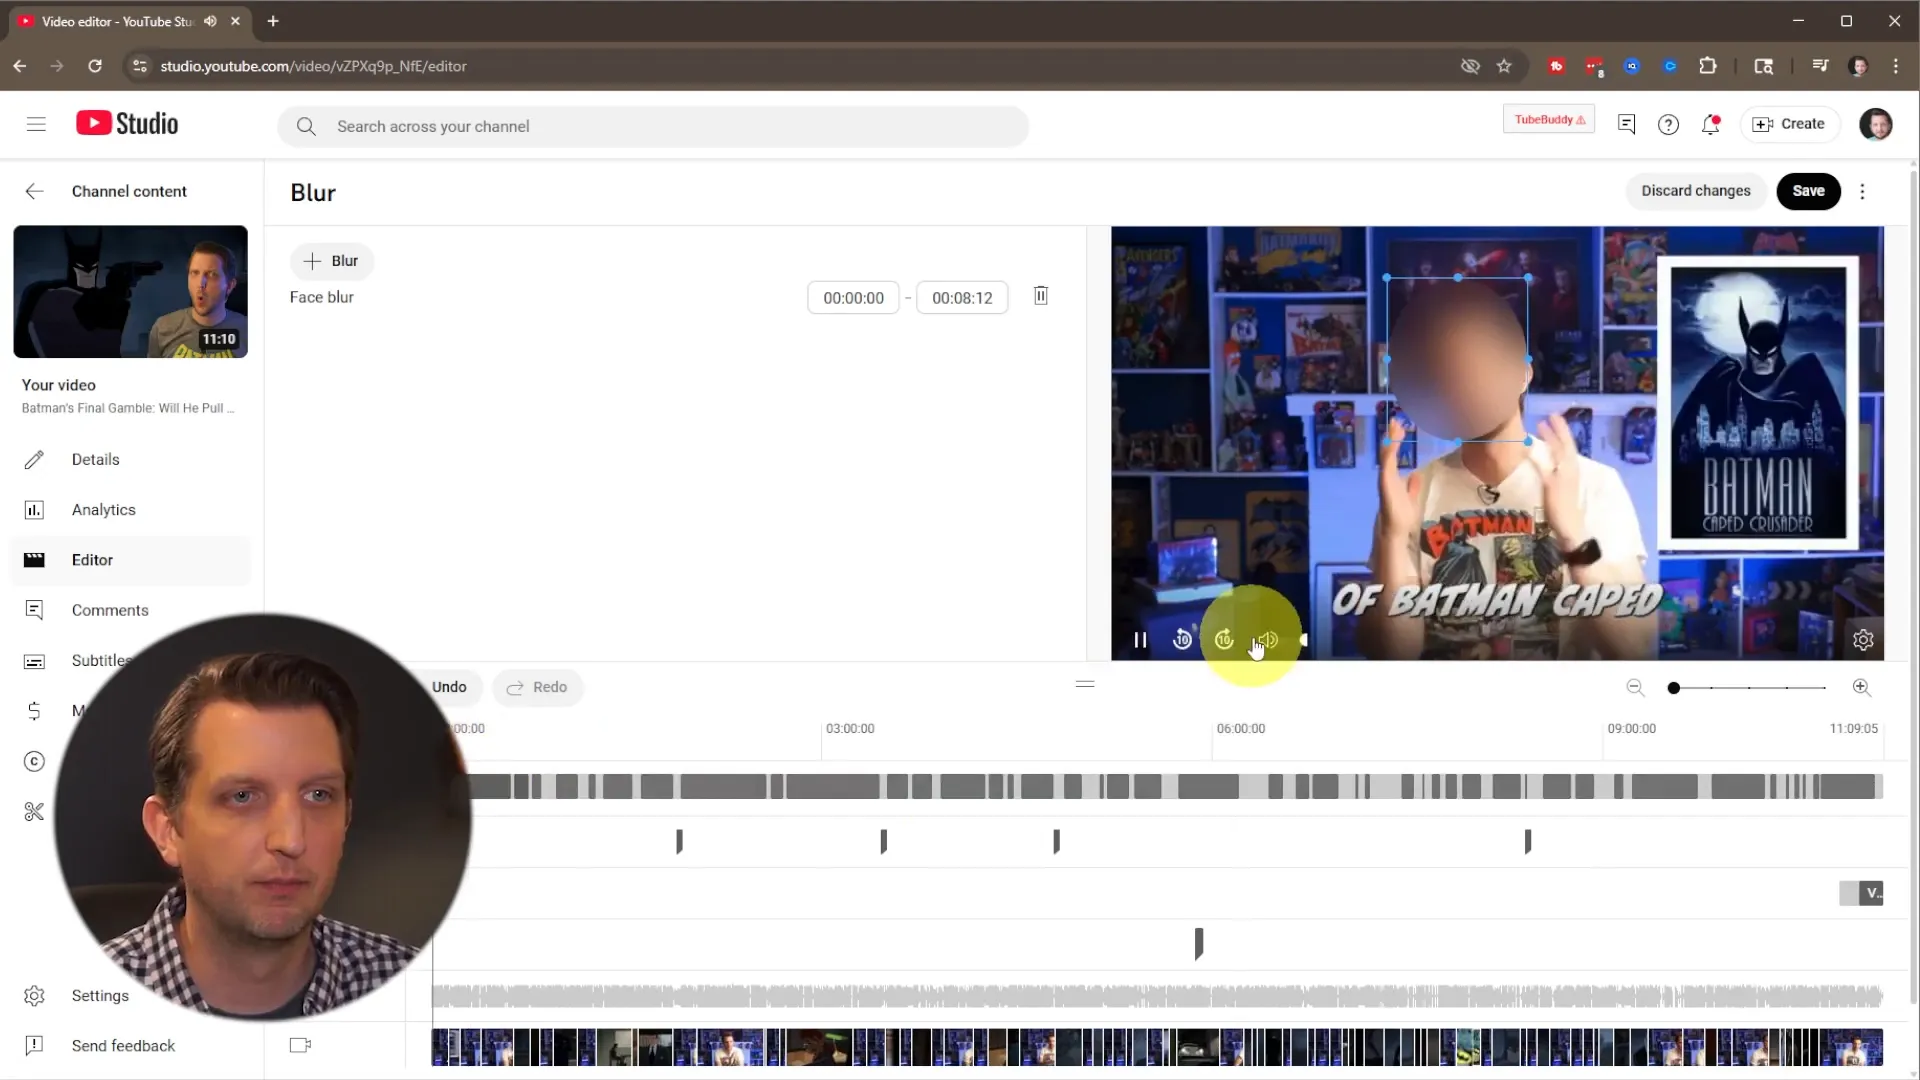
You also have some control over the blur’s appearance and behavior:
- Resize the blur area: Make the blur bigger or smaller to fit the face or object perfectly.
- Adjust the feather: Soften the edges of the blur for a more natural look.
- Add multiple blurs: If there are several faces or objects to hide, you can add multiple blur effects.
The editor shows a timeline with gray bars representing where the blur effects are applied throughout the video. This visual makes it easy to see exactly how long each blur lasts and where it appears.
Why This Tool is So Handy
This built-in blur tool saves you the hassle of re-editing your video in external software and re-uploading it, which can be time-consuming and risk losing your video’s views, comments, and SEO ranking. YouTube handles the heavy lifting by automatically tracking and blurring the selected faces or objects for you.
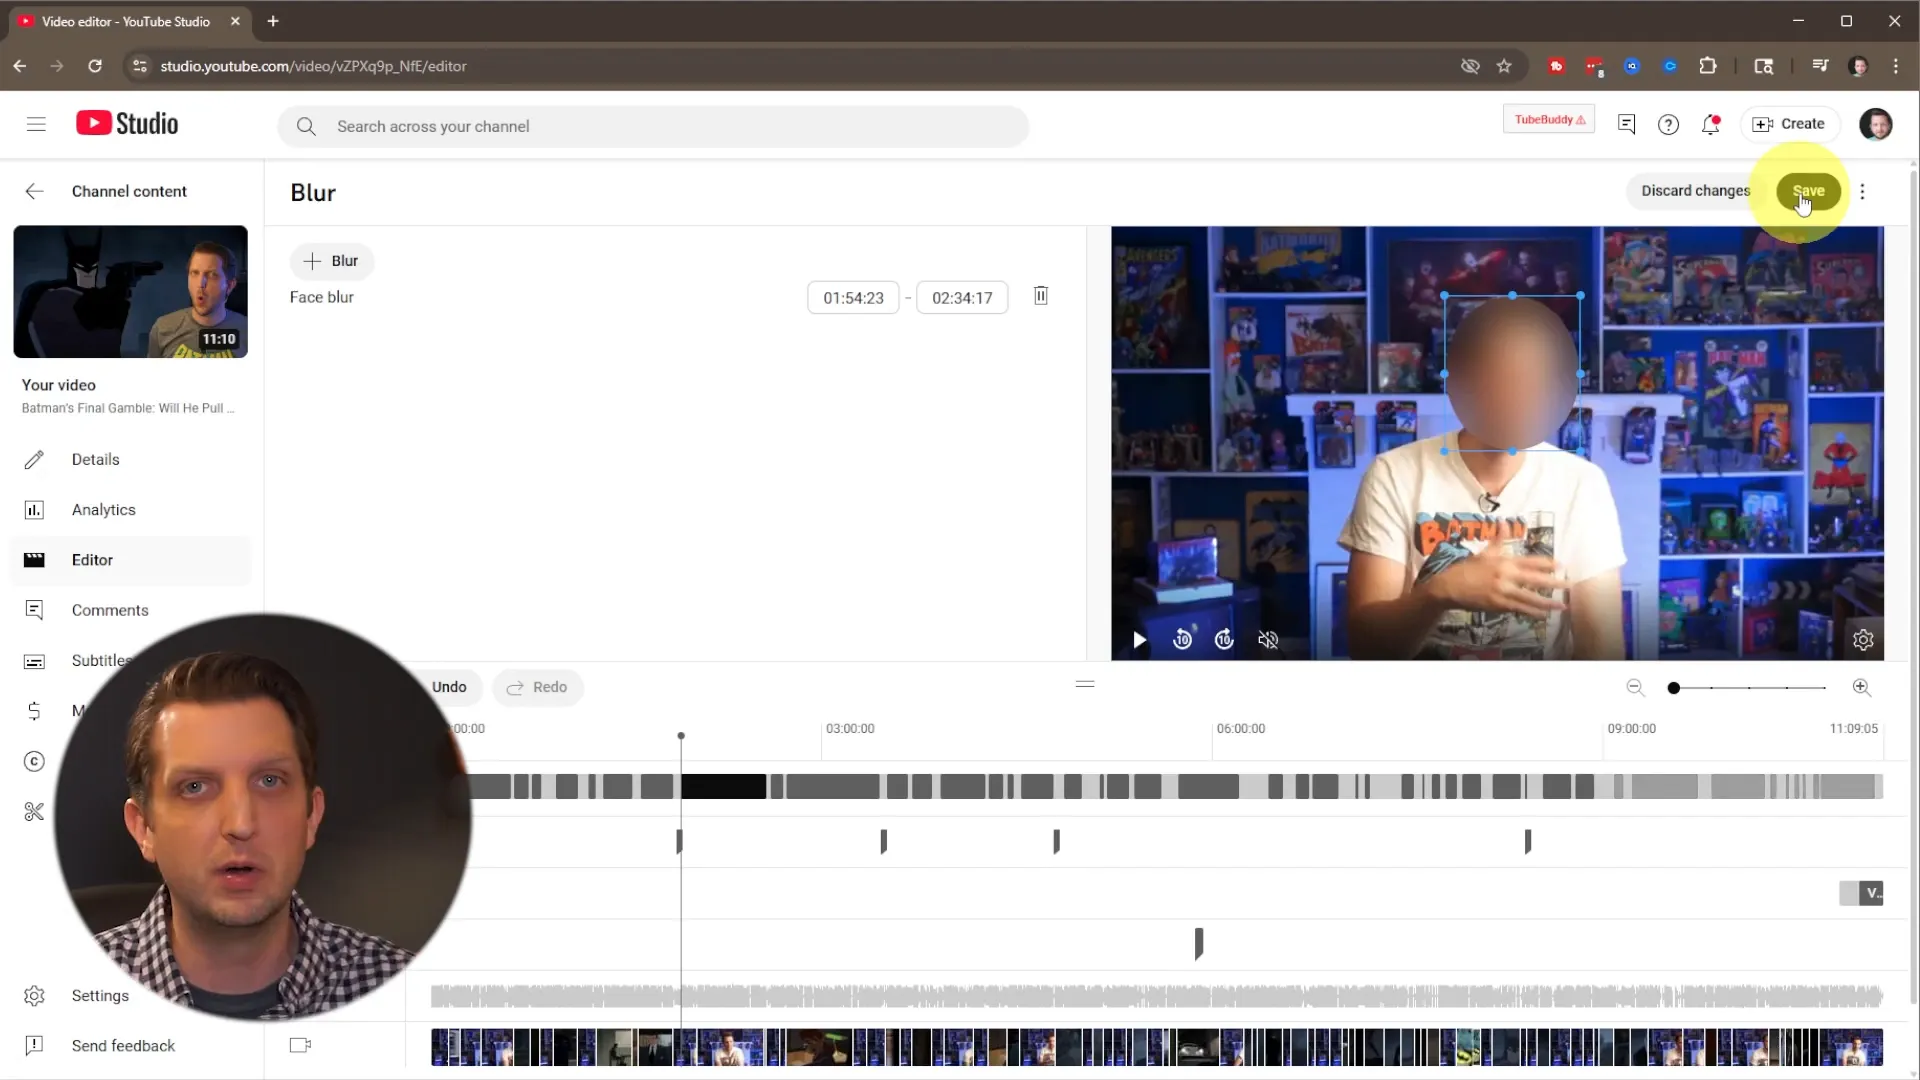
Saving and Publishing the Changes
Once you’re satisfied with the blur adjustments, you can save your changes. Keep in mind a few important points:
- Saving initiates a processing period where YouTube updates the video with the applied blur effect.
- This process can take anywhere from a few minutes up to 24 hours, depending on the video length and YouTube’s current workload.
- The original, unblurred version of your video remains live until the new blurred version is ready.
- Once processing is complete, YouTube seamlessly swaps the old video with the updated blurred one without affecting your video URL or stats.
So, if you’re in a hurry, it’s important to remember that the blur won’t appear immediately after saving. However, this process ensures that you don’t lose any engagement or data from your original upload.
Discarding Changes if Needed
If you change your mind before saving, or decide a blur isn’t necessary, you can simply discard your changes. This removes all blur effects you added and leaves the video as it was originally uploaded.
Conclusion: Blur Faces and Objects Easily on YouTube
Being able to blur faces or objects in your YouTube videos after posting is a game-changer for creators who want to protect privacy, comply with legal requirements, or fix mistakes without losing precious views and data. YouTube’s built-in blur tool offers a simple and powerful way to do this directly through YouTube Studio.
By following these steps—accessing the editor, choosing face or custom blur, adjusting the effect, and saving your changes—you can quickly resolve any privacy concerns without the hassle of deleting and re-uploading your content.
This tool is perfect for creators who want to maintain the integrity of their videos while making necessary edits fast and efficiently. Give it a try next time you spot something in your video that needs to be blurred out!
Happy creating!