

Have you ever wanted to improve your computer’s audio input without investing in an expensive microphone? If so, you’re in luck. Using your phone as a wireless microphone for your PC is easier than you might think. Thanks to a handy app called WO Mic, you can transform your smartphone’s built-in microphone into a high-quality wireless mic for your computer. This method works regardless of whether you have an iPhone or an Android device and can significantly enhance your audio recording or communication experience.
In this guide, I’ll walk you through the entire process step-by-step—from installing the app on your phone and computer, ensuring both devices are on the same Wi-Fi network, to connecting everything and setting your phone mic as the input source on your PC. Let’s dive in!
Why Use Your Phone as a Microphone for Your PC?
Before we get into the technical steps, let’s talk about why this is such a great idea. Most smartphones today come equipped with high-quality microphones designed to capture clear sound. Instead of buying a dedicated microphone, which can be expensive and sometimes complicated to set up, you can leverage the mic already in your pocket.
This setup is particularly useful for:
- Podcasters or streamers looking for a quick and affordable mic solution.
- Remote workers needing better audio for video calls.
- Anyone looking to improve audio quality for recordings or online meetings without extra hardware.
Using WO Mic, your phone connects wirelessly to your computer over Wi-Fi, eliminating the hassle of cables and allowing you to move freely while speaking.
Step 1: Download and Install WO Mic on Your Phone
The first step is to get the WO Mic app on your smartphone. Whether you have an iPhone or Android device, the app is available for free in your device’s app store.
- Open your phone’s app store (App Store for iPhone, Google Play Store for Android).
- Search for “WO Mic” by typing w o mic.
- Locate the app called “WO Mic” and tap to install it.
- Once installed, open the app to get ready for configuration.
Having the app installed on your phone is crucial because this is what captures your voice and sends the audio signal wirelessly to your PC.
Step 2: Install WO Mic Client and Drivers on Your PC
Next, you need to install the WO Mic client software on your computer, along with necessary drivers that allow your PC to recognize your phone as an input device.
- Open your preferred web browser on your PC.
- Search for “WO Mic” and navigate to the official website.
- On the website, find and click the “Free Microphone” or “Download” section.
- Download two essential files:
- VC Runtime: This is a Microsoft support file needed for the software to run.
- WO Mic Installer for Windows: The main client software.
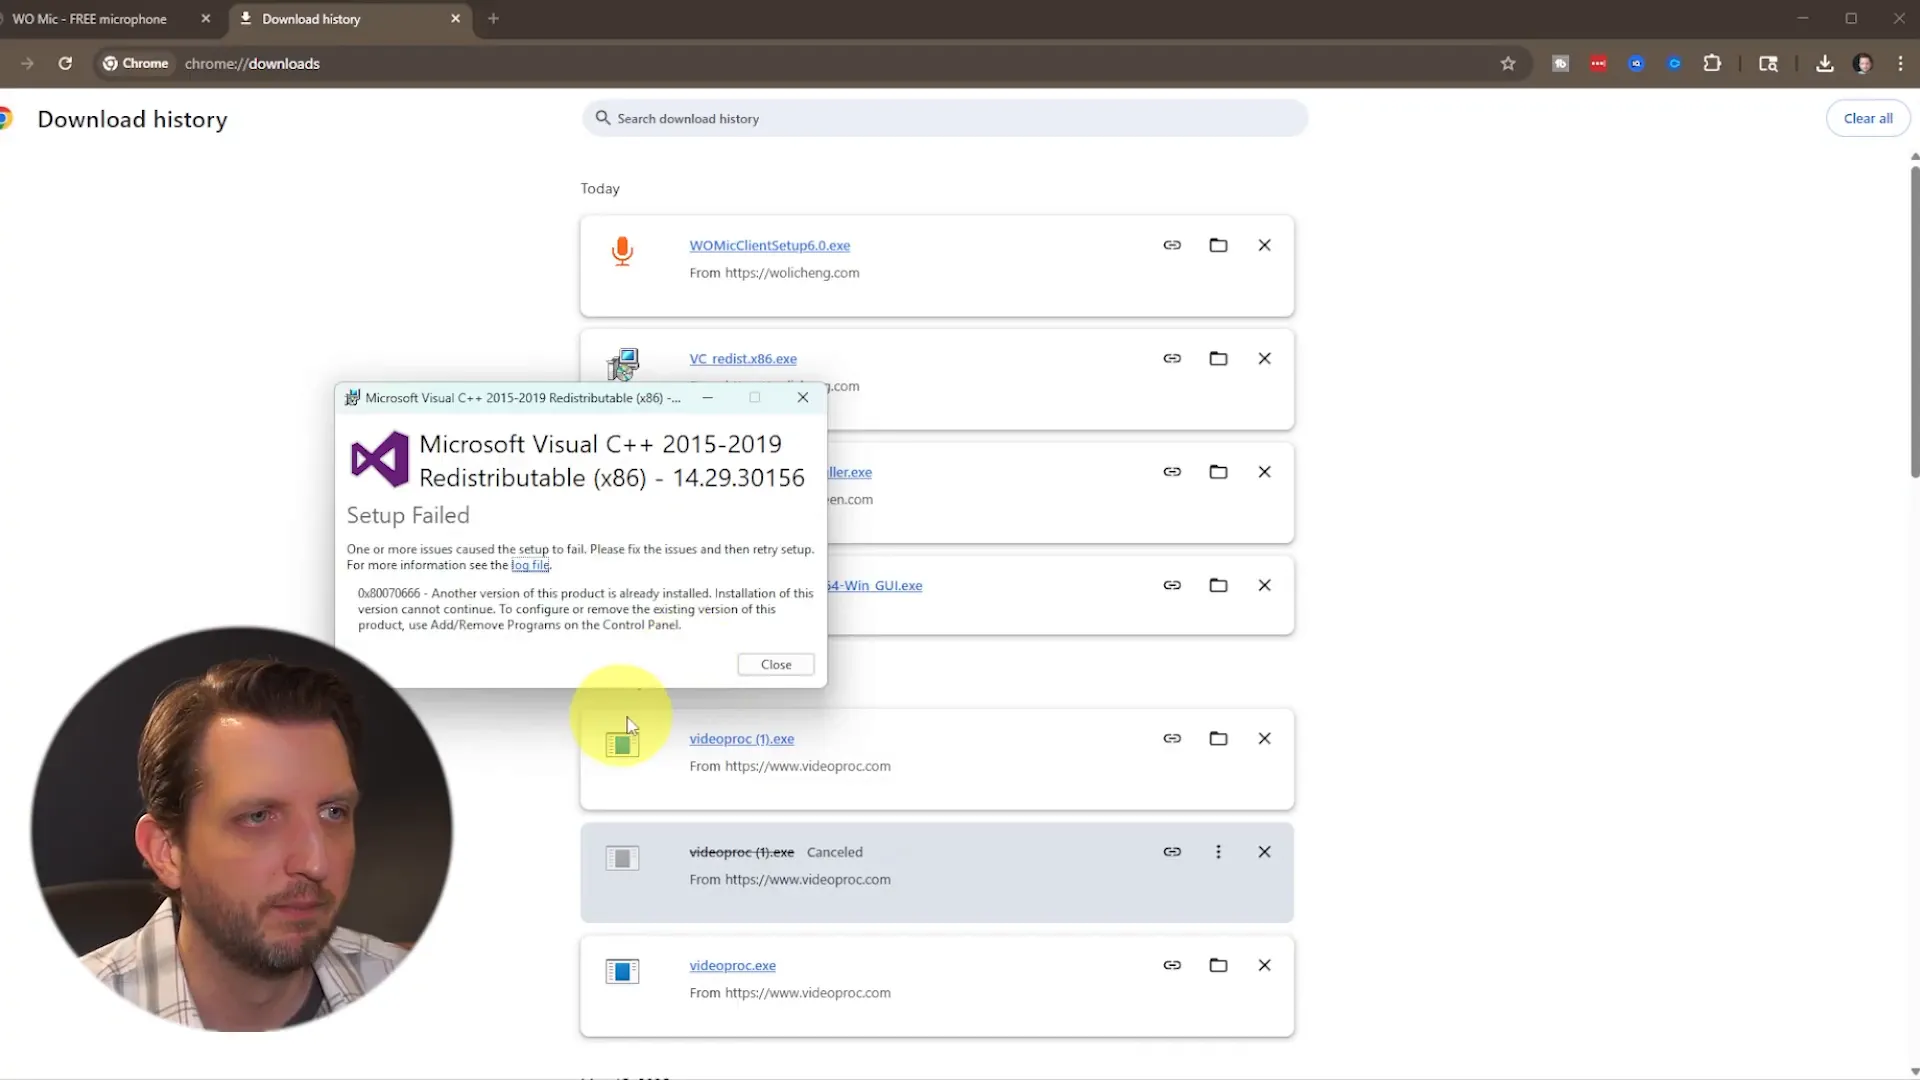
- After downloading, locate these files in your downloads folder.
- First, install the VC Runtime by opening the file and following the prompts. If you get a message saying the setup failed because it’s already installed, simply close that window and move on.
- Next, run the WO Mic client installer.
- Choose your language (e.g., English), then click through the installation wizard by selecting “Next,” agreeing to terms, choosing your install location, and clicking “Install.”
- Once the installation completes, you’ll be asked whether to reboot your PC immediately or later. You can choose “Reboot later” if you’re in the middle of something.
Installing these components is essential because they enable communication between your phone and PC, allowing your computer to receive the microphone input wirelessly.
Step 3: Connect Your Phone and PC to the Same Wi-Fi Network
For WO Mic to work seamlessly, both your phone and your PC must be connected to the same Wi-Fi network. This is how the audio data is transmitted between the devices.
Here’s how to check and ensure both devices are on the same Wi-Fi:
- On your PC, click on the Wi-Fi icon in the system tray (usually at the bottom right of your screen).
- Check the network name you are connected to.
- On your phone, open the Wi-Fi settings and verify you are connected to the same network name.
- If the networks do not match, connect both devices to the same Wi-Fi network.
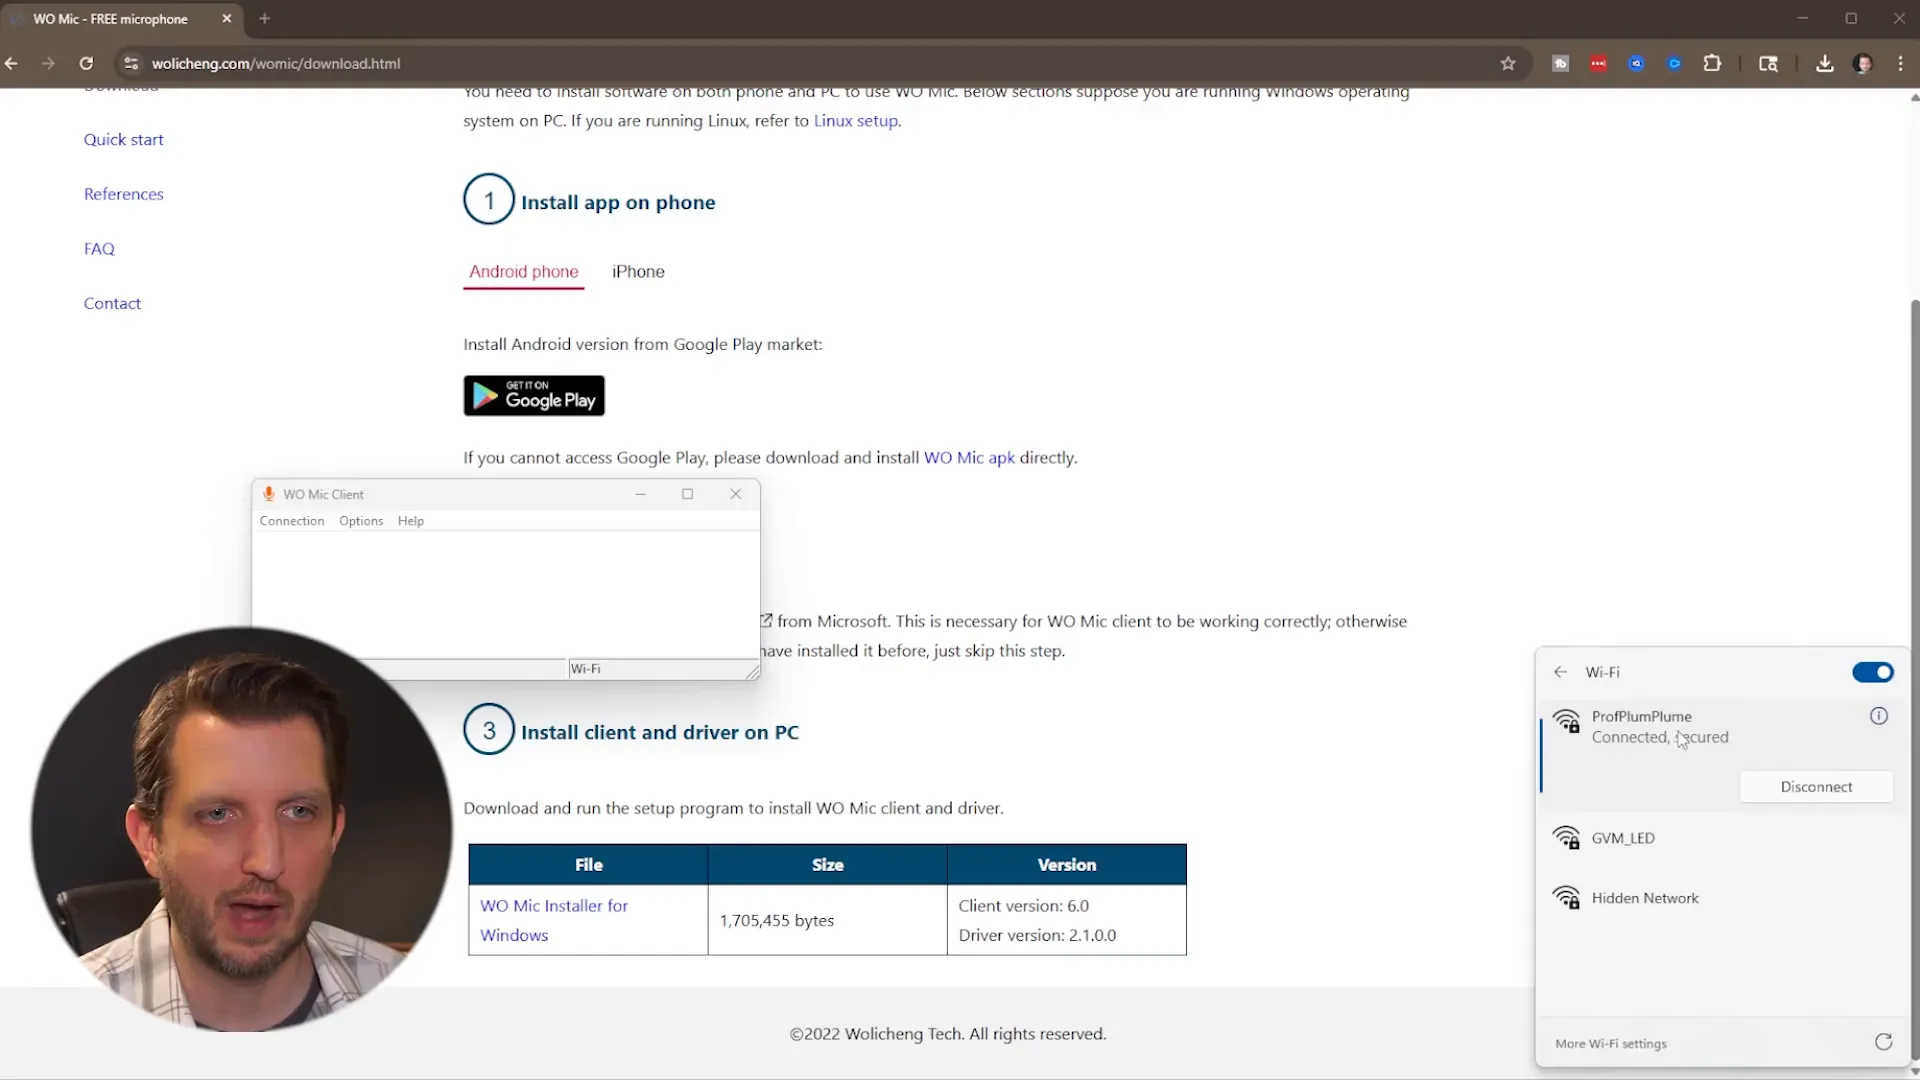
Being on the same network ensures that your PC can find your phone and establish a stable connection for audio transmission.
Step 4: Establish the Connection Between Your Phone and PC
Now that both devices have the app installed and are connected to the same Wi-Fi network, it’s time to link them together.
- Open the WO Mic client on your PC by typing WO in the search bar and clicking on the app.
- Leave the client open and ready.
- On your phone, open the WO Mic app.
- In the WO Mic client on your PC, click on the Connections menu and select Connect.
- Choose the connection method as Wi-Fi.
- Back on your phone, tap the Start button to begin transmitting audio.
- The phone will display an IP address (Wi-Fi address). Ensure this matches the IP address entered in the PC client.
- If the IP address on your PC does not match, manually enter the one shown on your phone.
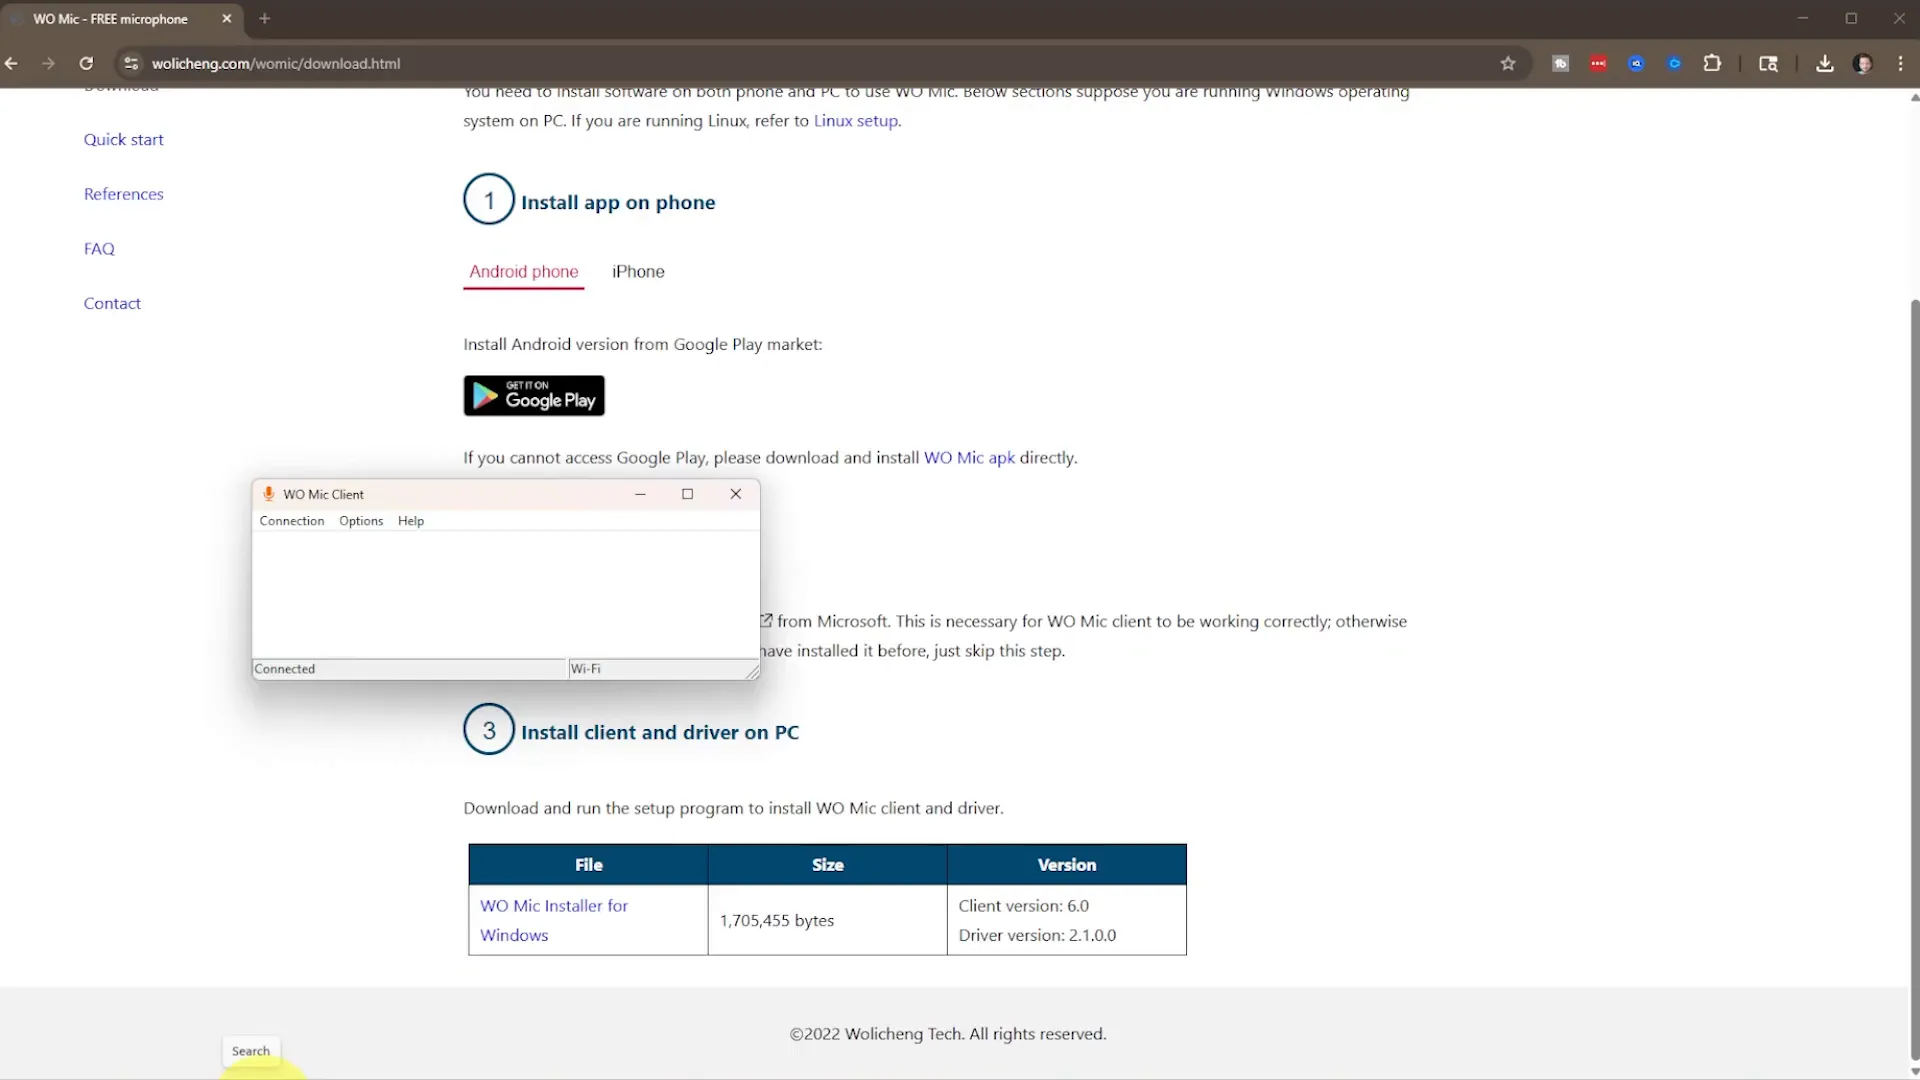
- Click Connect on the PC client.
- If prompted, allow permissions on both devices to enable the connection.
- You should see a confirmation indicating that the devices are connected.

This connection setup allows your phone’s microphone input to be streamed live to your PC over Wi-Fi.
Step 5: Configure Your PC’s Sound Settings to Use WO Mic
Finally, to make your PC actually use your phone as its microphone, you need to change the input device in your sound settings.
Follow these steps:
- Open Settings on your PC (you can find it by clicking the Start menu or searching for “Settings”).
- Navigate to System and then click on Sound.
- Scroll down to the Input section where you select your microphone device.
- From the dropdown menu, select WO Mic Device.
- Speak into your phone’s microphone and watch the input level indicator on your PC to verify it is picking up sound.
Once set, your PC will use the audio captured by your phone’s microphone for any applications that require a mic, such as Zoom, Skype, Discord, or recording software.
Tips for Best Performance
- Strong Wi-Fi Signal: Ensure both devices have a strong, stable Wi-Fi connection to minimize audio lag or dropouts.
- Close Unnecessary Apps: On your phone and PC, closing other apps can help reduce interference and improve audio quality.
- Position Your Phone Properly: Place your phone close enough to you to capture clear audio, but avoid covering the microphone area.
- Test Before Use: Always do a quick sound check before starting your meeting, recording, or stream.
Conclusion
Using your phone as a wireless microphone for your PC is a straightforward and budget-friendly way to improve your audio setup. With the WO Mic app and a few simple steps, you can enjoy clear, wireless audio input without the need for specialized hardware. Whether you’re recording podcasts, joining video calls, or streaming, this method offers flexibility and convenience.
Remember to install the WO Mic app on both your phone and PC, ensure both devices share the same Wi-Fi network, and configure your PC’s sound settings properly. Following these steps will have you ready to use your phone as a wireless mic in no time.
I hope you found this guide helpful. Give it a try and experience the difference in your audio quality today!