

If you want to elevate your YouTube content with stunning 4K resolution but don’t have a 4K camera, you’re in the right place. I’m going to walk you through the exact process I use to export and upload videos in 4K, even if they were originally shot in 1080p. This method leverages VideoProc Converter, a powerful yet user-friendly tool that upconverts your existing videos to 4K, allowing you to take advantage of YouTube’s ultra-high-definition playback without needing to reshoot your footage.
Whether you’re a content creator looking to improve the quality of your uploads or just curious about how to get the most out of your videos, this guide will cover everything from installation to final upload, step by step.
Getting Started: Downloading and Installing VideoProc Converter
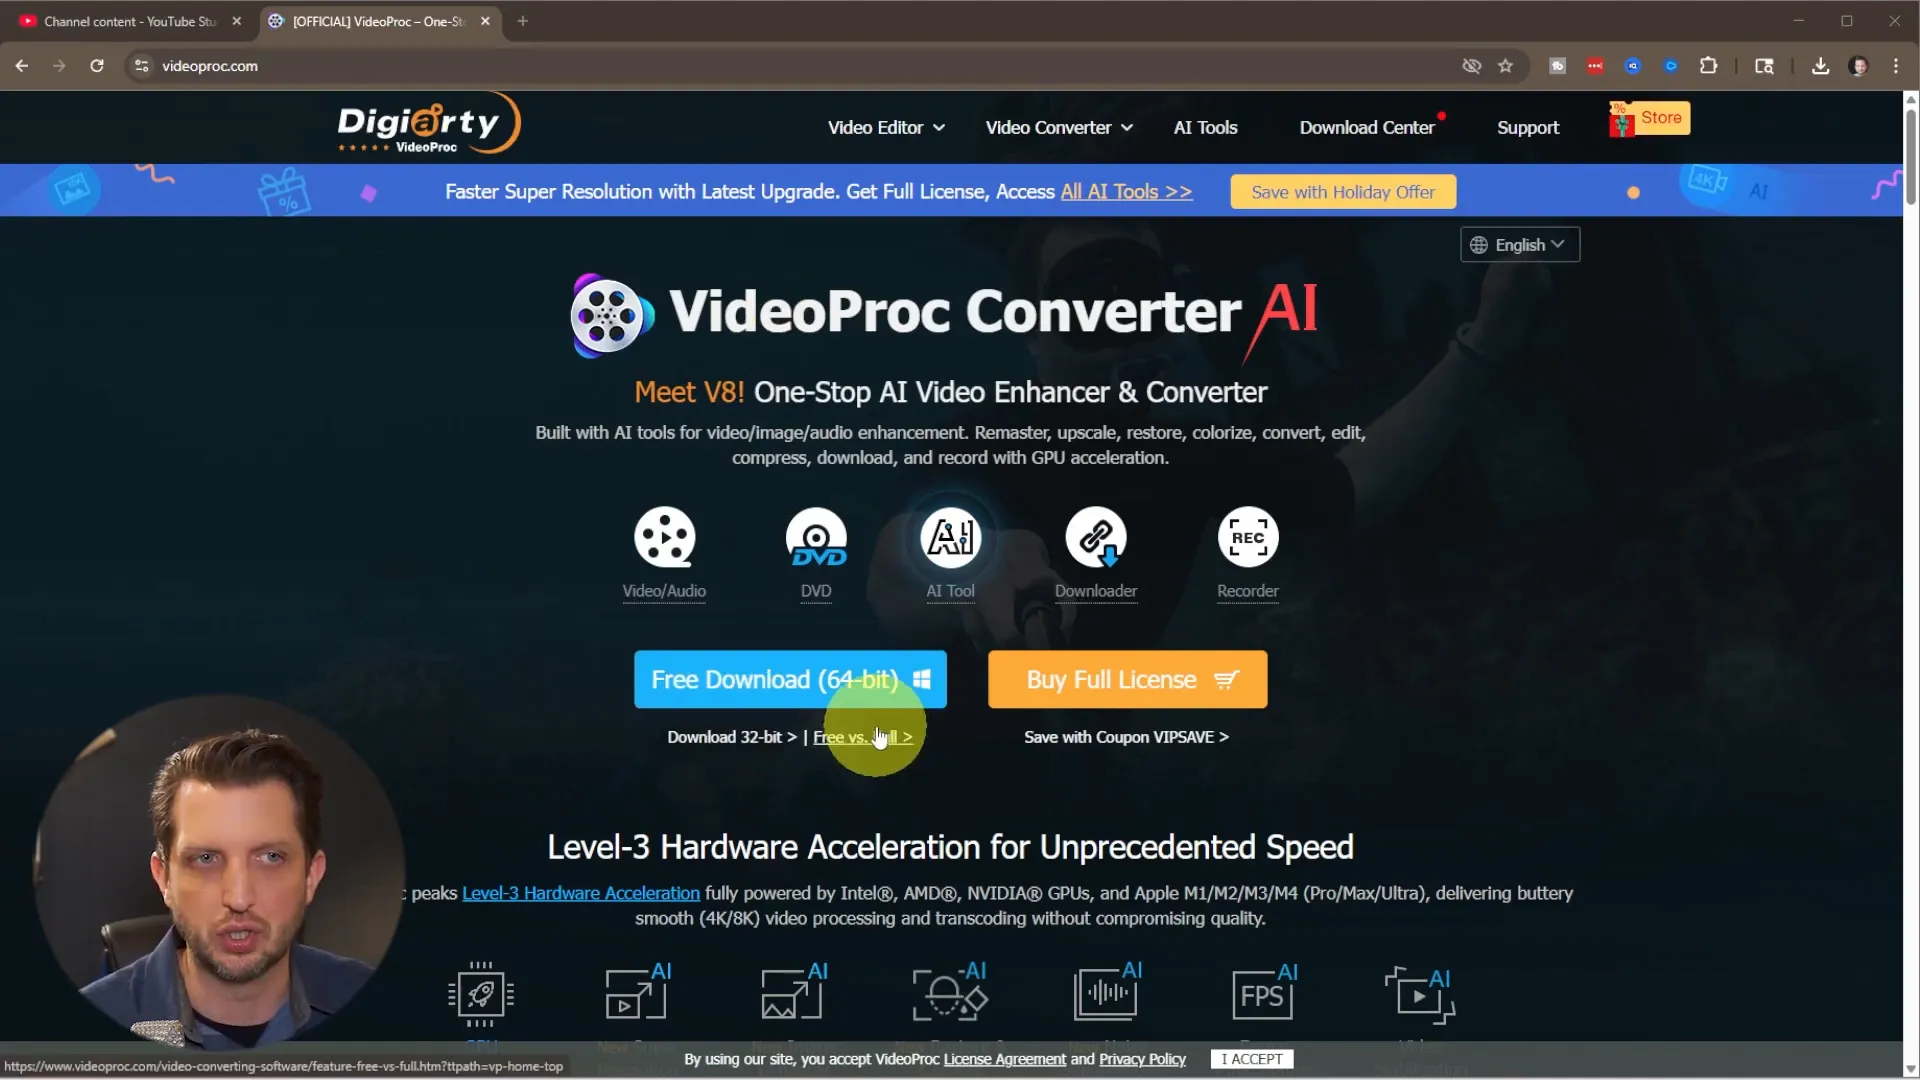
The first step is to download VideoProc Converter from videoproc.com. This software will do the heavy lifting when it comes to converting your videos to 4K. You can use the free version for videos under five minutes, which is perfect for quick projects or shorter clips. If your video exceeds five minutes, you’ll need to purchase the full version, which comes with various pricing options depending on your needs.
Once you’ve downloaded the installer, open it and follow the simple installation prompts. Just click “install,” let the program do its work, and then hit “launch” when it’s finished. The software might prompt you to enter a license key or offer to sell you the full version, but for now, you can select “remind me later” to continue using the free version.
Setting Up Your Video for 4K Conversion
With VideoProc open, navigate to the “Video Converter” section. This interface is straightforward and user-friendly. You can either drag and drop your video file into the converter or click “Add Video” to browse your files manually.
After selecting your video, it will load into the program. You can add multiple videos if you want to batch convert, but for this tutorial, we’re focusing on a single video conversion.
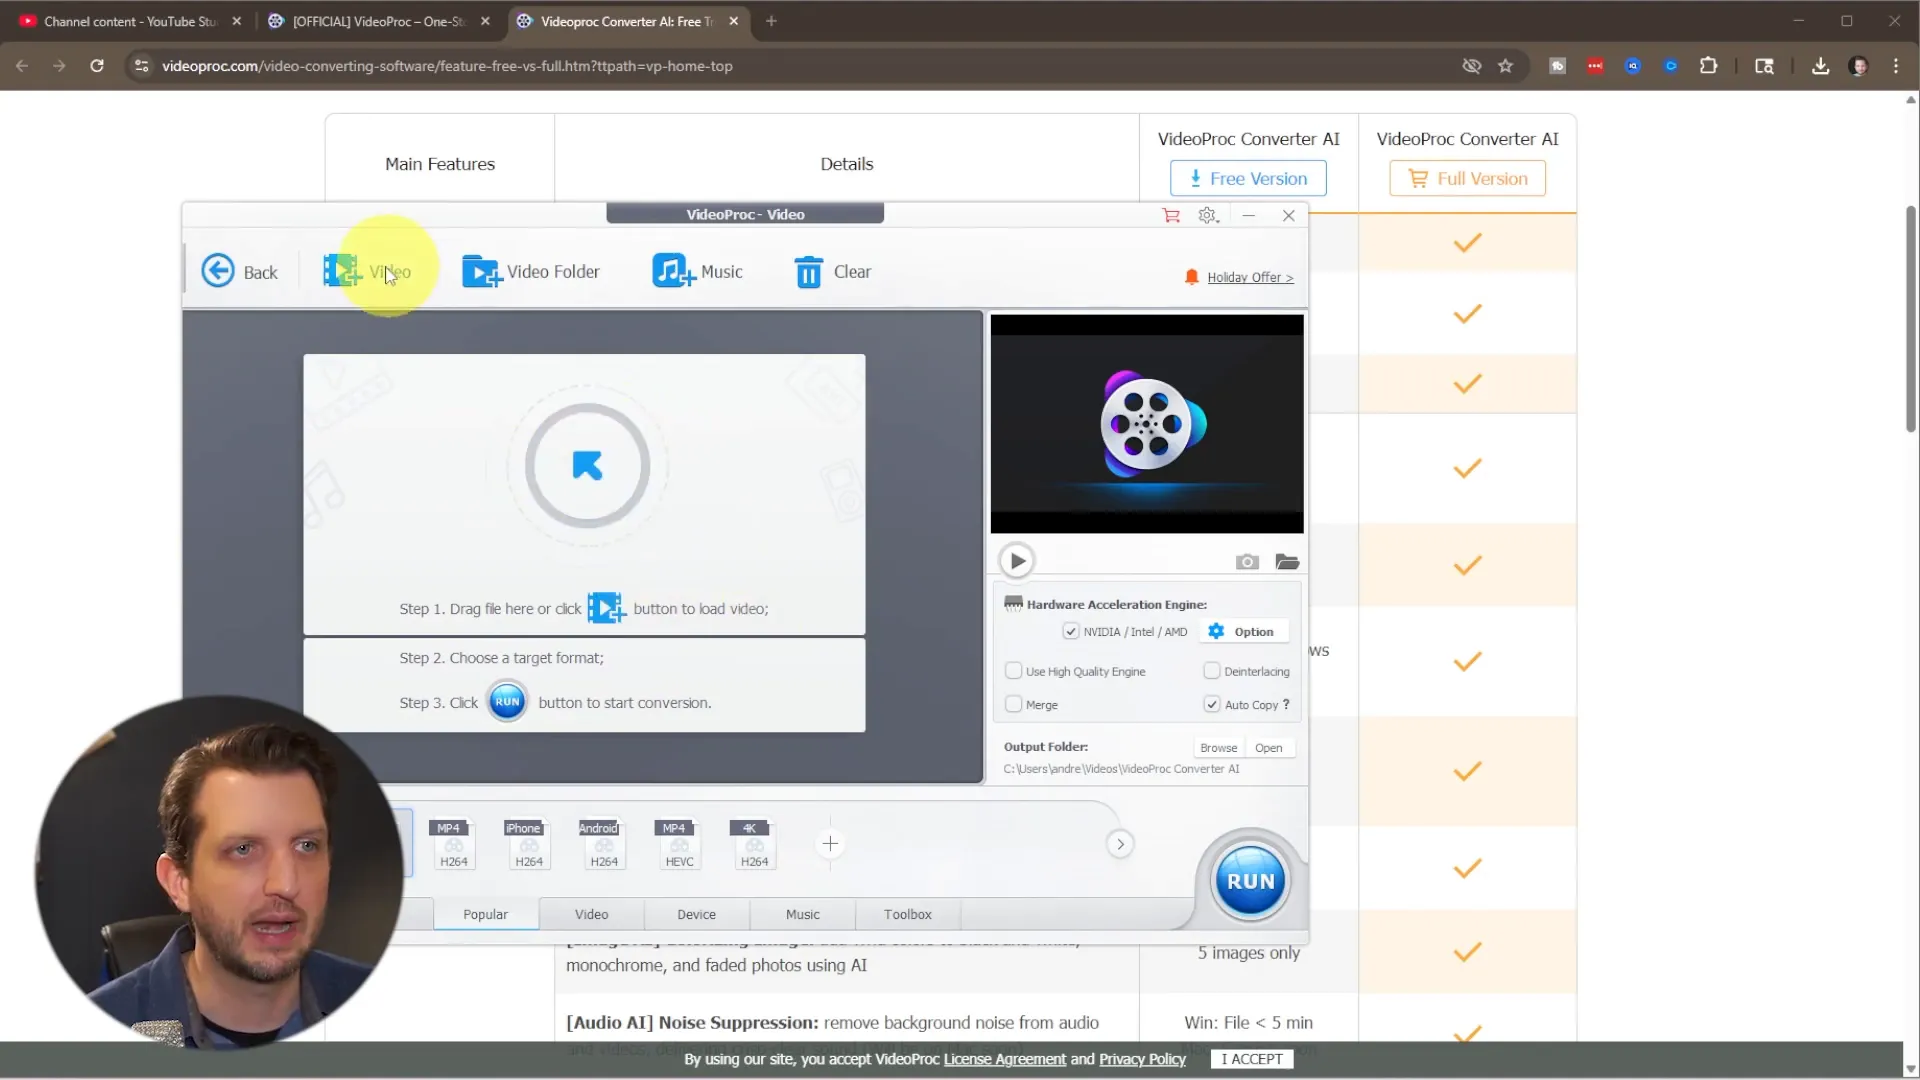
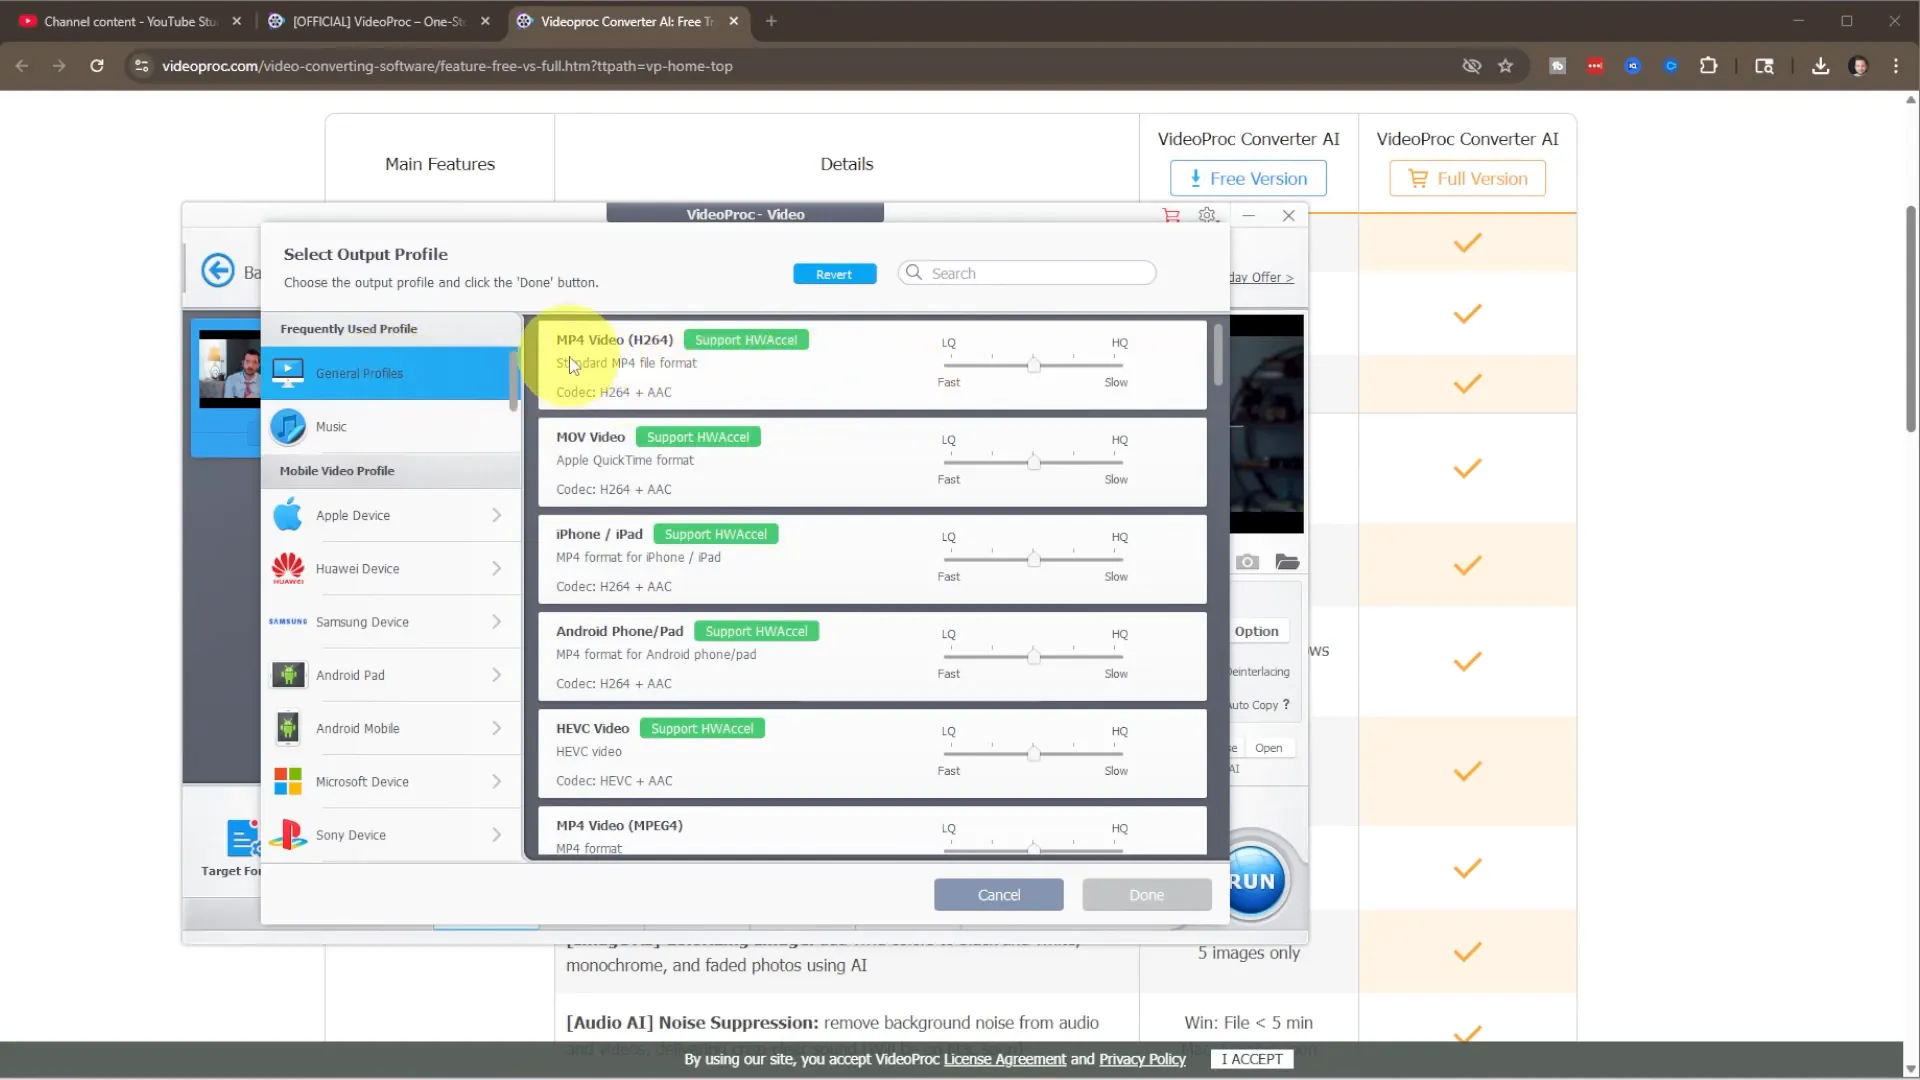
Next, look for the “Target Format” option. Click on it, then select the “General Profile” tab. Here, you want to choose “MP4 Video H.264” as your format. This is a widely compatible and efficient codec for YouTube uploads.
After selecting the format, click “Done.”
Choosing the 4K Resolution
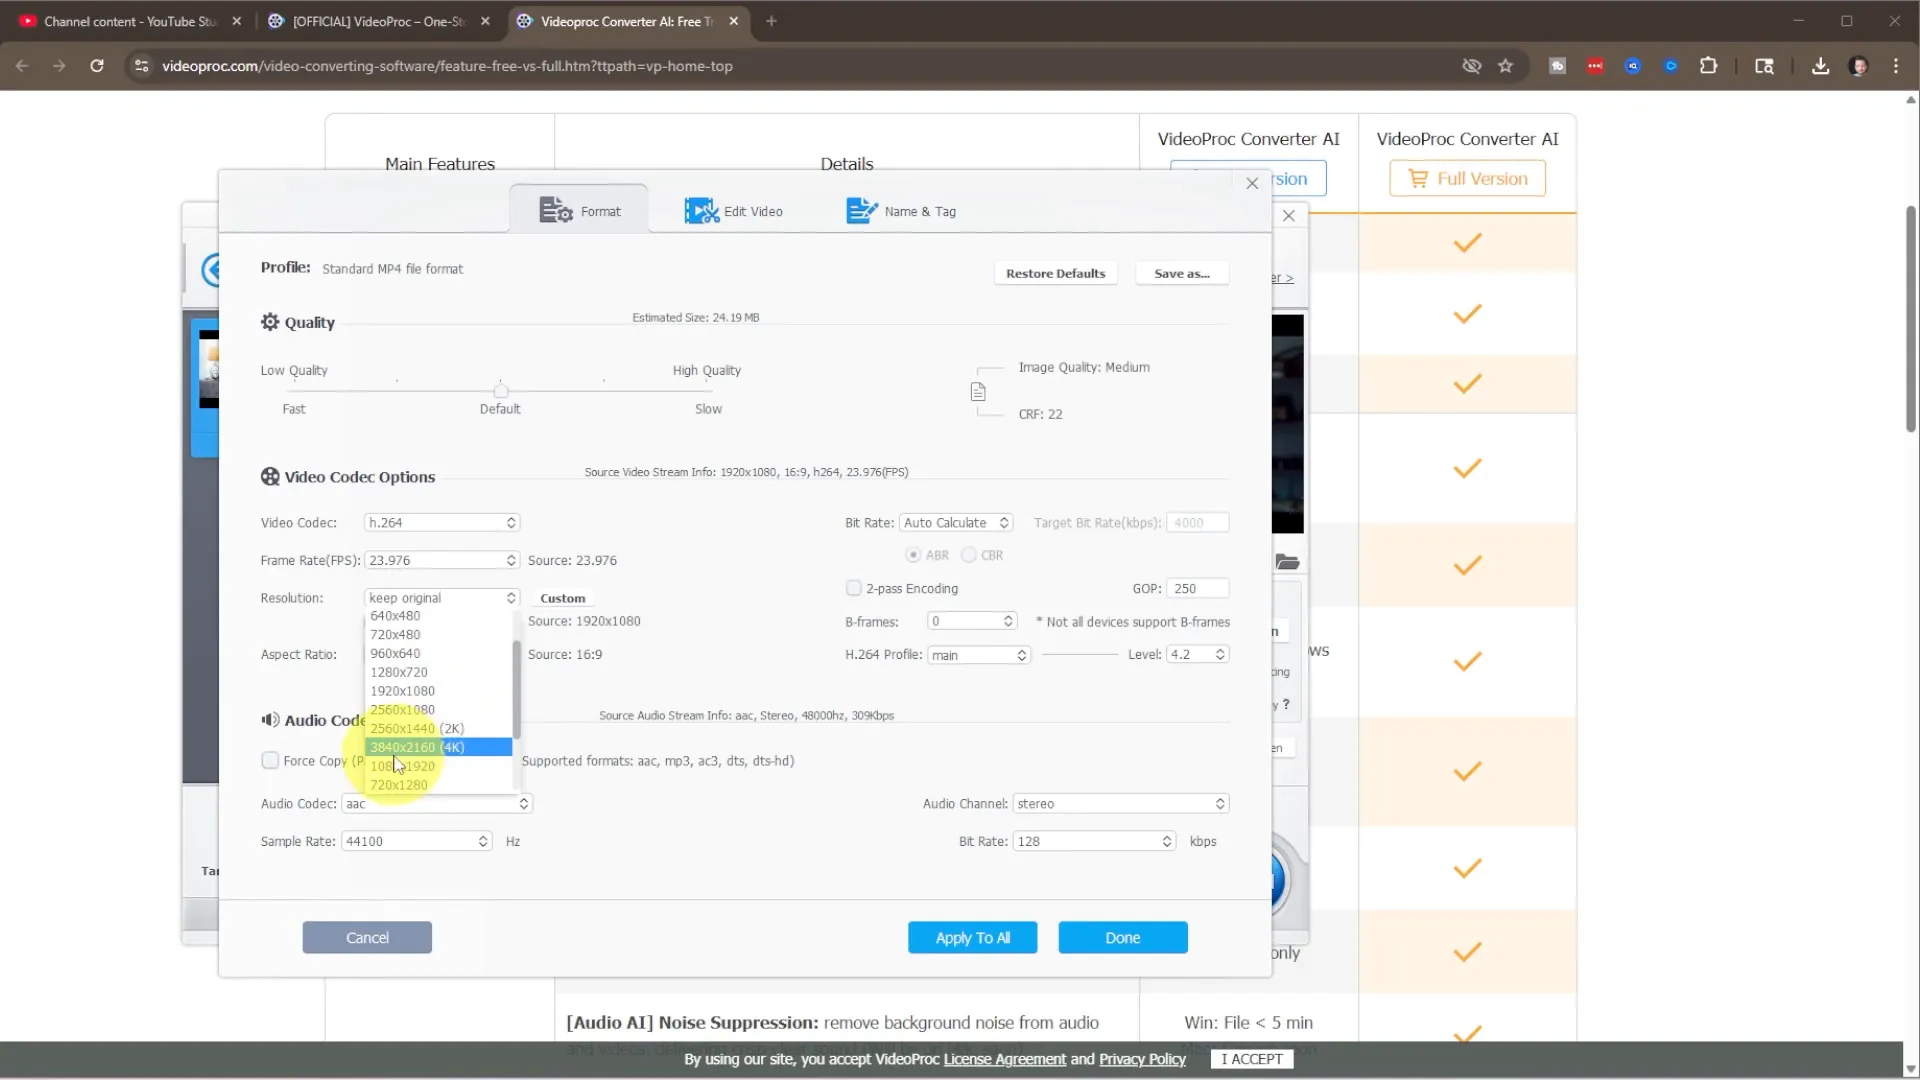
Now comes the key step: setting the video resolution to 4K. Click on “Options” next to your video file. Under the video codec settings, find the resolution drop-down menu. By default, it’s set to “Keep Original,” but you want to change this to 3840 x 2160, which is the standard 4K UHD resolution.
You can leave the other settings like audio and bitrate as they are for now, since the primary goal is to upscale your video to 4K. If you have multiple videos, you can apply this setting to all, but here we’ll just apply it to the single video.
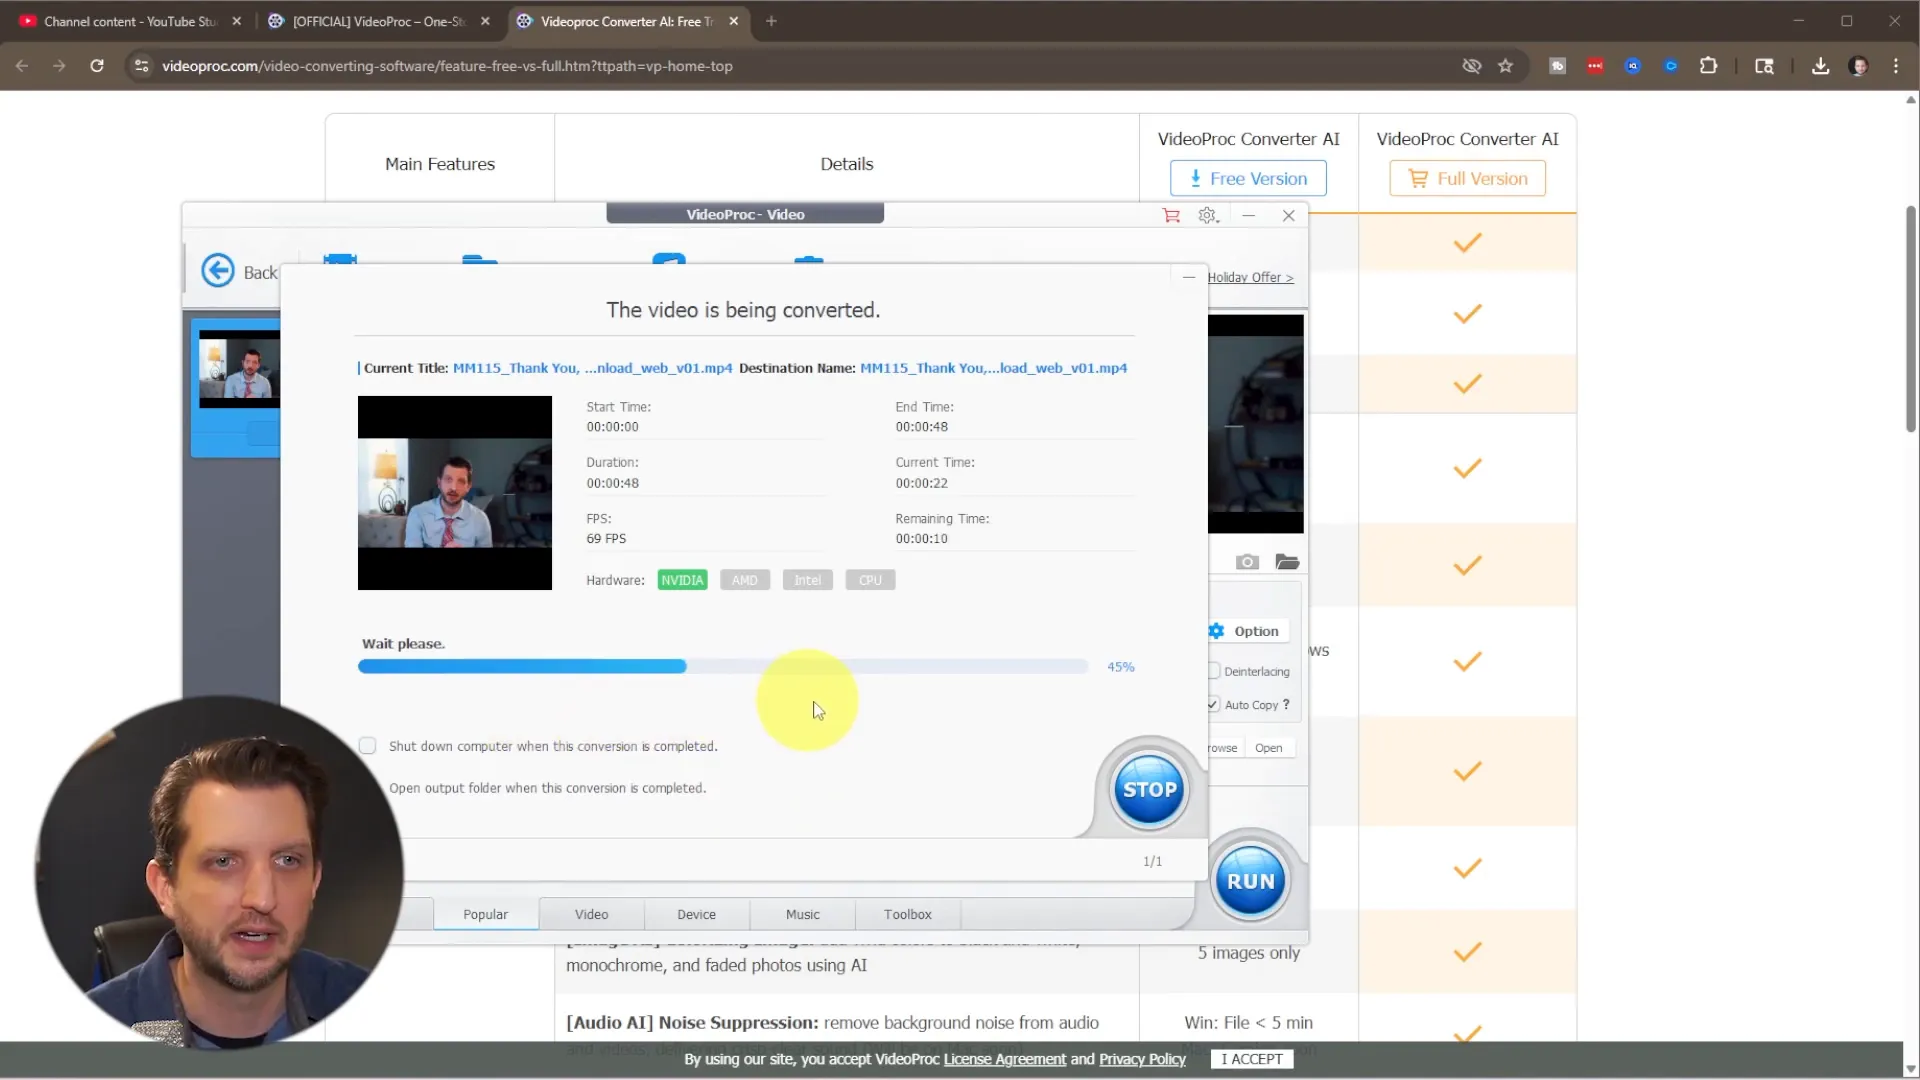
Starting the Conversion Process
Before you start the conversion, choose where you want the output video to be saved. I usually select my downloads folder for easy access. Once you’ve set the save location, click “Run” to begin the conversion.
If you’re using the free version and your video is under five minutes, you’ll be able to proceed without any issues. VideoProc will remind you about unlocking full features with the paid version, but you can continue with the free one for this task.
The conversion process takes a few minutes depending on your video length and system speed. You’ll see a progress bar in real time as the software upscales your video to 4K.
Verifying Your 4K Video
Once the conversion is complete, the program will automatically open the folder where your new 4K video is saved. To confirm the resolution, right-click the file, select “Properties,” and then go to the “Details” tab. Here, you should see the resolution listed as 3840 x 2160, confirming your video is now in 4K.
Uploading Your 4K Video to YouTube
With your newly converted 4K video ready, it’s time to upload it to YouTube. Head over to YouTube Studio and sign in to your account.
Click on the “Create” button and select “Upload Video.” Navigate to the folder where your 4K video is saved and drag it into the upload window.
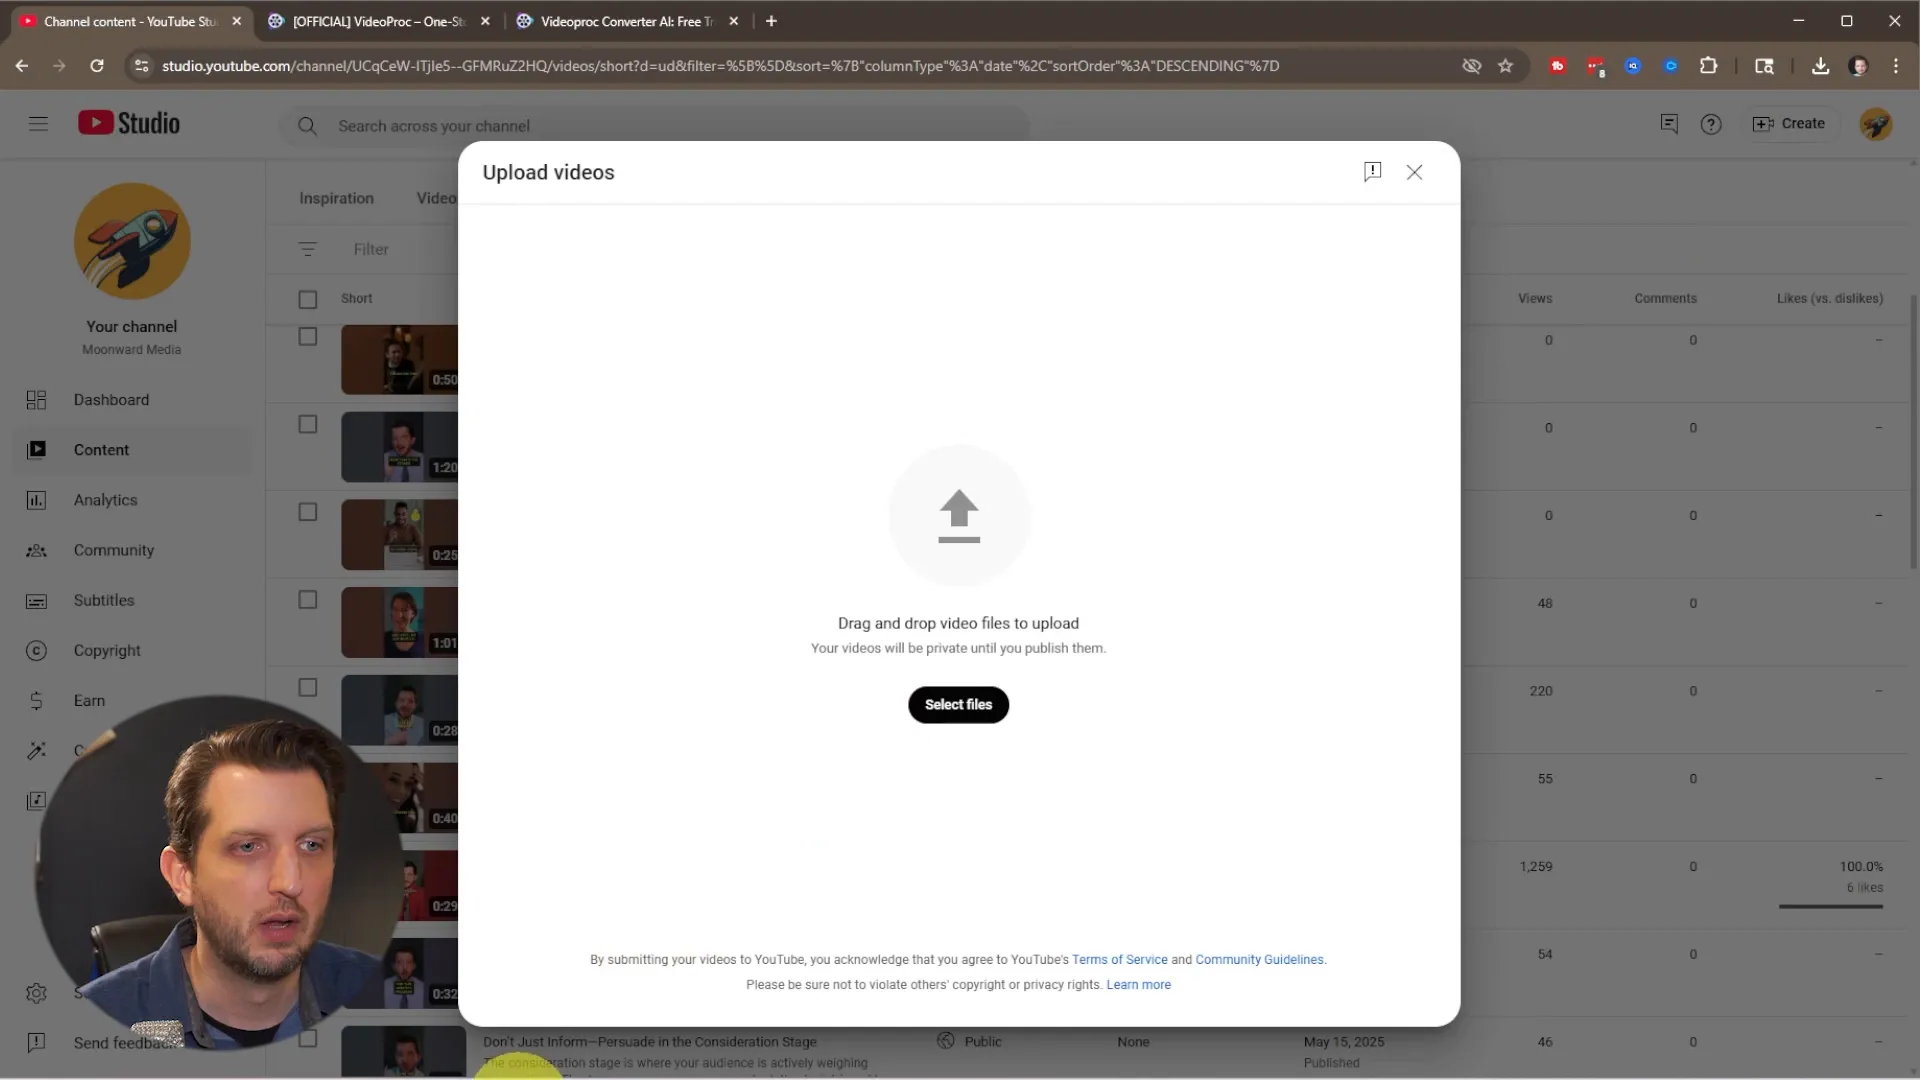
While YouTube processes the video, you can fill in your title, description, add tags, upload a thumbnail, and assign the video to a playlist — just like a normal upload.
Proceed through the upload steps, adding video elements such as end screens and subtitles if desired. YouTube will scan the video for copyright issues during this time.
For privacy, you can set the video to “Private” while it finishes processing, which gives you time to review everything before making it public.
Enjoying Your 4K Playback on YouTube
After the upload and processing are complete, go to your video on YouTube and open the settings menu. Under “Quality,” you should now see the option for 2160p (4K). Selecting this confirms that your video is playing back in 4K resolution.
This method works even if your original video was shot in 1080p, allowing you to deliver higher quality content to your viewers without needing to reshoot or upgrade your camera equipment.
Why Upscaling to 4K Matters
You might wonder why it’s worth converting a 1080p video to 4K if it wasn’t originally shot at that resolution. While upscaling doesn’t add new detail to the footage, it can improve the overall viewing experience on larger screens and take advantage of YouTube’s advanced compression algorithms, which often preserve quality better at higher resolutions.
This approach also future-proofs your content as 4K viewing becomes more common, helping your videos look sharp and professional across all devices.
Summary: Step-by-Step Guide to Export and Upload 4K Video
- Download and install VideoProc Converter (free version for videos under 5 minutes).
- Open VideoProc and navigate to the Video Converter section.
- Add your video file(s) via drag and drop or the “Add Video” button.
- Select “MP4 Video H.264” as the target format under General Profile.
- Go to video options and change the resolution to 3840 x 2160 (4K).
- Choose a save location for the converted file.
- Click “Run” to start the upconversion process.
- Once done, verify the resolution by checking the video file properties.
- Upload the 4K video to YouTube via YouTube Studio.
- Fill in the video details and set privacy as needed.
- After processing, confirm 4K playback by selecting 2160p in YouTube’s quality settings.
Final Thoughts
Uploading videos in 4K quality can significantly enhance your YouTube channel’s visual appeal and audience experience, even if you don’t have access to a 4K camera. By using VideoProc Converter to upscale your existing videos, you can easily deliver stunning, high-resolution content that stands out.
This process is efficient, cost-effective, and straightforward, making it accessible for creators at all levels. Try it out with your next video and see the difference for yourself!
Happy uploading, and I hope you found this guide helpful. See you in the next post!