
In this step‑by‑step guide I’ll show you how I edit on my phone using KineMaster. Whether you’re brand new to mobile editing or just want a faster workflow, KineMaster gives you powerful tools in a compact app. In this article I’ll walk you through downloading the app, creating a project, basic edits, working with layers and text, adding music, fixing vertical clips, handling the free vs. paid features, and exporting your final video.
Why choose KineMaster for phone editing?
KineMaster strikes a great balance between ease of use and advanced features. You get a touch‑friendly timeline, layer support (so you can stack text, stickers, B‑roll and audio), basic video adjustments like filters and pan/zoom, and export options suitable for YouTube, Instagram, and TikTok. There’s a free version to get you started and a paid tier that unlocks premium assets and removes the watermark.
“This is a really powerful tool that has a lot of capabilities that are built into it.”
I use KineMaster because it lets me move quickly on my phone while still producing polished results.
Getting started: download, install, and create a project
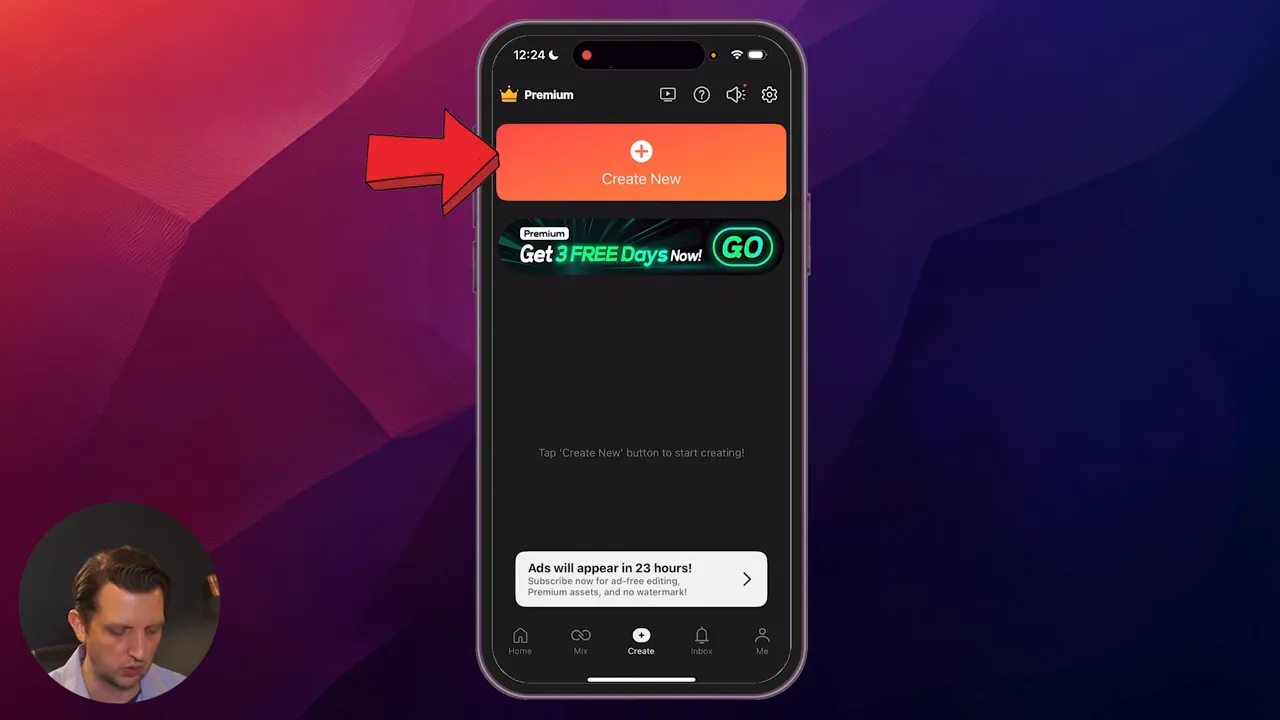
First, search for KineMaster in your app store and download it. The free version doesn’t require signup for basic use — you can jump straight into editing. When you open the app you’ll arrive at the dashboard. Tap Create New to start a project.
When you create a project you’ll be prompted to name it and choose an aspect ratio. KineMaster offers presets for YouTube (16:9), Instagram, and TikTok, which is handy if you’re producing content for a specific platform. I usually select the YouTube preset and proceed.
Understanding the KineMaster interface
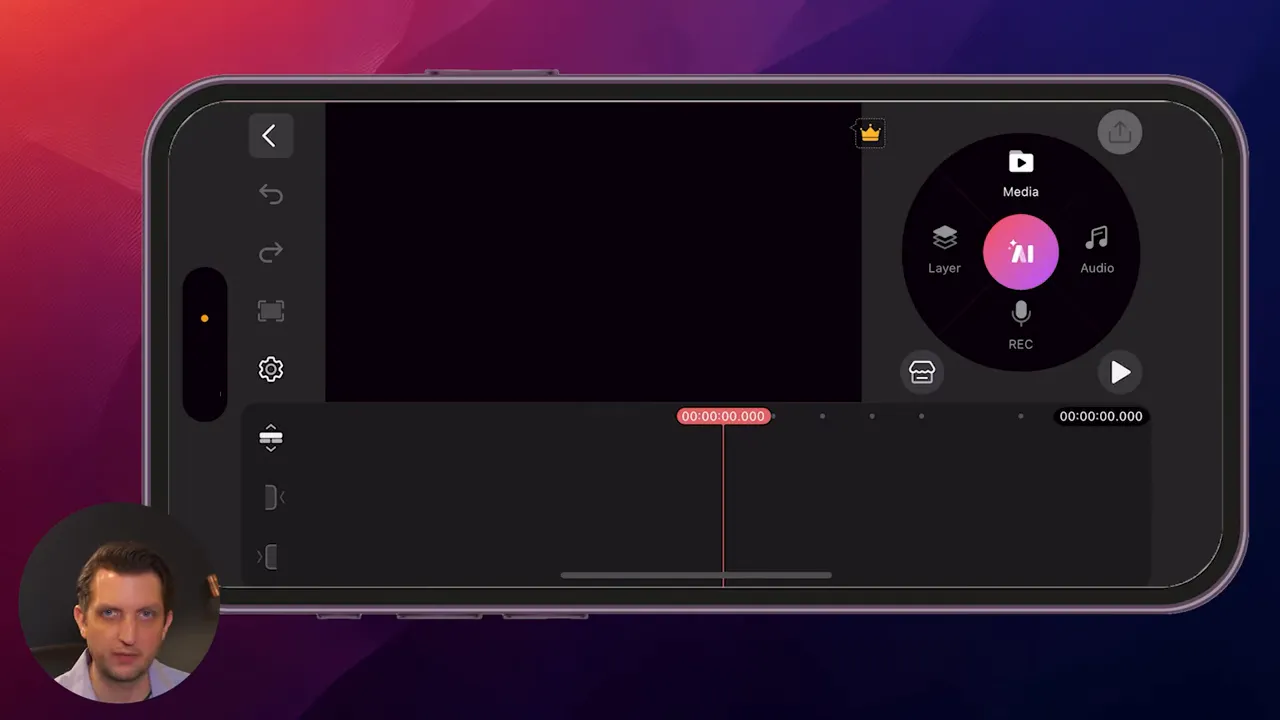
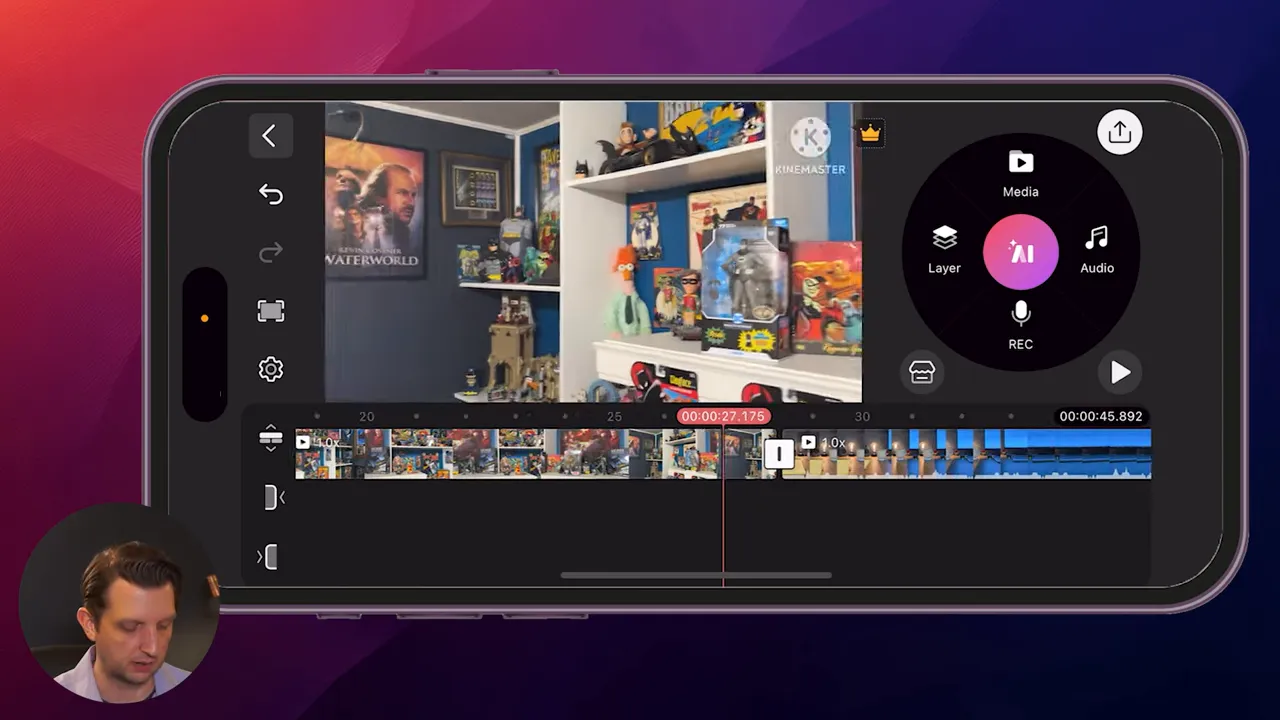
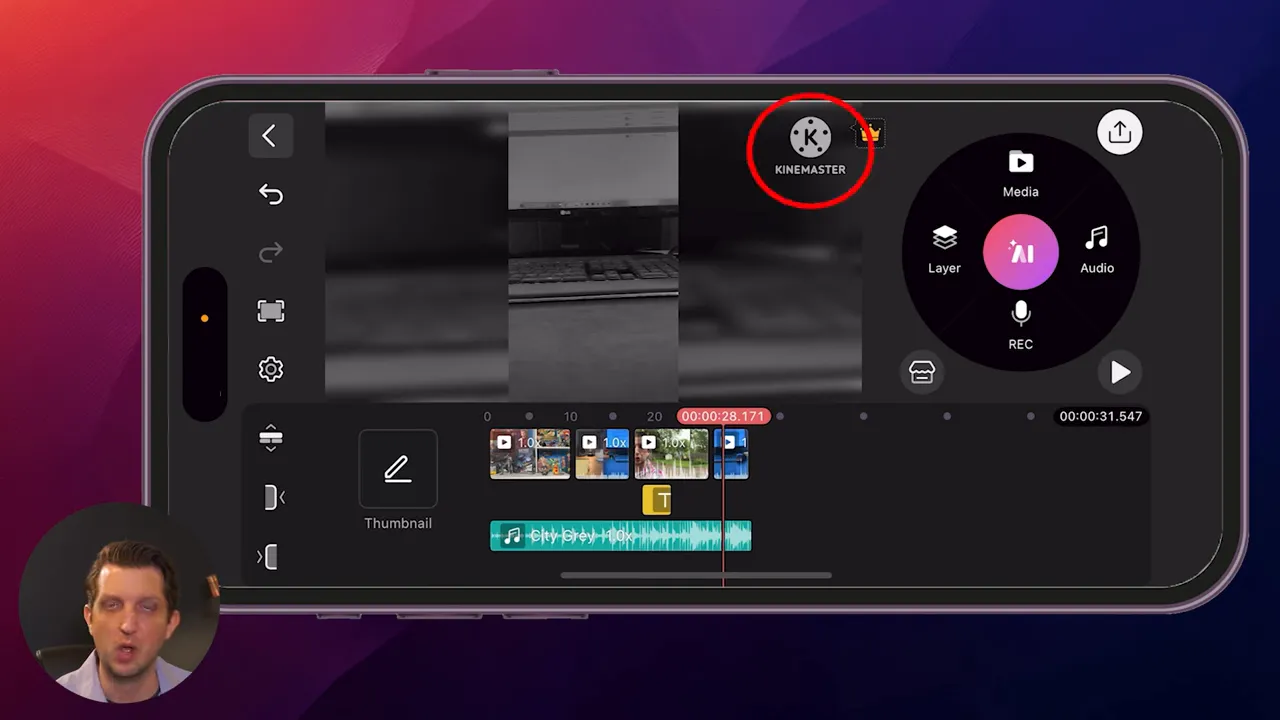
Once your project opens, KineMaster rotates the phone into landscape to give you more room. The interface is divided into a few key areas:
- Top right: the circular Add menu to import media, layers, or audio.
- Top left: a preview window showing the current frame.
- Bottom half: the timeline where clips, layers, and audio are arranged.
- Left edge: undo, project settings, and other tools.
Spend a minute getting comfortable with these zones — you’ll be using them constantly.
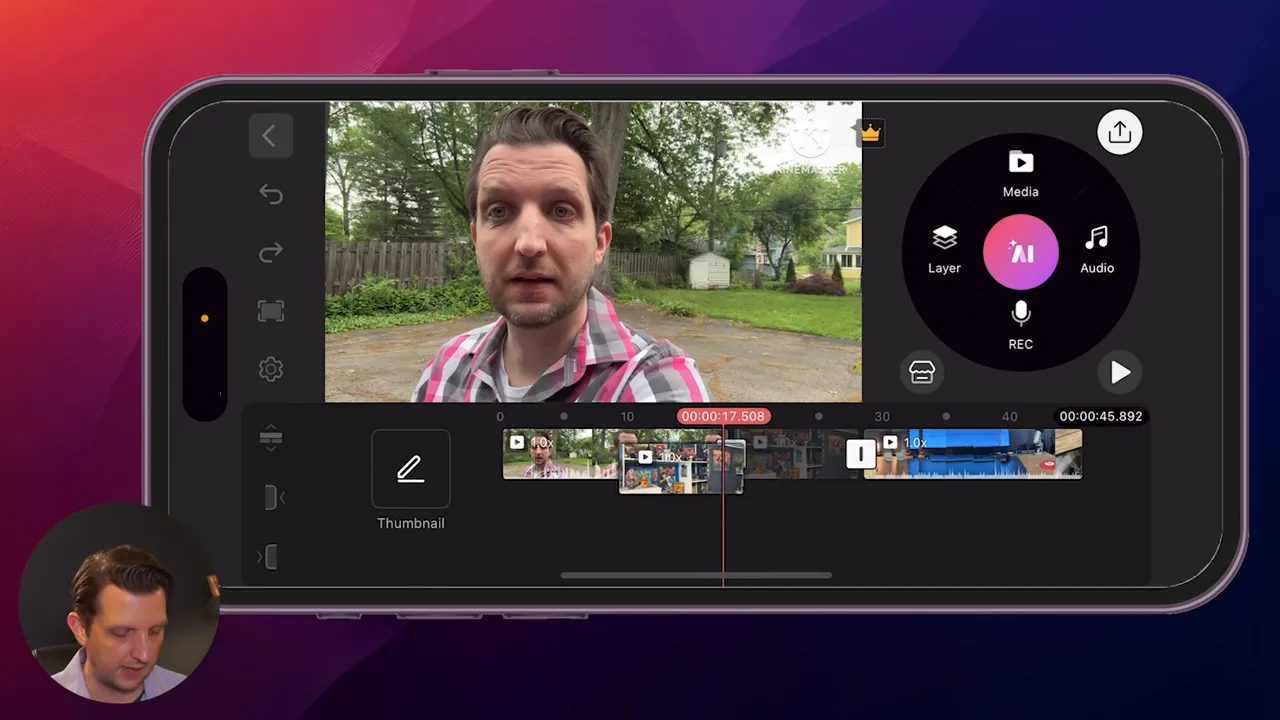
Importing clips and navigating the timeline
To add clips, tap the circular menu and choose Videos (or Photos). The clips will appear on the timeline in the order you select them. You can pinch the timeline to zoom in and out — this only affects visibility, not playback speed. Zooming in helps when you need frame‑accurate trims.
Use the play button to preview your edits and drag the playhead to scrub through the timeline. Pinch, scrub, and preview — that triad is the core of fast mobile editing.
Basic editing: reorder, trim, split
Some basic moves you’ll use constantly:
- Reorder clips: press and hold a clip, then drag it to a new position.
- Trim with handles: tap a clip and drag the yellow handles at either end to shorten or lengthen the visible portion.
- Trim & Split: use the Trim & Split tool to trim everything to the left/right of the playhead or to split a clip into two pieces.

Splitting is useful when you want to insert a clip, remove a small section, or add different effects to separate parts of the same clip. After splitting, you can move the newly created clip independently on the timeline.
Clip adjustments and creative options
With a clip selected you get several creative controls:
- Speed: speed up or slow down footage for dramatic or comedic effect.
- Reverse: play a clip backward.
- Pan & Zoom: simulate camera moves to add motion to static shots.
- Filters and color adjustments: change the mood with built‑in filters.
Don’t be afraid to experiment — KineMaster’s real‑time preview shows you changes instantly so you can fine‑tune effects quickly.
Working with layers and adding text
One of KineMaster’s strengths is layer support. Tap Layers to add text, stickers, images, overlays, or additional video tracks. I usually add a simple name tag or title using the Text layer.
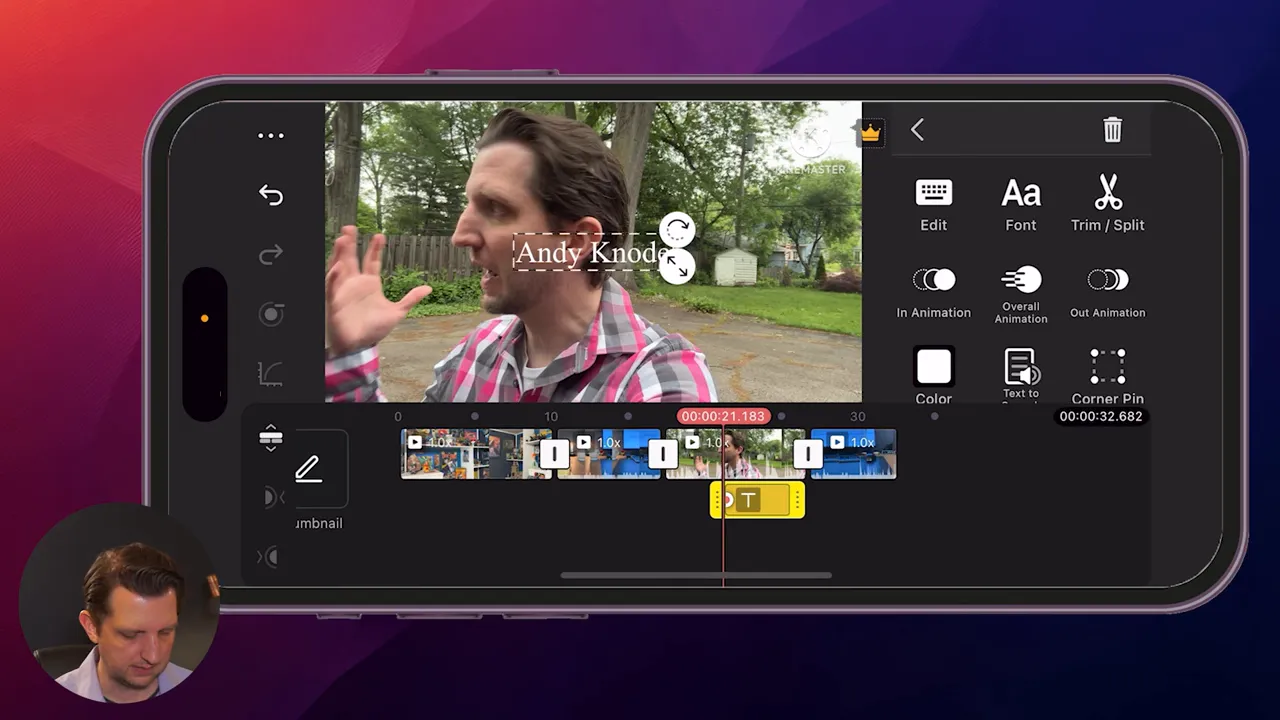
Text customization options include:
- Font choices — pick a style that fits your brand.
- Color and gradient controls — select a color or subtle gradient.
- In/Out animations — animate how text enters and exits the frame.
- Shadow and outline — improve legibility over busy backgrounds.
- Touch positioning — tap and drag text directly in the preview to place it precisely.
Because text is on its own layer, you can control exactly when it appears and disappears by dragging the text layer on the timeline.
Applying filters and color looks
KineMaster includes built‑in filters that are a quick way to change your clip’s tone. Whether you want black & white, moody, or brighter saturation, try filters as a first pass and then tweak intensity to taste.
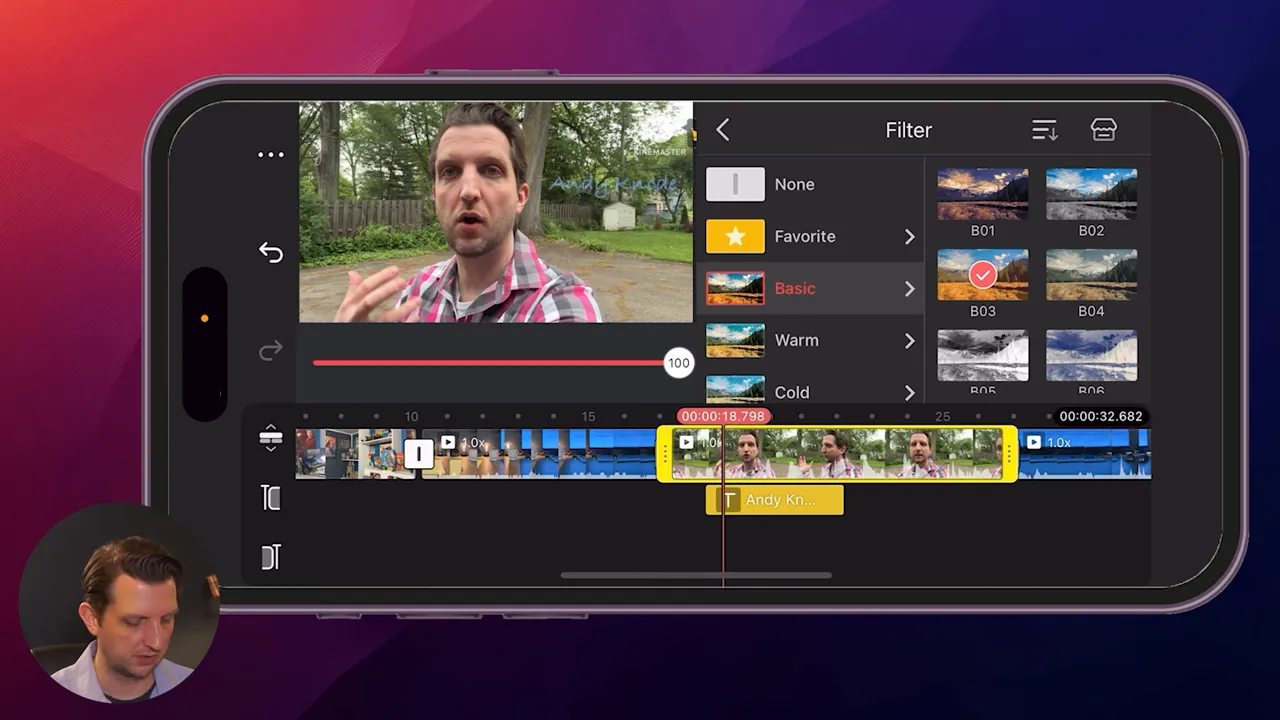
Filters are an easy way to create consistency across clips shot in different lighting conditions.
Adding and editing audio
Audio is handled via the Add > Audio option. KineMaster offers a mix of free tracks and premium tracks (denoted with a crown icon). You can import your own music, use the free tracks, or upgrade for premium assets.

Once an audio track is on the timeline you can trim its length by dragging the end handle, fade in/out using the audio envelope controls, and adjust volume normally. I often shorten the music to match the video length and lower the music volume during dialog segments so speech remains clear.
Fixing vertical clips: background blur trick
If you mix vertical phone footage into a horizontal project, you’ll notice black bars or pillarboxing. A slick and simple solution is to use a blurred background. Select the vertical clip, go to Background and choose a blurred fill. This uses the same clip (or a color) to fill the side areas and applies blur so the main subject remains the focus.
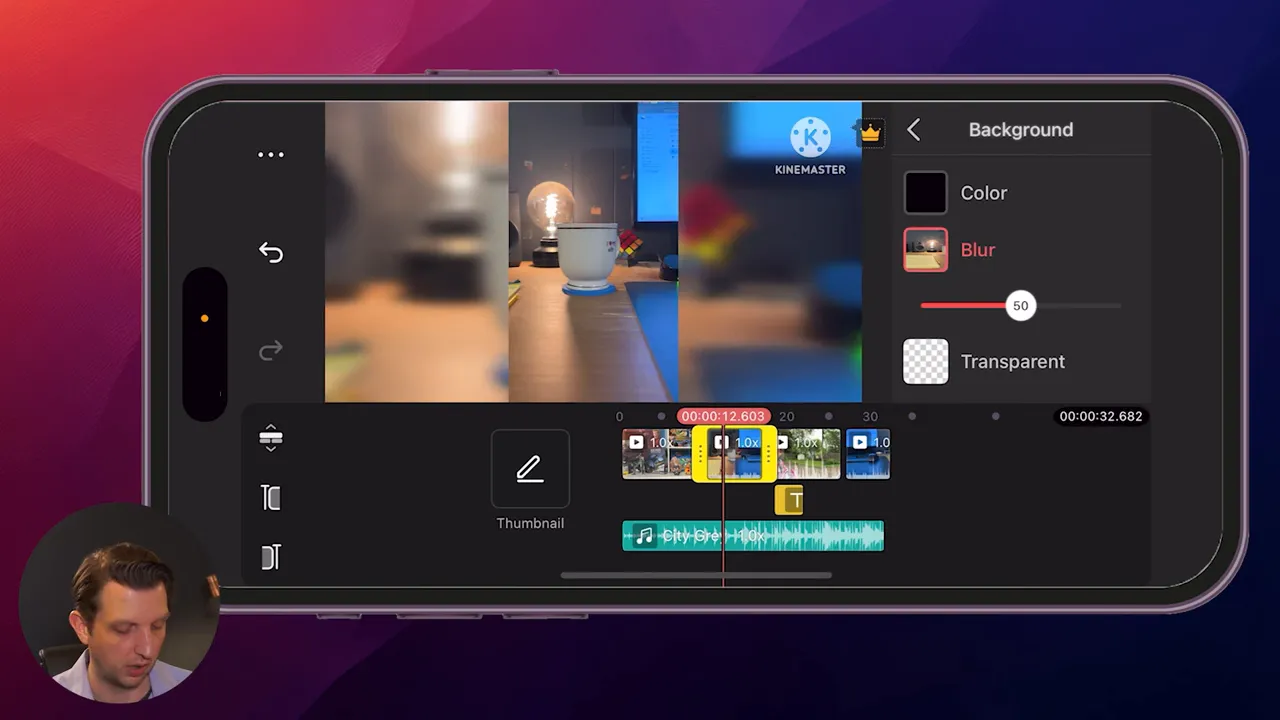
This small touch keeps the frame filled and looks much more professional than black bars.
Free vs. paid: watermark and premium assets
KineMaster’s free tier is generous but places a watermark on exports. Anything with a crown icon requires a KineMaster subscription to remove the watermark or use premium assets. The watermark appears in the top right while editing and will be present in the exported video unless you upgrade.
If you’re experimenting or learning, the free version is perfect. When you’re ready to publish branding‑free videos regularly, consider the subscription to unlock additional assets and remove the watermark.
Exporting your final video
When you’re ready to export, tap the up arrow in the top right. Choose your resolution, frame rate, and quality — KineMaster gives sensible defaults, but you can increase these for higher‑quality exports (note: higher quality = larger files).

After you tap Save as Video, KineMaster will render your project. If the project uses premium assets or if you have the watermark enabled, you’ll be prompted to upgrade or skip. Skipping lets you export with the watermark; upgrading will export without it.
Quick tips and best practices
- Organize clips before editing: name or group your clips in your phone’s gallery so you can select them in the right order.
- Work in short passes: do an assemble pass (order clips), a trimming pass (tighten), and a polish pass (text, audio, filters).
- Use layers for B‑roll: add extra footage on a layer above your main track to cut away from talking heads and improve pacing.
- Mind audio levels: reduce music volume during dialog and use fades to smooth transitions.
- Export settings: choose 1080p at 30/60fps for YouTube; higher frame rates are only necessary for action or slow‑motion footage.
- Backup projects: export a project file or copy original clips in case you want to re‑edit later.
Common beginner pitfalls and how to avoid them
A few things I see beginners struggle with:
- Overusing filters and animations: less is more. Apply effects sparingly to maintain a clean look.
- Not trimming tightly: mobile viewers have short attention spans — tighten pauses and remove filler.
- Ignoring aspect ratio: pick the target platform first (YouTube or TikTok) to avoid reformatting later.
- Forgetting audio ducking: if music overpowers voice, use manual volume automation or lower the track during speech.
Wrapping up
KineMaster gives you a surprisingly complete editing experience on your phone. Start with the free version to learn the layout and basic tools: import clips, trim and split, add text and layers, drop in audio, fix vertical shots with a blurred background, and export. When you’re ready to remove the watermark or access premium assets, KineMaster’s subscription options are available inside the app.
If you follow the steps above you’ll be able to produce a polished mobile edit in a short amount of time. I hope this guide makes it easier to get started with KineMaster — have fun editing and I’ll see you in your next video!