
StreamYard simplifies live streaming by handling the technical bits so you can focus on content. It works in your browser, connects to multiple platforms like Twitch, YouTube, and Facebook, and includes built-in tools for branding, overlays, and audience interaction. If you want a fast, reliable way to go live without wrestling with complicated encoding software, StreamYard is a solid option.
Quick setup: create an account and choose a plan
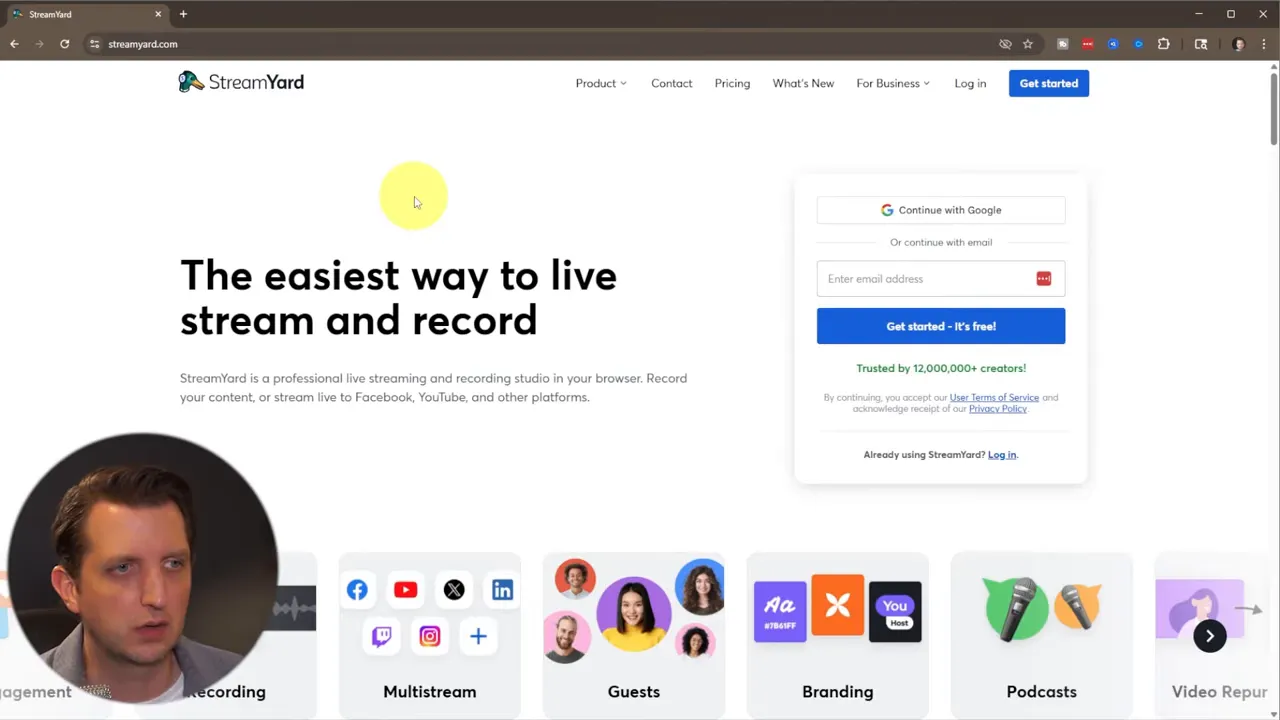
Start by signing up with an email or Google account. Basic setup asks a few questions to customize your experience. A free trial is available, but note that StreamYard requests card information to begin the trial so it can continue billing if you do not cancel. Billing can be monthly or yearly, depending on how long you plan to use it.
Once signed in, the dashboard becomes your command center. It lists your recordings, connected destinations, and team members if you’re sharing an account.
Step 1 — Add your streaming destinations
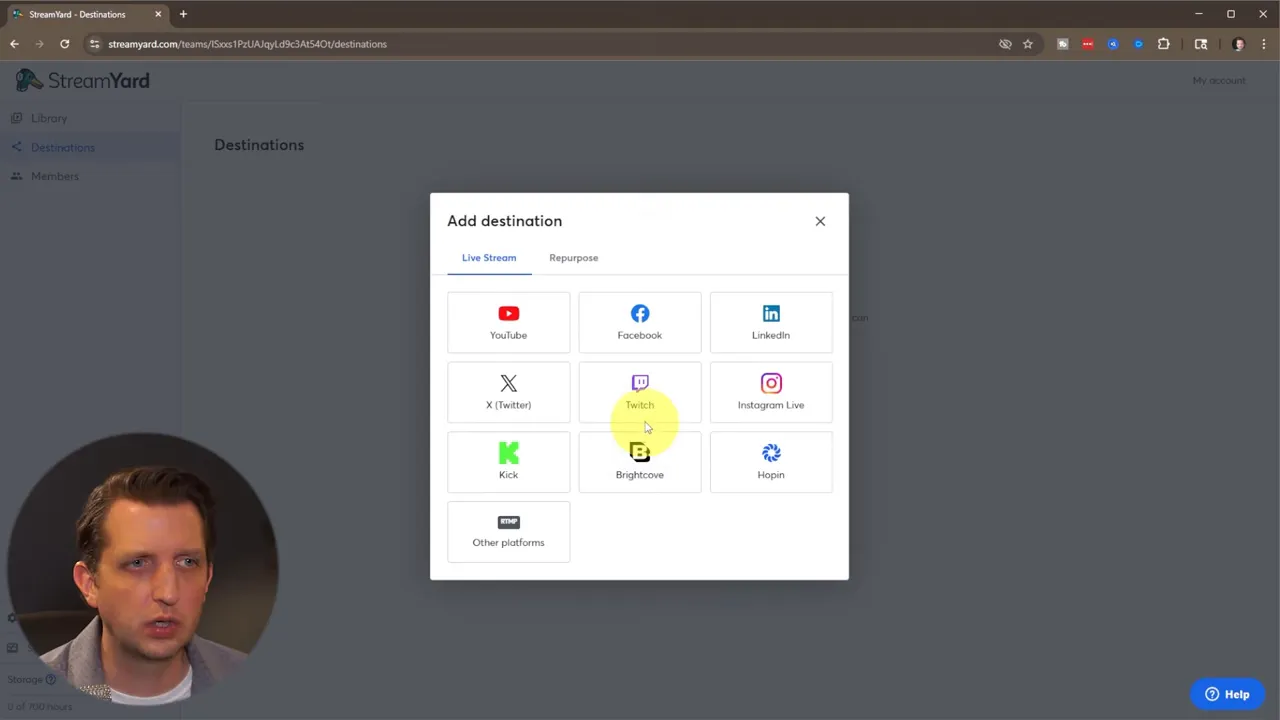
Before going live, tell StreamYard where to send the stream. Click Add Destination and connect as many services as you want. For example, connecting a Twitch account requires authorizing StreamYard to post to Twitch. After authorization the destination appears in your dashboard and is ready to broadcast.
Step 2 — Prepare your studio
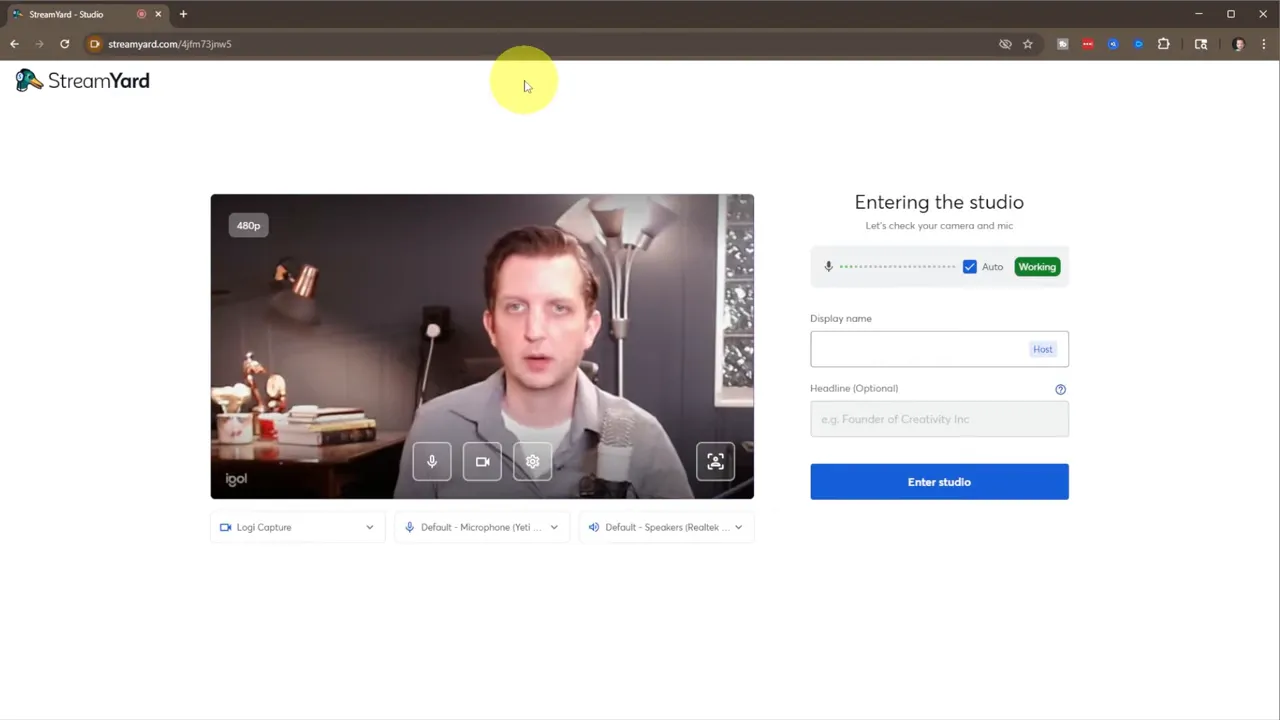
The studio is the live layout editor where you arrange presenters, camera feeds, screen shares, and graphics. When you enter the studio you will be asked to grant access to your camera and microphone. Choose which camera and mic to use, check your speakers, and give your display a name so cohosts can identify you.
Layout options include single-person fullscreen, side-by-side interview layouts, and multi-guest grids. Add participants to the stage for interviews or guest segments. Controls are intuitive: toggle mic and camera, move people on and off stage, and switch layouts on the fly.
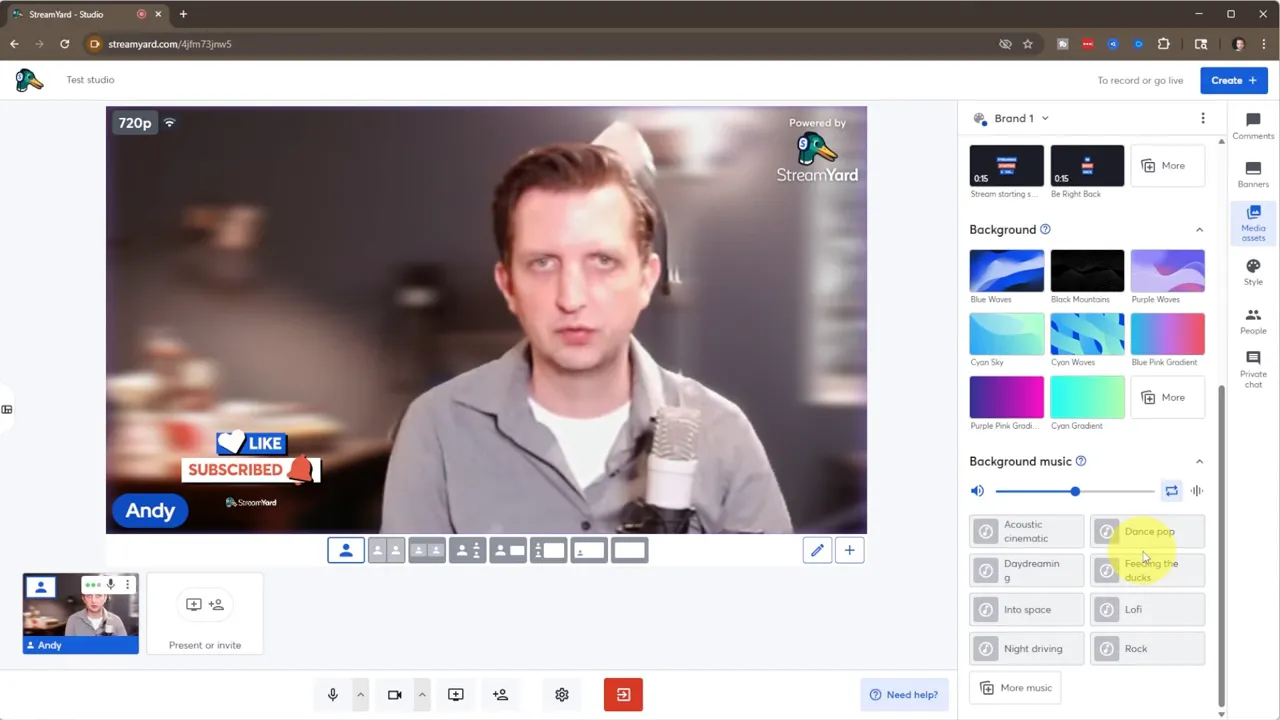
Design polish: backgrounds, branding, and overlays
StreamYard helps your stream look professional without complicated video editing. Use virtual backgrounds, logos, overlays, intro clips, and looping countdowns to establish a consistent look.
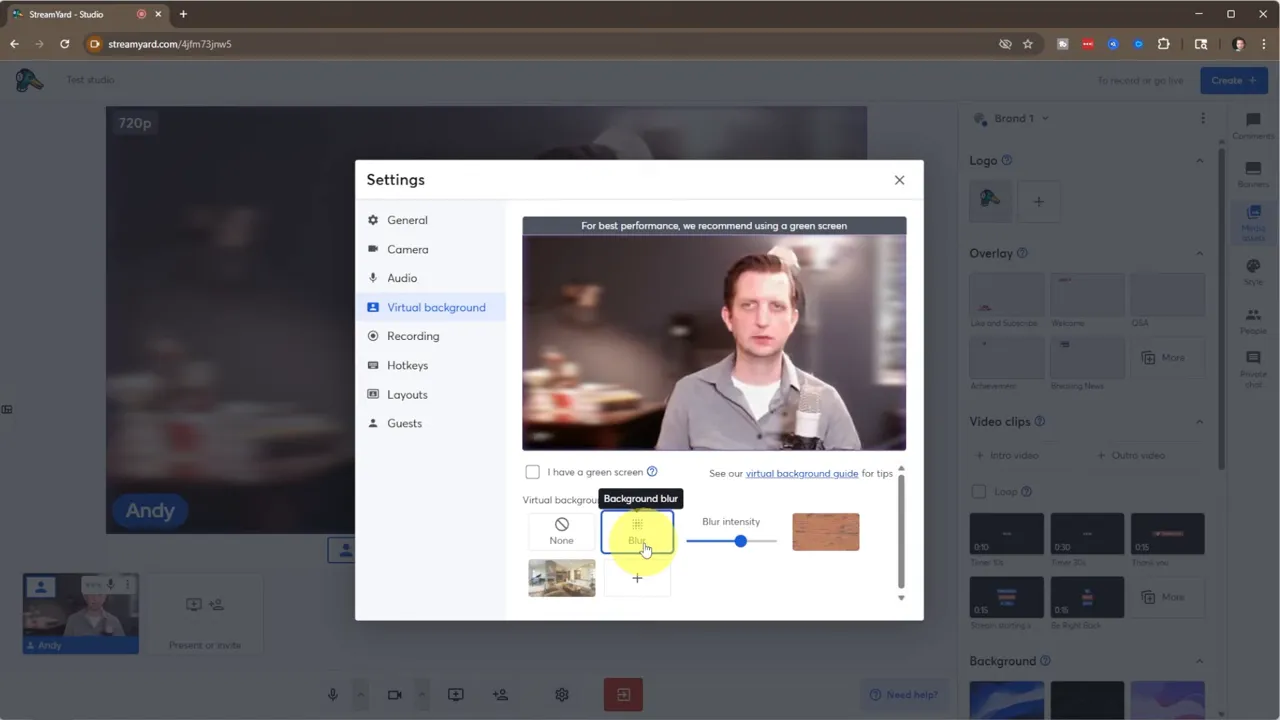
Virtual backgrounds are especially useful if you want to blur or replace your real background for a cleaner visual. StreamYard offers preloaded options and a blur feature that subtly separates you from the environment.
Under Branding, upload a logo and add overlays such as “Like and Subscribe” reminders, welcome graphics, or lower thirds. You can also upload an intro clip or a short countdown loop to play before your broadcast starts. These elements give your stream a polished, consistent feel and help with audience recognition.
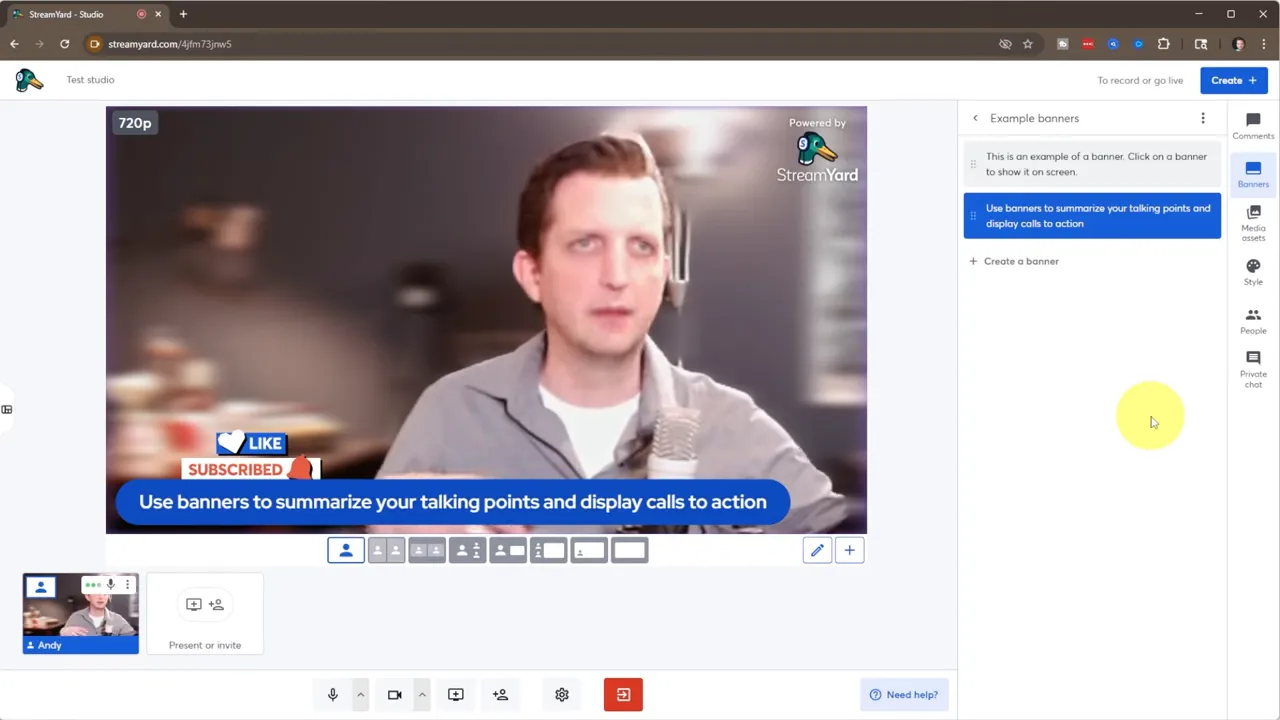
Engagement features: comments, banners, and highlights
Engagement tools are built into the studio so you can interact with the audience without leaving the editor. The comments panel aggregates chat from connected destinations and allows you to show any comment on-screen as a live highlight.
Banners are a simple way to display short messages like schedules, calls to action, or links. Create and switch banners during the stream to share important information with viewers. Use these alongside comment highlights to emphasize questions or announcements.
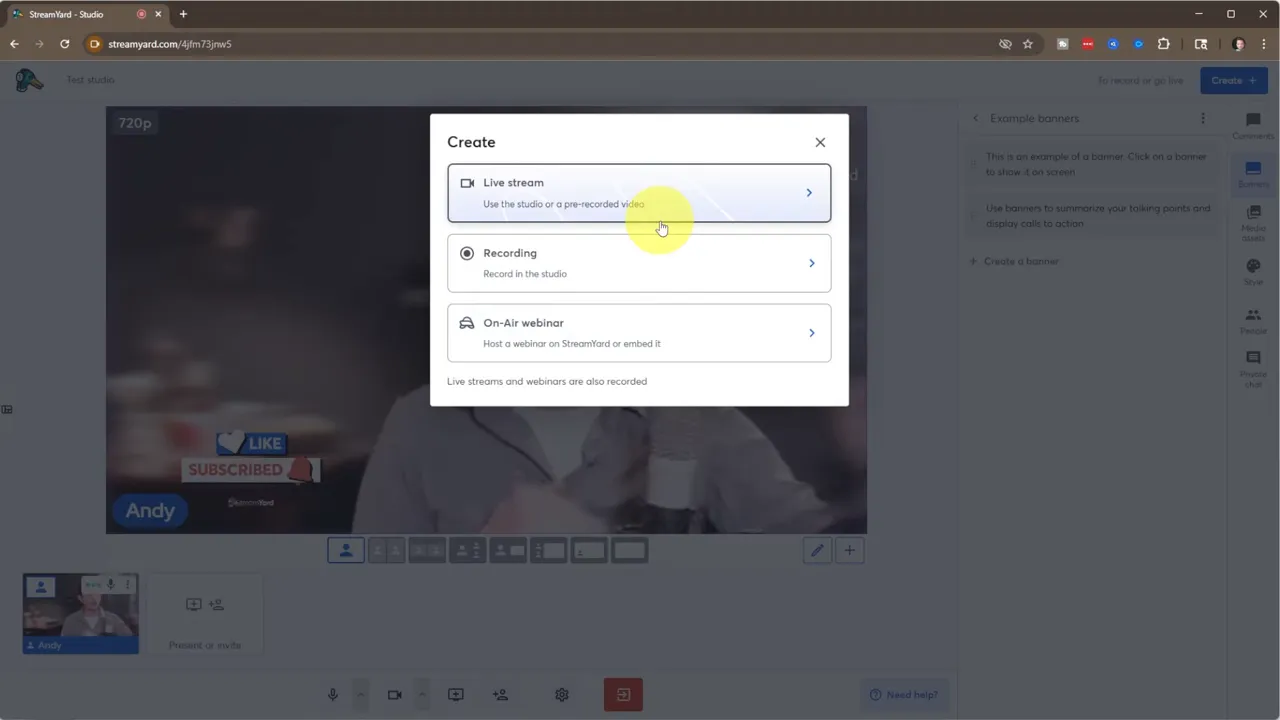
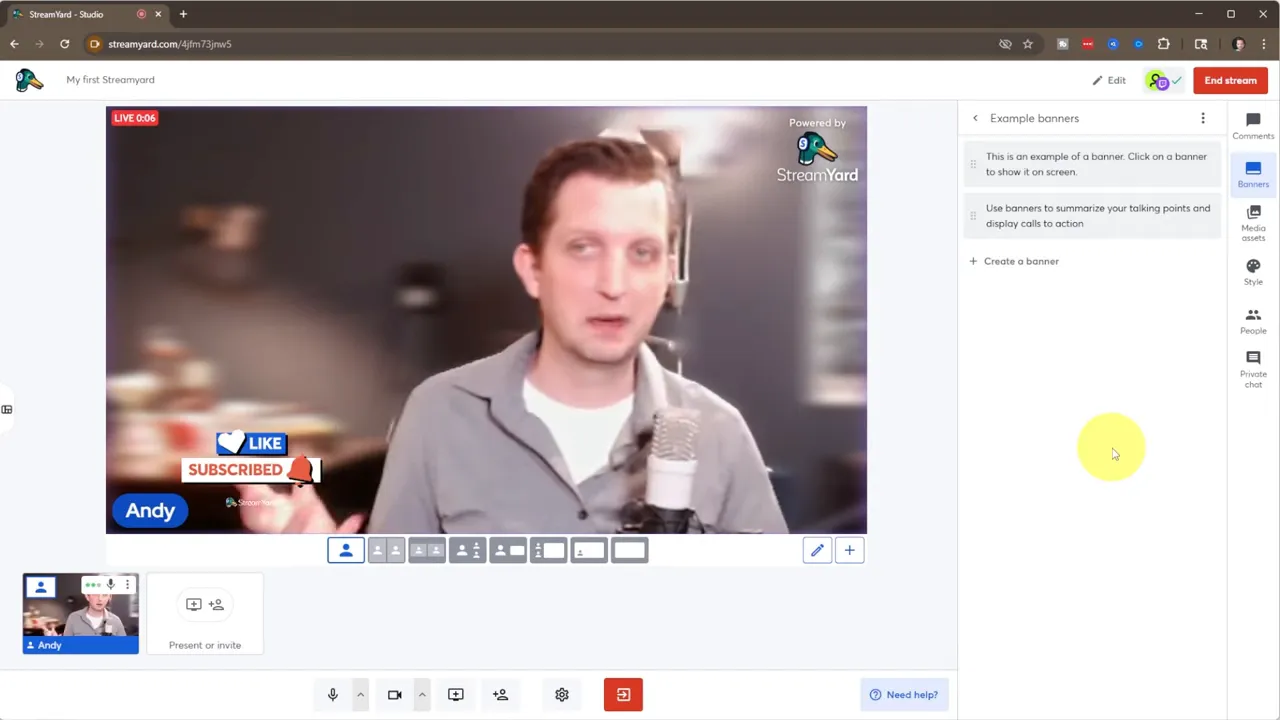
Going live: stream, record, or host a webinar
When everything looks right, click Create and choose between Live Stream, Recording, or On-Air Webinar. Live Stream pushes the broadcast to your connected platforms. Recording saves a version to your StreamYard library, which is useful for repurposing content later. The On-Air Webinar option gives you a StreamYard link to invite an audience into a contained webinar experience.
Before starting, set stream metadata like title and category. Select the destination(s) you want to broadcast to — StreamYard can go to multiple platforms at once if linked. If you have an intro video, you can play it automatically or start immediately.
Keep in mind there is usually a short delay between what you see in the studio and what viewers experience on platforms like Twitch. This latency depends on internet speed, encoding, and the destination platform.
Ending the stream and post-broadcast options
Ending a session is straightforward: click End Stream and optionally play an outro clip. After ending, you’ll be prompted to provide feedback if you want. Recordings saved to your library can be downloaded or edited for clips and repurposed content.
Checklist: What to do before you go live
- Connect destinations: Link Twitch, YouTube, Facebook, or other platforms.
- Test audio and video: Verify camera, mic, and speaker settings in the studio.
- Branding ready: Upload logo, overlays, and banners for consistent visuals.
- Intro/outro clips: Prepare a short intro or countdown to signal the start and finish.
- Engagement tools: Create banners and be ready to highlight comments on screen.
- Confirm title and category: Set stream metadata so the audience finds the broadcast.
Troubleshooting tips and best practices
- Watch your bandwidth: Stable internet is the most important factor for smooth streaming. Use wired Ethernet when possible.
- Minimize delay concerns: Expect a slight delay. If real-time interaction is critical, factor this into your Q&A timing.
- Keep overlays subtle: Overuse of banners, music, and animated overlays can distract from the content. Use them strategically.
- Record locally if possible: Use the Recording option to keep a clean copy for editing and repurposing.
- Test with a private stream: Do a private or unlisted run-through to catch any issues before a public broadcast.
“It is that easy to go live on StreamYard.”
Final thoughts
StreamYard takes the complexity out of live streaming while offering enough customization to look professional. From connecting destinations and preparing your studio to using overlays, banners, and comment highlights, the workflow is straightforward. With a little prep and a consistent branding setup, you can produce high-quality live sessions quickly and confidently.
Use the checklist above before every stream, run a quick private test, and lean on StreamYard’s built-in tools to keep the focus on content. When you are ready, pick your destination, click go live, and start streaming.