

If you’ve ever felt overwhelmed trying to edit your videos using complicated editing apps, you’re not alone. Many creators find themselves drowning in the intricacies of video editing software that can seem more like a burden than a tool. Fortunately, there’s a solution that streamlines the entire process, and it’s called Wisecut AI Video Editor. This innovative tool takes a lot of the work off your shoulders and puts it on the shoulders of artificial intelligence, allowing you to focus on what you love most: creating content.
Getting Started with Wisecut AI
To get started with Wisecut, head over to wisecut.ai. Once you arrive at the site, you’ll see a straightforward interface with a box that says “drop a video link.” This can be a link from an existing YouTube video, or you can upload videos from Google Drive or Dropbox. For example, I often use videos from my channel, Culinary Chronicles, as a reference.
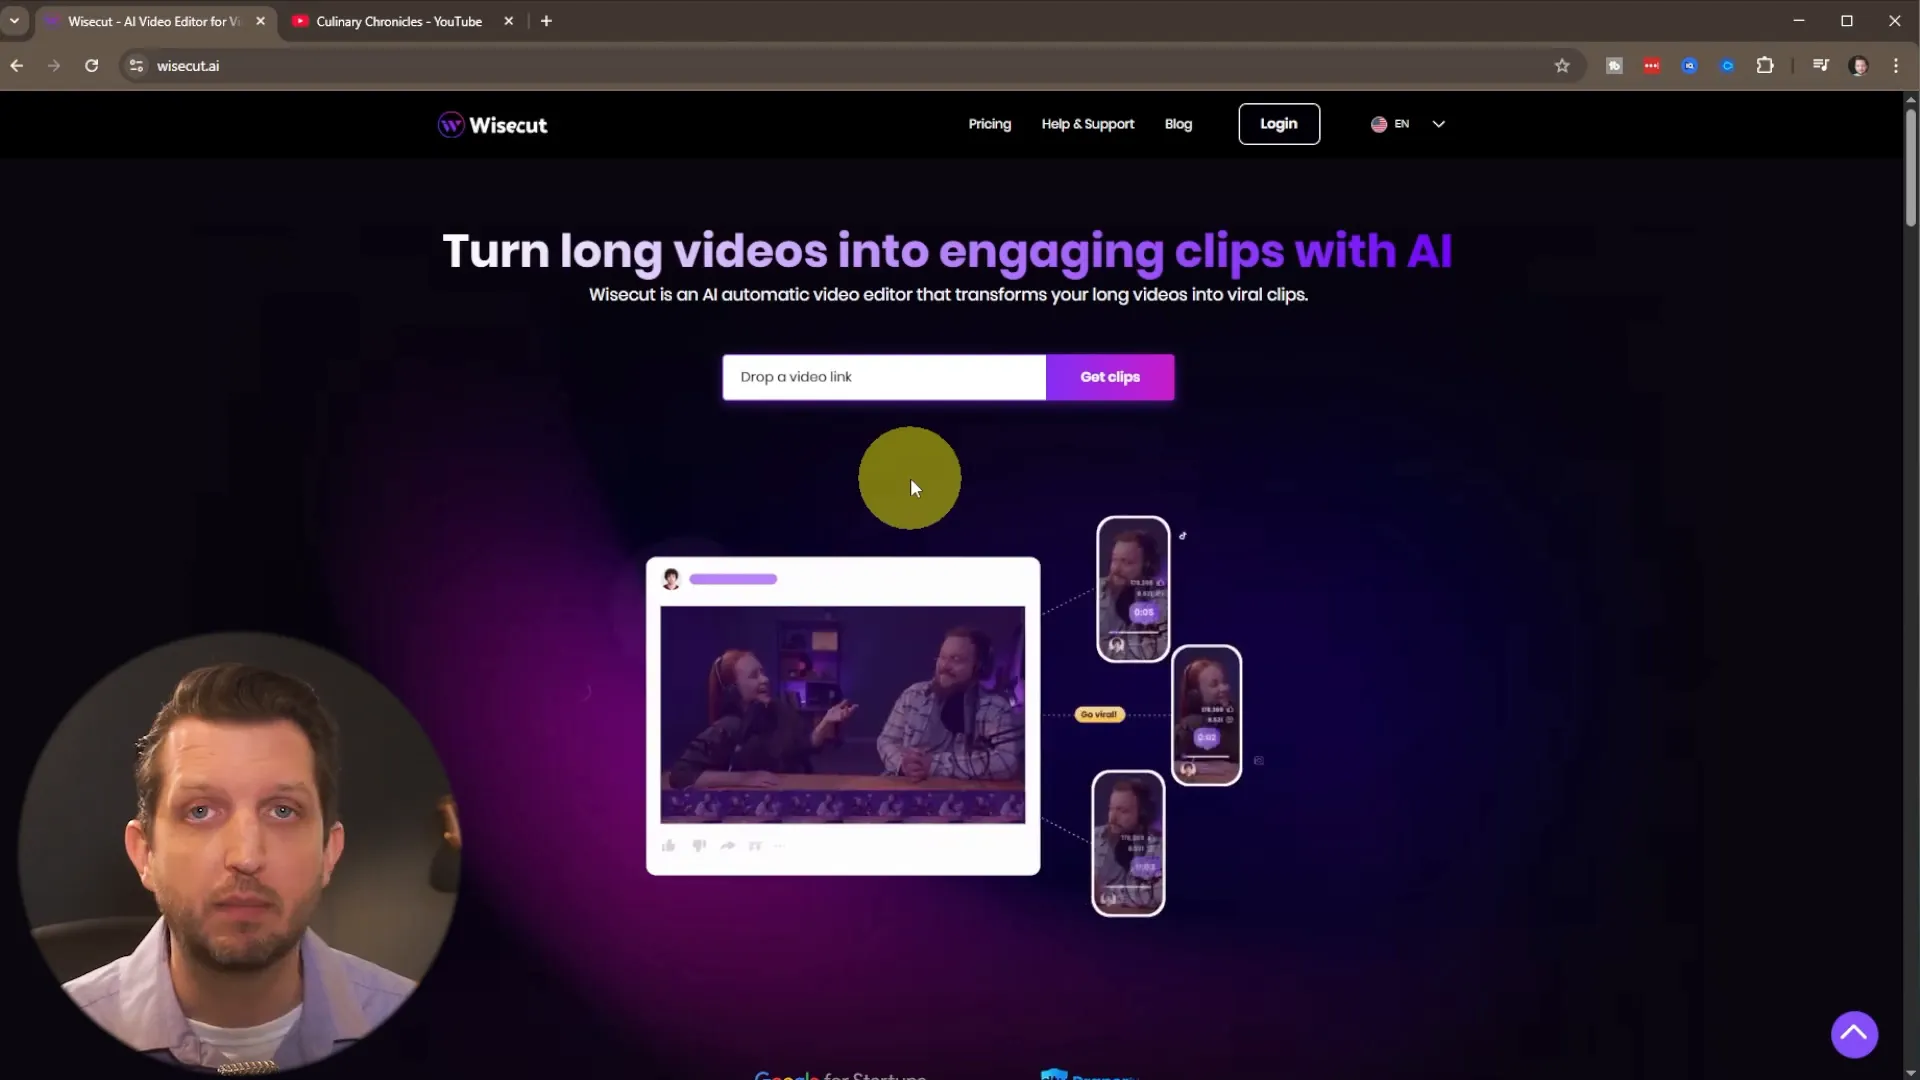
To begin, simply select the video you want to use, click on the three dots next to it, and copy the share link. Paste this link into Wisecut, and you’re ready to go! Click on the “Get Clips” button, and if it’s your first time, you’ll be prompted to create an account. If you’ve already set up an account, just sign in.
Understanding the Pricing Plans
One important aspect to note is the pricing structure. While you can start using Wisecut for free, there are limitations. For instance, the free plan doesn’t allow you to download any videos. You can edit and preview them, but if you want to download your work, you’ll need at least the starter kit. This plan provides unlimited downloads, higher resolution, more storage, and the ability to upload more videos.
If you’re serious about video editing, upgrading to the annual plan is usually more economical. However, if you have a specific project in mind, you can opt for a month-to-month plan instead.
Processing Your Video
Once you’re signed in, paste the video link again into the designated box and hit “Create Project.” Wisecut will start processing your video. The duration of the processing will depend on the length of your video. For instance, a 20-minute video might take a few minutes to process, but it’s generally quick.
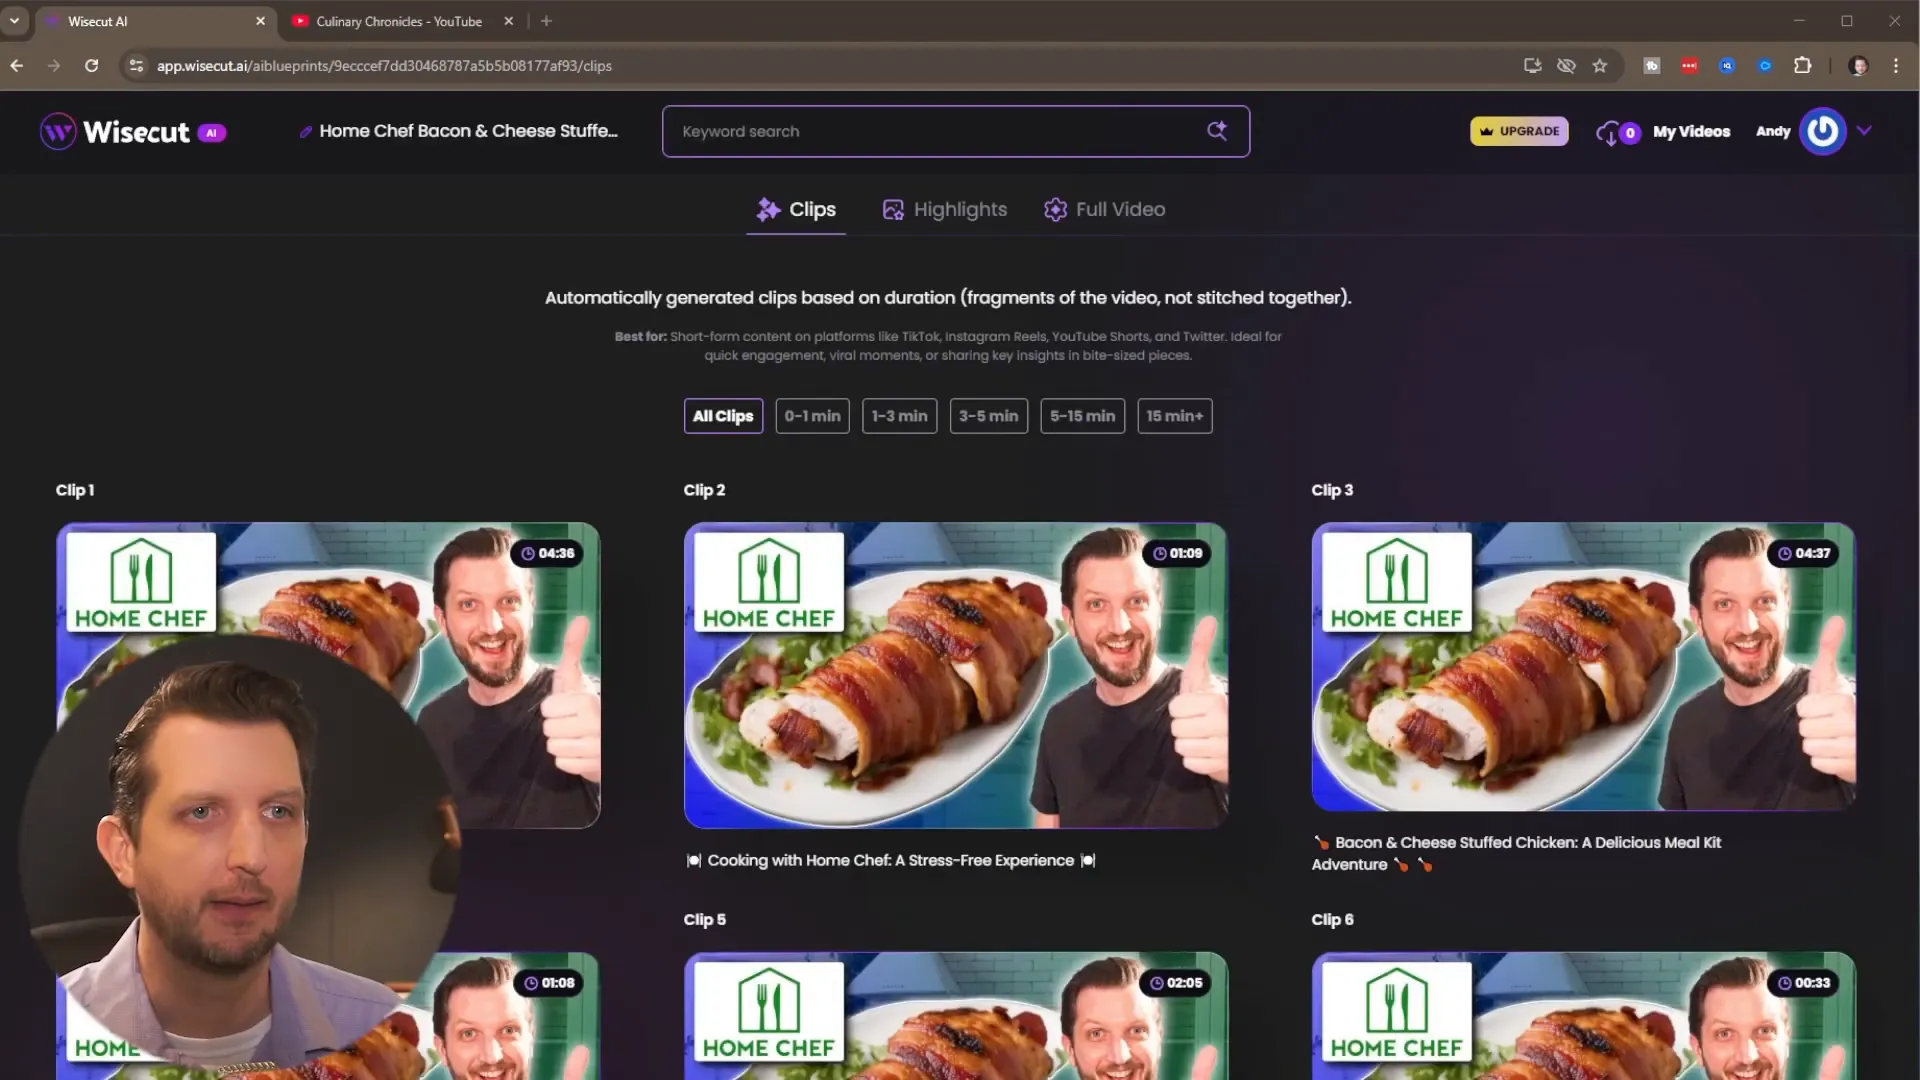
After processing, you’ll be directed to a screen displaying the clips Wisecut has extracted. Depending on your video’s length, it can generate numerous clips. In my experience, a 20-minute video can yield around 29 clips, each varying in length and content.
Exploring the Clips Section
Wisecut uses AI to analyze your video and find the best clips, even providing titles for each one. You can easily preview these clips by hovering over them. If you find a clip you like, simply click on the download button to select your desired format. The tool allows you to add subtitles, which is a fantastic feature for creators looking to engage a wider audience.
Highlight Reels and Full Video Options
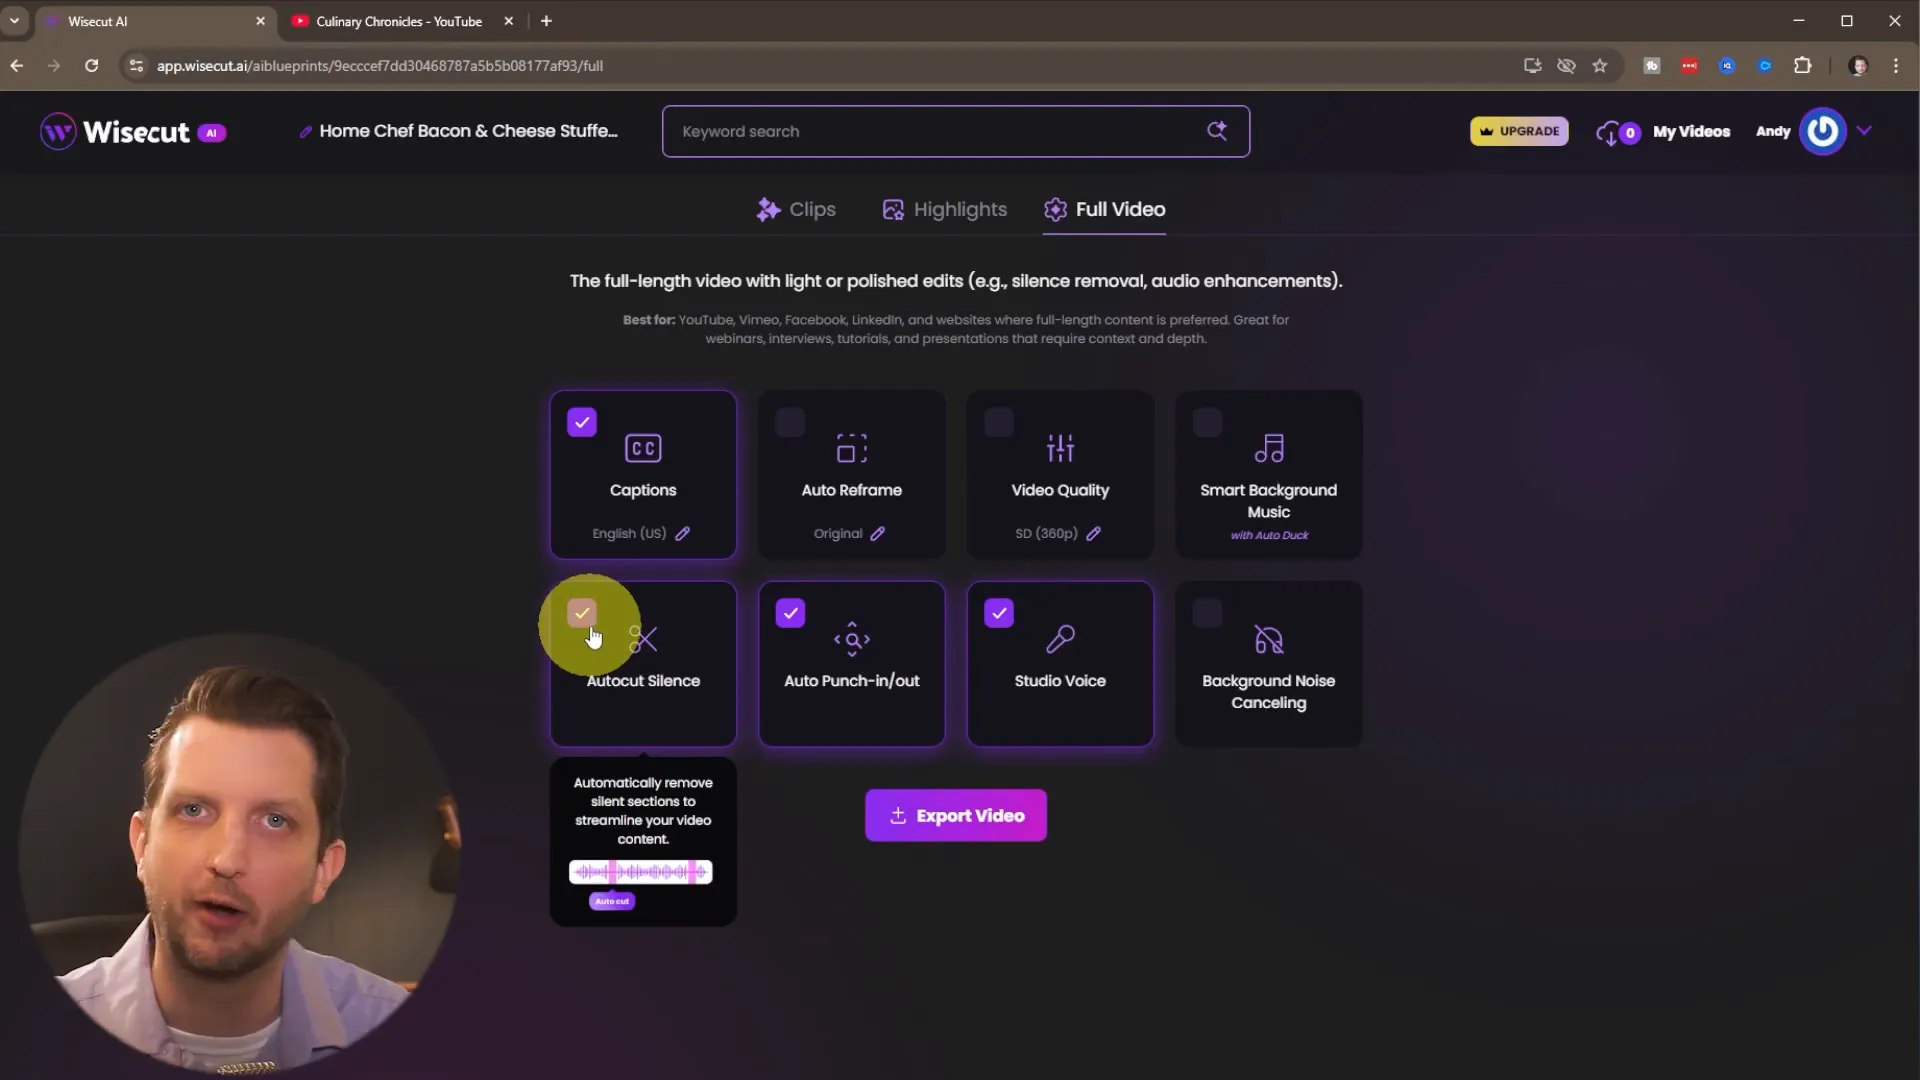
In addition to individual clips, Wisecut also offers a “Highlights” feature. This option compiles the best parts of your entire video into a highlight reel, which is perfect for social media sharing or promotional material. Furthermore, if you want to edit the full video, you can easily do that as well. The platform allows you to add captions, change the format from horizontal to vertical, and even cut out silent parts of your video.
Editing Clips for Social Media
One of the most exciting aspects of Wisecut is its ability to help you create short, engaging clips for platforms like Instagram Reels or YouTube Shorts. You can filter clips by duration, making it easy to find the perfect snippets for your social media needs. For example, if you’re looking for clips that are under one minute, you can easily filter for those.
Once you find a clip you want, click on “Edit.” Wisecut does much of the heavy lifting here, automatically generating a title, description, and even a transcription of the dialogue in the video. This saves you a significant amount of time and effort, allowing you to focus on refining your content.
Customization Options
The editing interface is user-friendly and offers a range of customization options. You can add subtitles, choose colors, and even include background music if you wish. If you prefer not to have music, you simply toggle it off. Additionally, you can enhance the audio quality, remove background noise, and adjust the volume levels.

Another notable feature is the “Auto Punch In and Out” function, which detects your face and zooms in when appropriate. This makes your video more engaging and visually appealing.
Exporting Your Video
Once you’re satisfied with your edits, it’s time to export your video. Wisecut allows you to select the format you prefer, whether it be vertical for Reels, square, or horizontal. Make sure to toggle on the subtitles if you want them visible on the final product. After confirming your settings, the video will be added to a processing queue.
Once processing is complete, you can preview your video to ensure everything looks good. If you’re happy with it, simply click the download button. Keep in mind that if you’re still on the free plan, you may encounter limitations when trying to download your video.
Final Thoughts
In conclusion, Wisecut AI Video Editor is an invaluable tool for anyone looking to streamline their video editing process. It not only saves time but also enhances the overall quality of your videos. By automating much of the editing work, Wisecut allows you to focus on what truly matters—creating engaging content that resonates with your audience.
Whether you’re a seasoned content creator or just starting out, Wisecut can help you transform long videos into captivating short clips with ease. So why not give it a try? You might find it to be the secret weapon you’ve been looking for in your video editing arsenal.
Hope you found this guide helpful, and I encourage you to check out Wisecut AI for yourself!