How to build a chatbot for your website with HubSpot
Sign up for HubSpot's free chat builder, go to Service, then Chatflows, and click Create chatflow. Choose Website, pick a widget color and font, set your chat hours, write a welcome message, then preview and publish. Afterward, add a knowledge base so the chatbot can answer for you, and choose which pages it appears on.
Quick steps
- Sign up for HubSpot's free chat builder, or sign in to your HubSpot account.
- Go to Service, then Chatflows, and click Create chatflow.
- Choose Website, then pick a widget color and font.
- Set chat availability, such as operating hours or 24/7.
- Write a welcome message, then preview and click Publish.
- Add a knowledge base and choose which pages show the chat on the Target tab.
- Save, preview and publish to make it live.
HubSpot Free Chatbot Builder
HubSpot's free chat builder for adding a chatbot to your website without writing any code.
You can add a live chat and chatbot to your website with HubSpot’s free chat builder, without writing any code. This guide follows the video’s setup for a small business: a branded chat widget, office hours, a personal welcome message, a knowledge base the chatbot can answer from, and the pages where the chat appears.
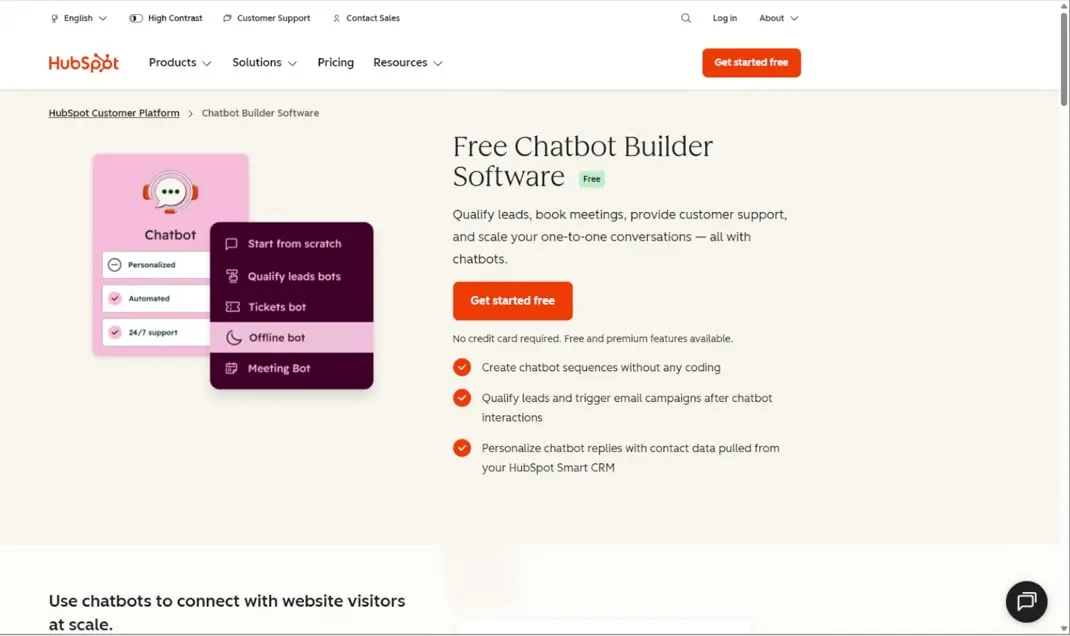
Sign up for the free chat builder
- Open HubSpot’s free chat builder page (the link is on this page).
- Click Get started free.
- If you already have a HubSpot account, sign in. Otherwise, create a new account and walk through the sign-up steps.
Create a chatflow for your website
- From the main dashboard, go to Service in the left-hand menu.
- Click Chatflows.
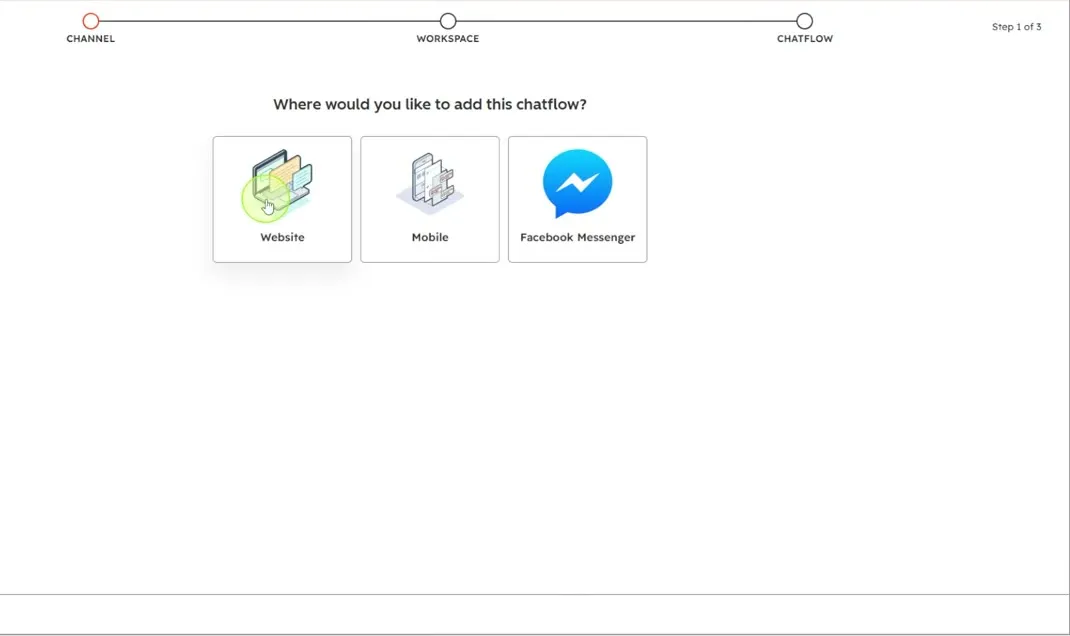
- Make sure you are on the web chat tab, then click Create chatflow.
- You can choose where the chatbot lives. For a website, click Website, then Set up chat.
- Make sure web is selected and click Next.
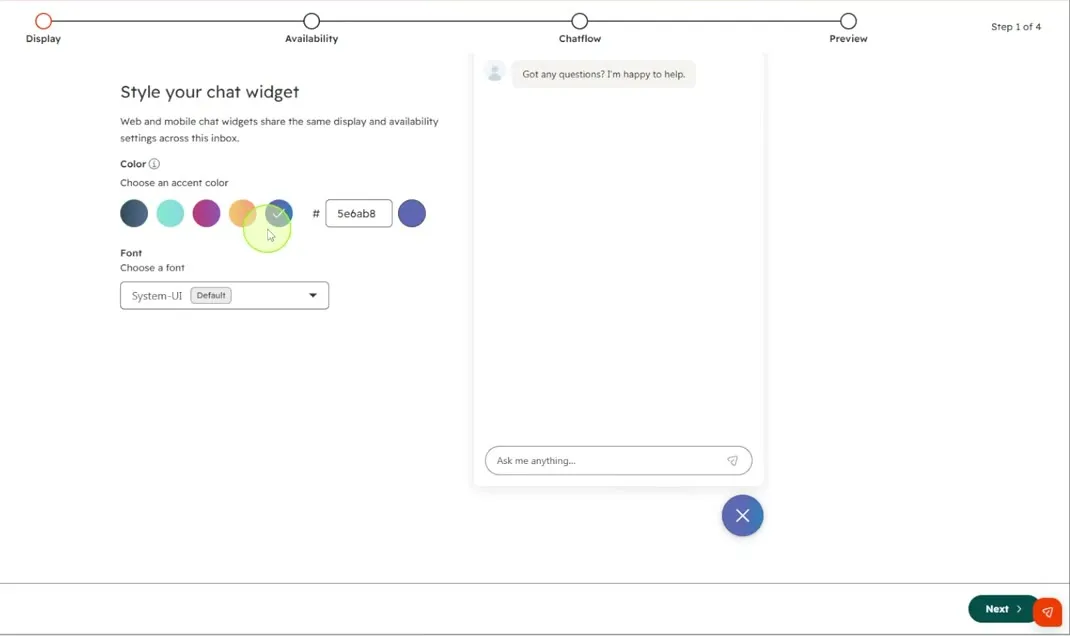
Style the chat widget
- Under Color, choose an accent color for the widget. Base it on your brand colors, your design or your own preference.
- Under Font, pick a font. The video leaves it on the default, System-UI.
- Click Next.
Set chat availability
Next, choose when visitors can chat with you.
- Based on user availability: chat is available when at least one user is in the help desk and available.
- Based on chat operating hours: chat is available during the hours you set. The video uses Monday to Friday, 9:00 AM to 5:00 PM.
- Chat is available 24/7: tick this to keep chat open all the time.
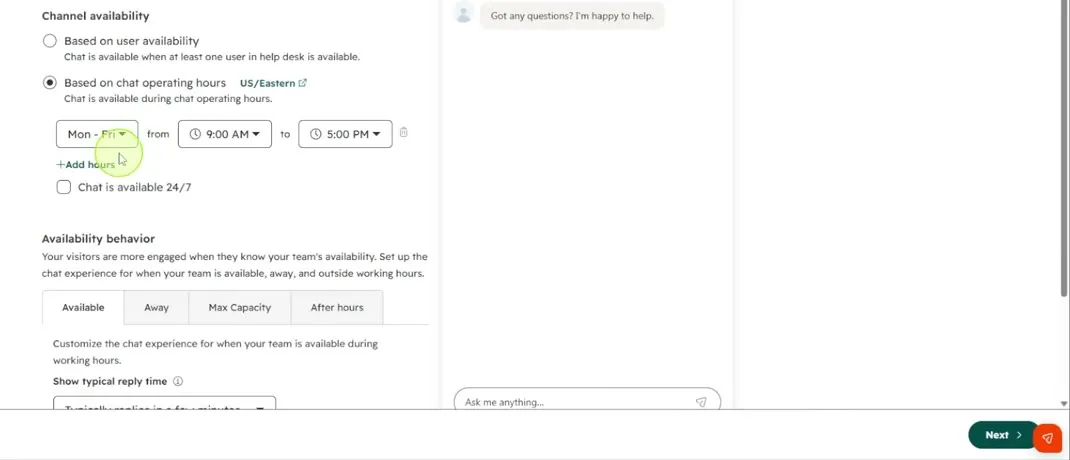
Under Availability behavior, the Available, Away, Max Capacity and After hours tabs each set what visitors see. For example, when you are available it can say you typically reply in a few minutes, and when you are away it can say you are away but will get back to them soon. The defaults are usually good, but you can change the wording to match your brand and tone. Click Next.
Write a welcome message
- Under Chat heading, choose who appears in the chat. You can add more users if you have a team.
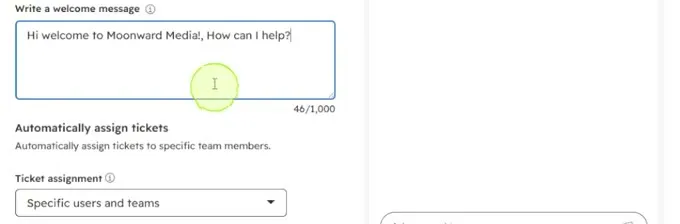
- In Write a welcome message, type the first message visitors see. Include your business name and how you can help, so visitors know they are talking to the company whose site they are on. For example:
Hi, welcome to [your business name]! How can I help?- Leave Ticket assignment set to Specific users and teams, the default. If you have more team members, set up the assignment rules you want.
- Click Next.
Preview, publish and reply in the help desk
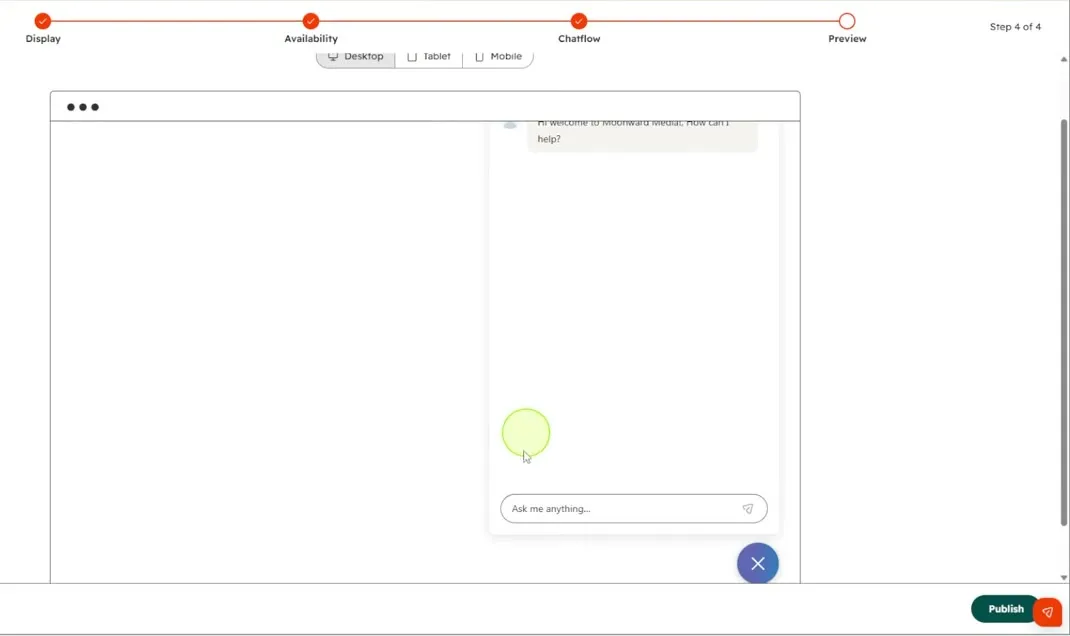
- Preview the chat to see how it pops up on the side of the page. You can switch between desktop, tablet and mobile.
- When you are ready, click Publish. A message confirms that live chat is now connected, and a sample message comes through so you can see how it works.
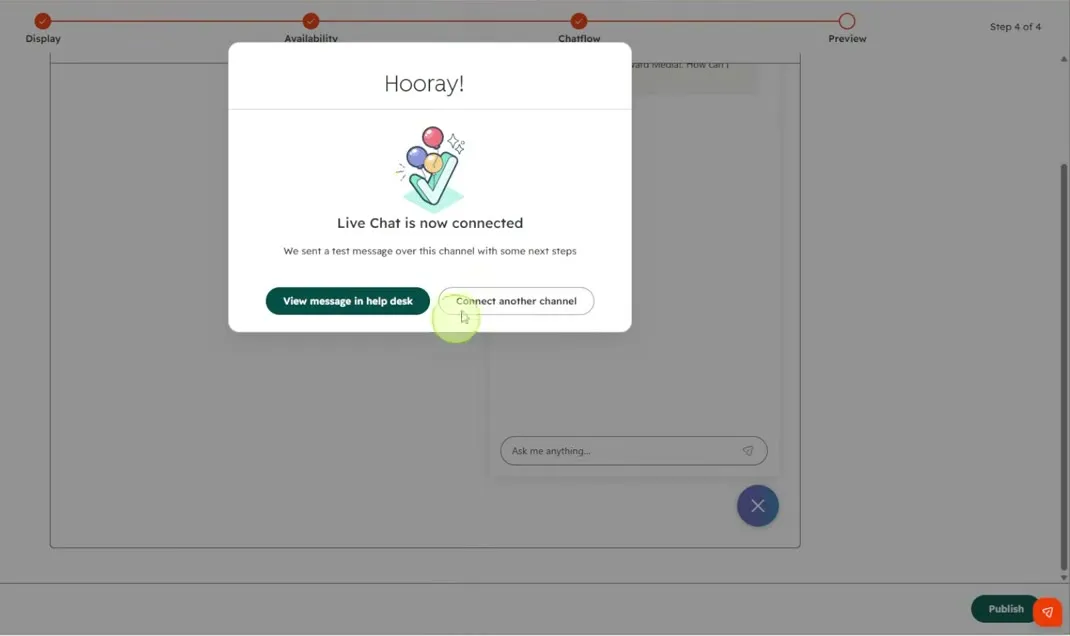
- Click View message in help desk. This is where chat requests arrive. Open a message, write your response and click send. The sample message cannot be answered, since it is only a test.
Add a knowledge base and personalize the chat
From the help desk you can open your chatflow again to edit it.
- Open the Knowledge Base tab.
- Click Create Knowledge Base and add information about your company, such as your packages and services. The chatbot uses it to respond on your behalf, and the more you add, the more it knows about what you offer and how to talk to your clients.
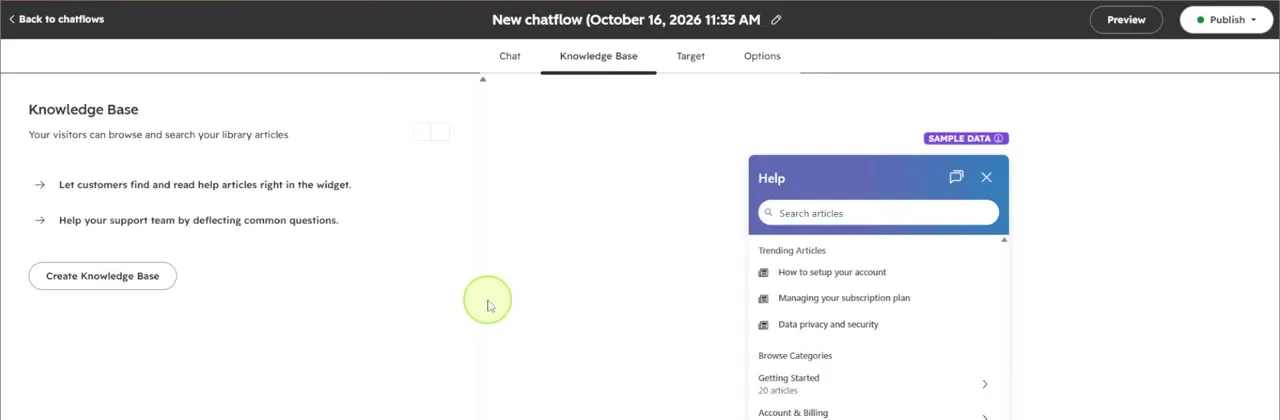
- Go back to the Chat tab to change the welcome message, let visitors send you their email when you are not available, or change your avatar.
Choose where the chat shows up
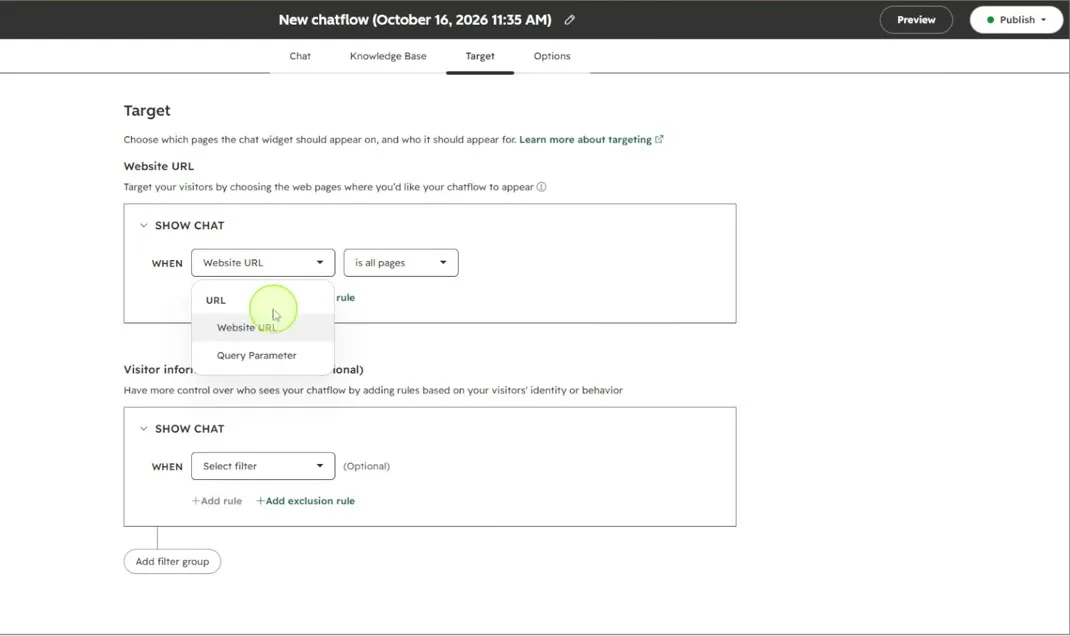
- Open the Target tab.
- Under Website URL, choose where the chat appears. Keep is all pages, or pick specific pages, such as only your contact page or your homepage.
- Under Visitor information and behavior, choose who sees it. You can limit it to signed-in existing customers or show it to any visitor, and add filters such as location or device.
- Click Save.
- Click Preview to try the chat the way a visitor would, then close it.
- Click Publish to make it live.
If you already build your website with HubSpot’s website tools, the chat connects directly. If not, you can create the link to add it to your other website builder.
Common questions
How do I make a chatbot for my website without coding?
Use HubSpot's free chat builder. Create a chatflow, choose Website, then walk through the display, availability and chatflow settings and click Publish. No code is needed.
Is the HubSpot chatbot builder free?
Yes. The video uses HubSpot's free chat builder. You click Get started free and either sign in with an existing HubSpot account or create a new one.
Can the chatbot answer questions for me?
Yes, once you add a knowledge base. Add information about your company, packages and services, and the chatbot can respond on your behalf. As the knowledge base grows, it knows more about what you offer.
Can I show the chatbot only on certain pages?
Yes. On the Target tab you can show the chat on all pages or on specific pages, such as your contact page or homepage. You can also choose which visitors see it and add filters like location or device.
Where do I reply to chat messages?
In HubSpot's help desk. When a visitor starts a chat, the message comes in there, and you type your reply and click send.
Can I add the HubSpot chatbot to a website not built on HubSpot?
Yes. If you build your site with HubSpot's website tools, it connects directly. If not, you can create the link to use with your other website builder.
HubSpot Free Chatbot Builder
HubSpot's free chat builder for adding a chatbot to your website without writing any code.
HubSpot Free Chatbot Builder
HubSpot's free chat builder for adding a chatbot to your website without writing any code.
Get started free