
CapCut is one of the most capable, approachable video editors available right now. Whether you edit on desktop, tablet, or mobile, it packs powerful features—many accessible in the free tier—that let you produce professional-looking videos without a steep learning curve or expensive hardware.
Below are 10 practical, hands-on tips and tricks to level up your CapCut edits. Each tip includes step-by-step instructions, useful shortcuts, and suggestions for creative use. Use these to create cinematic text treatments, AI avatars, virtual studios, smooth motion-tracked blurs, karaoke tracks, faster edits, collaborative feedback links, brand kits, snappier performance, and automatic captions.
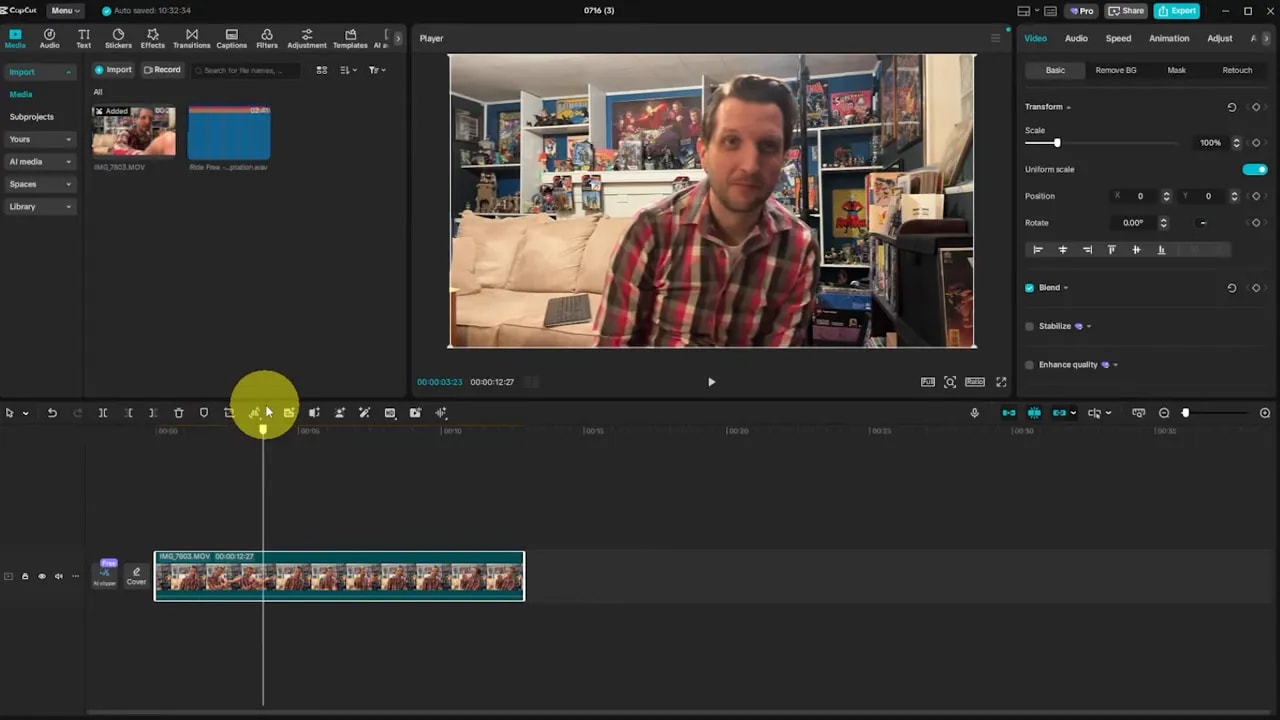
Tip 1 — Put Text Behind a Person (Layered Text Effect)
This is a slick, modern effect: bold text appears behind the subject while the person stays in front. It adds depth and emphasis to titles and lower thirds.
How to do it:
- Start a new project and make sure Arrange layers is turned on in Details > Modify.
- Import your clip and add it to the timeline.
- Add a text layer and position the text where you want it on-screen.
- Duplicate the video clip and place the duplicate above the text layer (hold Alt and drag to copy).
- Select the top video layer and use Video > Remove background > Auto removal to cut the subject out.
- Adjust text size and placement. The text will be sandwiched between the background clip and the cutout subject.

Tips: use bold, high-contrast fonts for readability, and consider animating the text with a subtle scale or slide to make the reveal more dynamic. This technique works best when the subject and background have clear separation for background removal to work cleanly.
Tip 2 — Create an AI Avatar News Reporter
Want a polished on-screen presenter without hiring talent? CapCut’s AI Avatars can generate a speaking character using text prompts and selectable tones. This is great for intros, announcements, or fun social clips.
Steps:
- Choose a suitable background: Media > Library > search for news studio backgrounds and drag one onto the timeline.
- Create a text layer containing the script you want the avatar to speak.
- Open AI Avatars, pick an avatar, choose a speaking tone (for example, narrative), and generate.
- Delete or hide the original text layer once the AI avatar has generated audio and visuals, then resize and position the avatar on-screen.
Practical ideas: use short, punchy scripts for social posts, or record longer scripted segments and split them into chapters. Experiment with different tones (narrative, conversational, newsy) to match the mood of the content.
Tip 3 — Build a Virtual Studio with AI Backgrounds
Skip building a physical set. Generate a virtual studio with AI images and composite yourself into it using background removal.
How to:
- Go to Media > AI media > All images, and type prompts like modern tech virtual studio.
- Generate several options and choose one that matches your aesthetic.
- Import your recorded clip, duplicate it if needed, then select the clip and run Video > Remove background > Auto removal.
- Resize and position the subject to match the virtual background. Extend the background clip to match duration.
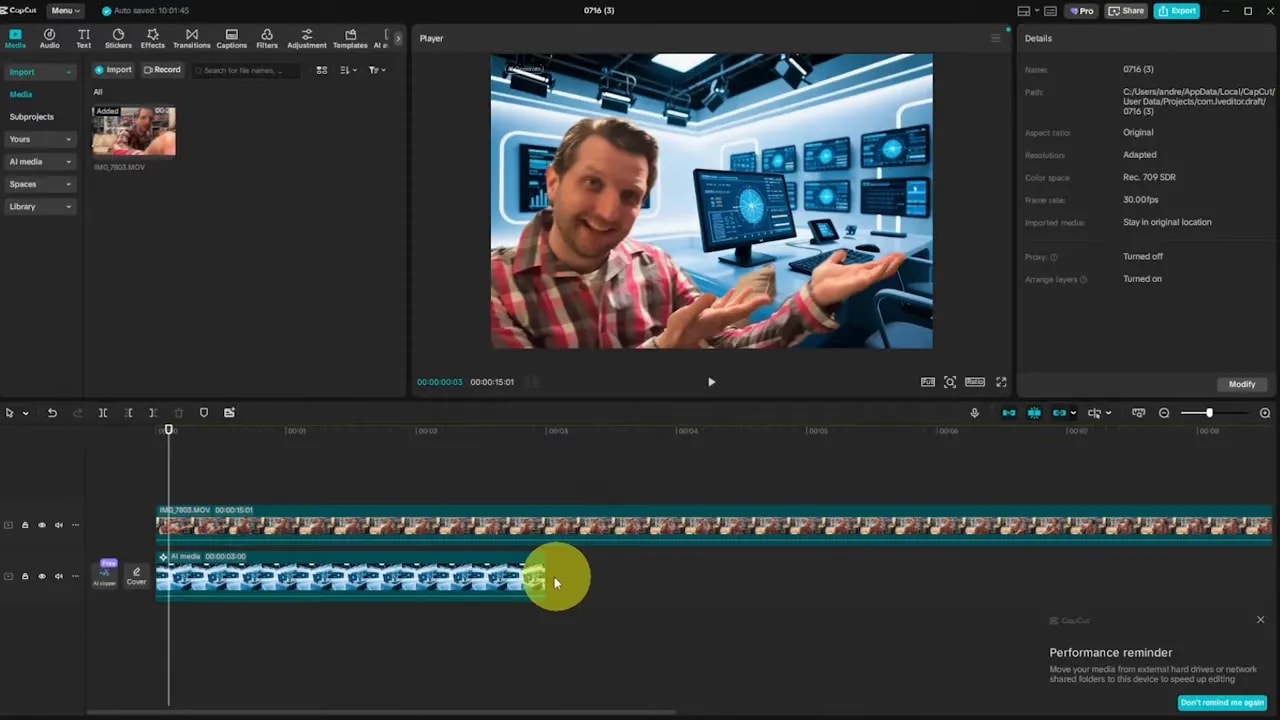
Design tips: match color temperature and perspective by scaling and placing the subject consistently. Virtual studios allow instant branding swaps between episodes and reduce production complexity for recurring shows.
Tip 4 — Blur a Face with Motion Tracking
Need to obscure a face, license plate, document, or other moving object? Layering a blur and using a mask with keyframes is the most reliable approach.
Step-by-step:
- Duplicate the footage and place the copy on the track above the original (Alt-drag to copy).
- Apply a blur effect to the top clip via Effects > search for Blur and add it.
- In Detail > Special effects, go to Mask and add a mask (use the circle mask for faces).
- Position the mask over the face and add a keyframe in Mask settings.
- Play forward and reposition the mask whenever the subject moves; each move creates a new keyframe automatically.
- Fine-tune the path and feathering for a natural look.
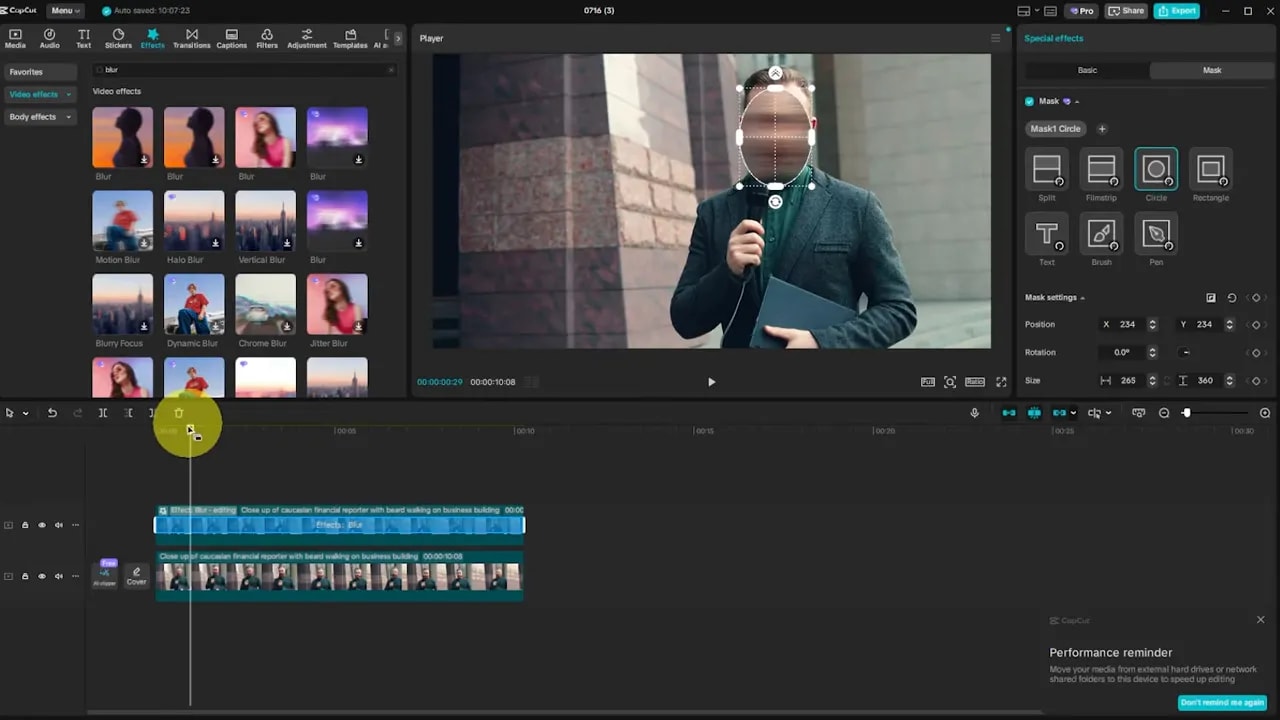
Use cases: privacy protection, content compliance, or hiding sensitive data. If the motion is complex, increase the number of keyframes so the mask follows the subject more accurately.
Tip 5 — Remove Vocals to Make Karaoke Tracks
Separate vocals from instrumentals to create backing tracks or isolate a vocal recording for remixing. CapCut’s audio separation makes this quick and surprisingly effective.
Procedure:
- Import the audio file and drag it to the timeline.
- Open the Basic audio controls and choose Separate audio.
- Select Vocals and click Separate. Wait while CapCut processes the file.
- After separation, the instrumental will appear on one layer and the vocal on another. Mute whichever layer you do not want.
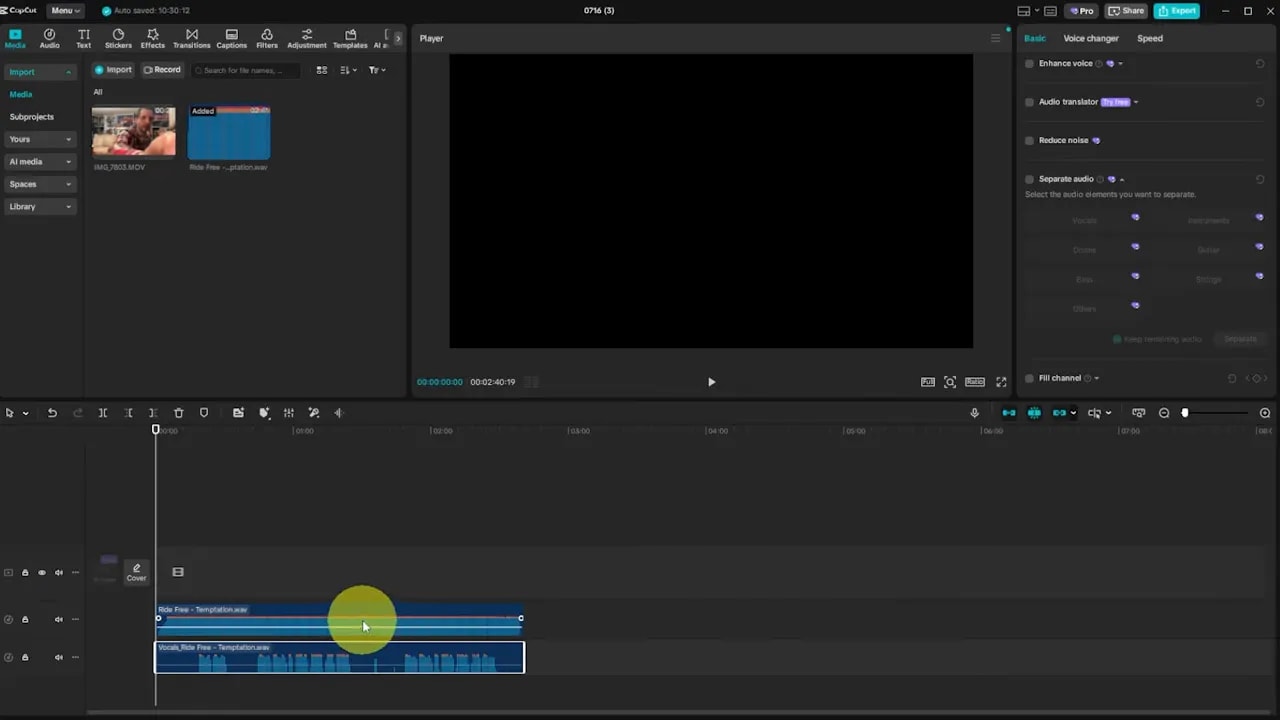
Notes: separation quality varies with the mix. Clear, unmixed tracks separate best. This method is perfect for making karaoke versions, creating acapellas for edits, or reducing a vocal to sample.
Tip 6 — Supercharge Editing with Keyboard Shortcuts
Using the mouse for every cut is slow. These keyboard shortcuts speed up rough cuts and fine edits and will dramatically reduce editing time once practiced.
Essential shortcuts:
- I and O — set in and out points on source clips before dragging to timeline.
- Ctrl + B — split a clip at the playhead to create two separate clips.
- Q — cut everything to the left of the playhead and delete it (instantly trims start).
- W — cut everything to the right of the playhead and delete it (instant trim end and ripple adjust).
- Shift + Z — fit the timeline to screen so you can see your entire project at once.
Workflow suggestion: perform a fast pass using Q and W to remove filler, then use Ctrl + B to isolate segments for detailed adjustments. Combine these shortcuts with in/out points to assemble rough cuts in minutes rather than hours.
Tip 7 — Share Projects to Gather Timestamped Feedback
Collecting feedback becomes far easier when collaborators can leave comments anchored to exact moments in the timeline. Rather than emailing renders back and forth, use CapCut’s project sharing link.
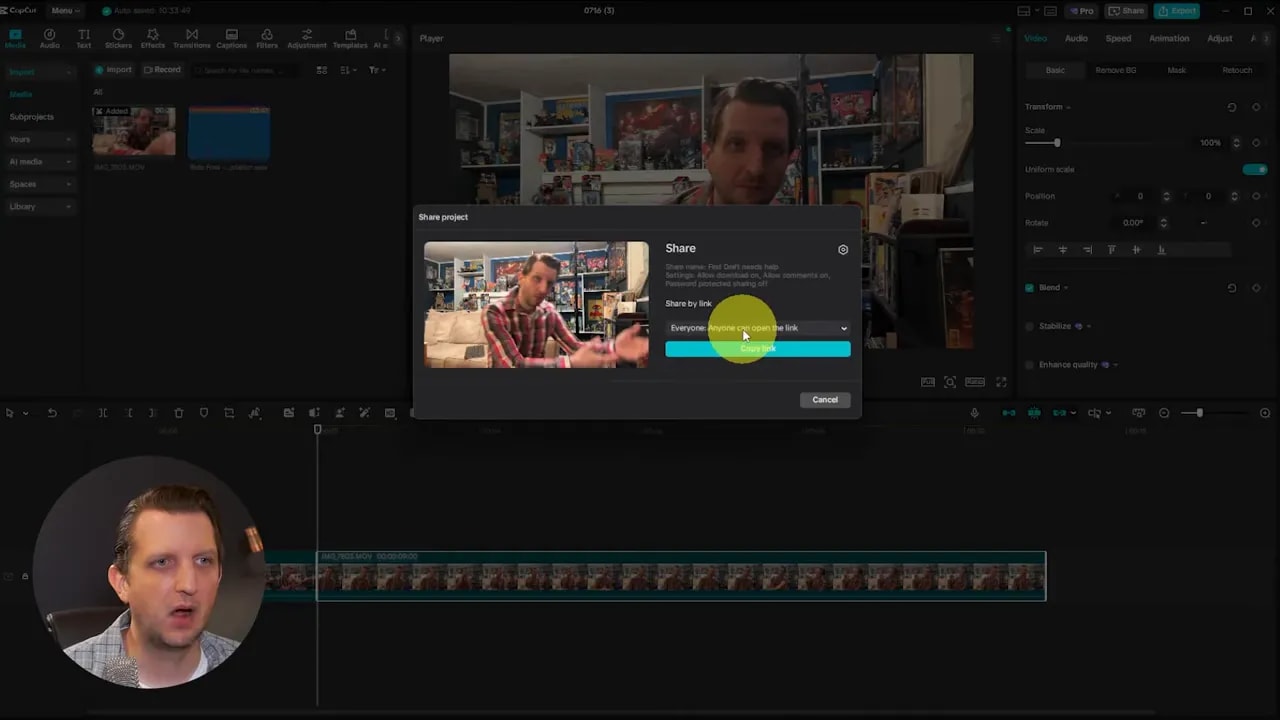
How to share for feedback:
- Click the Share button beside Export.
- Name the project, choose a workspace, and click Create link.
- Set link permissions (anyone with link or specified people) and copy the link to send.
- Recipients open the link in a browser, play the timeline, and leave timestamped comments tied directly to the frame they reference.
Benefits: precise feedback, reduced confusion, faster revisions, and an audit trail of iterative notes. This is especially useful for client work and team projects.
Tip 8 — Set Up a Brand Kit in Spaces
If you reuse logos, end cards, graphics, or music across videos, organize them into a Spaces brand kit so assets are always within reach.
Quick setup:
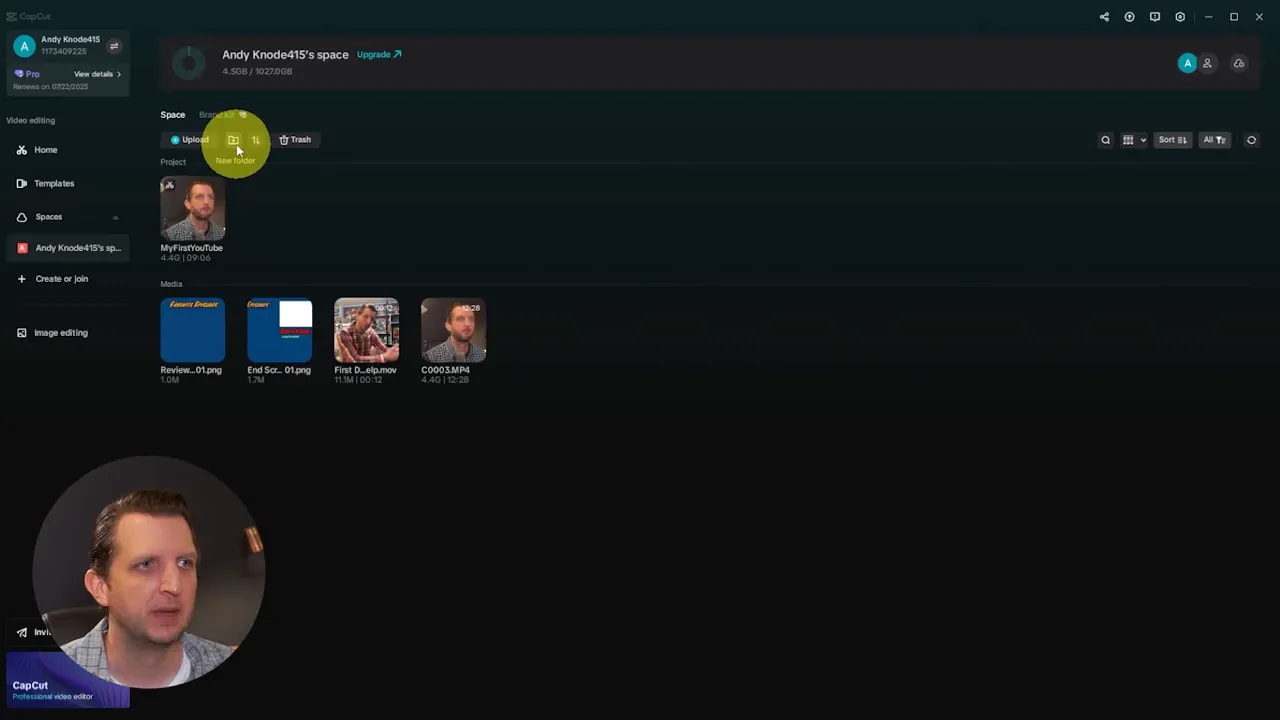
- Go to Home > Spaces and select or create a new space for your channel or brand.
- Click Upload media and add logos, stingers, end cards, and frequently used images or audio.
- Create folders to keep assets organized by type or campaign.
- When you create a new project, open Spaces and drag ready-made assets directly onto the timeline.
Why it helps: consistent branding, faster assembly of recurring templates, and fewer repeated uploads. For teams, Spaces is a centralized place to share approved assets.
Tip 9 — Improve Performance with Proxy Files
Large, high-resolution footage can slow down playback and make editing clunky. Generating proxy files creates low-resolution working files that lighten CPU load while editing—then the final render uses the original high-res files.
How to enable proxies:
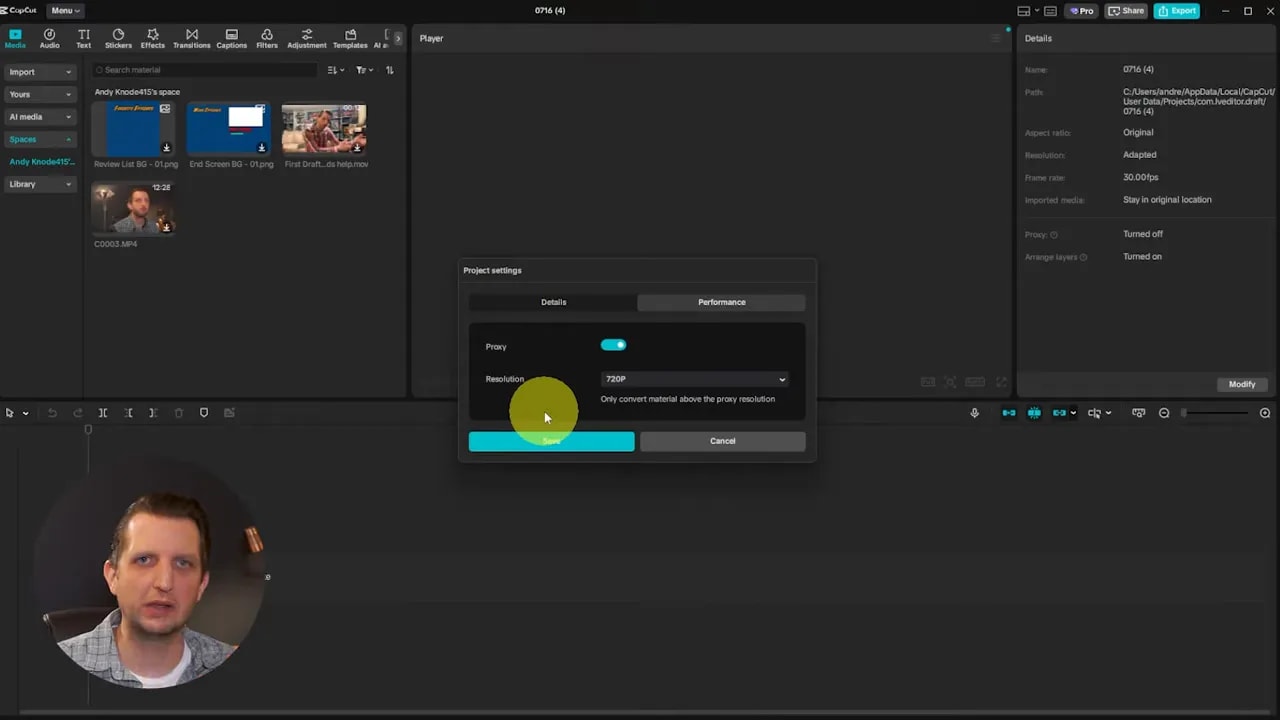
- Open Details > Modify > Performance.
- Turn on Proxy and click Save.
- When importing, CapCut will create lower-resolution working copies; initial processing may take a moment.
- Edit smoothly in real time; exports will still render using full-resolution originals.
Best practice: enable proxies when working with multiple 4K files, many tracks, or on a laptop with limited processing power. The trade-off is a small upfront wait that yields much smoother playback.
Tip 10 — Auto-Generate Captions Quickly
Captions boost accessibility and engagement, and automatic captioning takes care of the heavy lifting in seconds.
How it works:
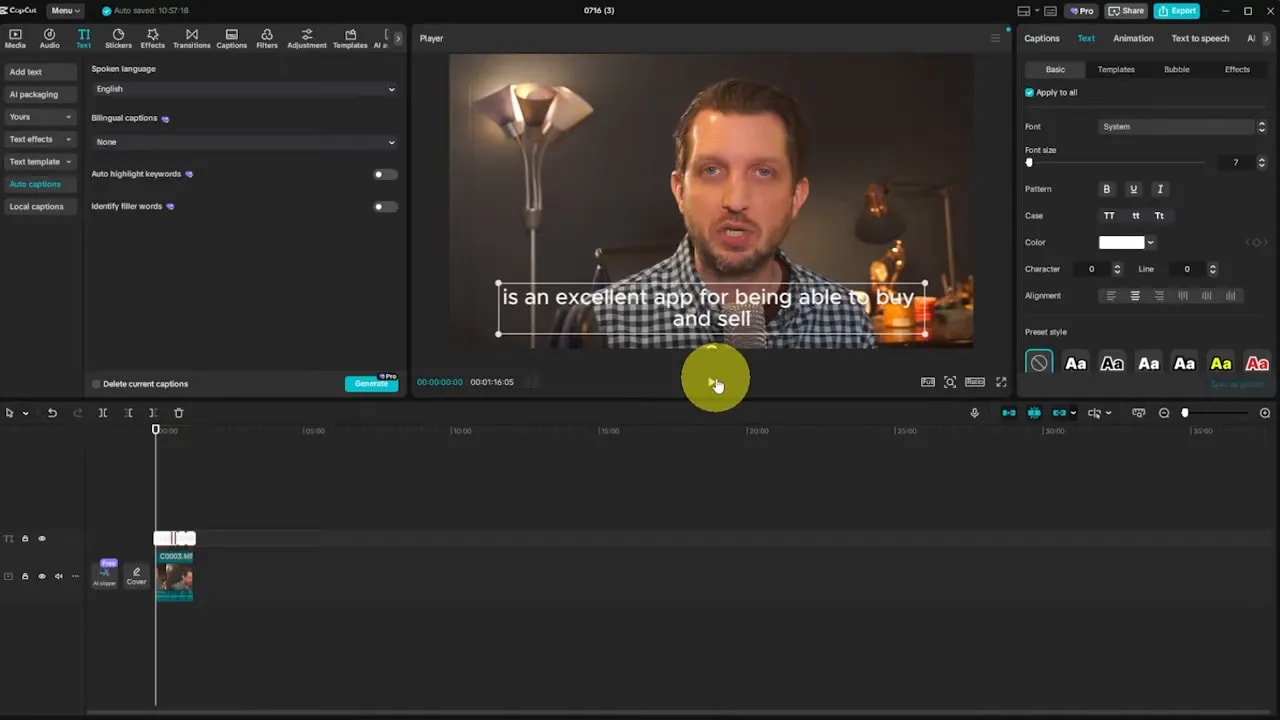
- Add the clip to the timeline and select Text > Auto captions.
- Choose the language and click Generate.
- CapCut transcribes the audio and places captions on-screen where spoken words occur. Adjust font, size, color, and global style as needed.
Notes: always proofread and correct punctuation, speaker labels, and any transcription errors. Captions are essential for silent autoplay on social platforms and improve comprehension for all viewers.
Extra Tips, Troubleshooting, and Creative Ideas
Background removal works best when the subject contrasts with the background. If auto removal struggles, try filming on plain backdrops or use a higher aperture to create separation.
AI avatars and images can accelerate content creation, but maintain a consistent voice and brand style. Keep scripts concise for better-sounding generated speech and consider combining AI sections with real footage to build trust and authenticity.
Masking and motion tracking require patience. Use small, frequent keyframes for fast movement and larger mask sizes with more feathering for smoother transitions when the subject changes speed or distance from the camera.
Project sharing is ideal for client approvals. Ask collaborators to leave comments with suggested timestamps and suggested replacement assets when possible—this speeds the revision cycle.
Shortcuts practice is the single best habit for faster editing. Start by memorizing Q, W, I, O, Ctrl B, and Shift Z and apply them during a full rough-cut session to feel the speed gains.
Conclusion
CapCut combines ease of use with surprisingly deep capabilities. From creative text treatments to AI presenters and virtual studios, to practical tools like proxy files, auto captions, and project sharing, these ten techniques cover a broad spectrum of production needs. Most are available in the free version, and the few pro features are worth testing via trial if you rely on the platform for frequent production.
“Ten incredibly powerful and useful CapCut tips to make your editing even better and more professional looking.”
Start with one tip at a time and incorporate it into your workflow. Over the course of a few projects, these methods will save time, improve presentation, and make edits look far more professional.